EasyManua.ls Logo

Levo G2 Deluxe Tablet Stand - Assembly Instructions; Install Casters; Assemble Connector Center; Attach Base Components

Levo G2 Deluxe Tablet Stand
3 pages
To Previous Page IconTo Previous Page
Loading...
PUSH
CASTERS into
holes in bottom
of HEAVY BASE.
1
2C SNAP
TABS into
RECEPTACLES.
2B SLIDE
TOP
CONNECTOR
CAP in place.
2D SPIN
CONNECTOR
CAP until very
tight.
SET
WASHER and
BASE COVER on
HEAVY BASE
2
TAB
RECEPTACLE
6
Book Platform (1)
Swing-arm (1)
Triple Column (1)
Top Connector
Cap (1)
Connector
Center (1)
Base Cover (1)
Heavy Base (1)
Base Washer (2)
Base Washer (2)
Casters (4)
Tension Dial (1)
Tension Ram (1)
ASSEMBLY
LEVO Deluxe Tablet Floor Stand - tem# 33778
SPIN
BOTTOM
CONNECTOR CAP
until very tight.
3
SLOT
NOTCH
SLOT
NOTCH
2A
Separate
the Top
Connector
Cap and
Bottom
Connector
Cap from
Connector
Center
TIGHTEN
TENSION DIAL with coin until
snug. Do not overtighten. Do
not use a screwdriver.
4
Coin
TAB
RECEPTACLE
PUSH
Push Platform into Swing Arm until TAB snaps into
RECEPTACLE. Important - test the connection by pulling
on platform. Be sure the Platform does not pull out.
NOTE: this step is shown with optional Tablet Platform.
Mount the two page-holders
to the holes in the bottom
corners of the bookboard.
Follow the diagram for correct
hardware placement. Tighten
the small nut with just enough
force so the page-holders will
rotate with little e ort. The
rotation lets you adjust the
page-holders to  t any size
book. NOTE: the small nut has
a friction  tting that keeps it
from loosening. You’ll need
to use a wrench (or pliers) to
tighten the nut.
Small Screw
Page Holder
Small Washer
Small Nut
Book
Platform
5
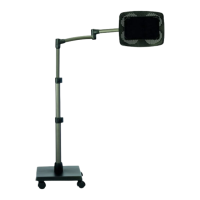
Book Platform (1)
Swing-arm (1)
Tri
p
le Column (1)
Top Connector
Cap (1)
Connecto
r
Center (1)
B
a
se Cover
(
1
)
Heavy Base (1)
Base Washer (2)
Base Washer (2
)
C
a
sters (4)
Tension Dial (1)
Tension Ram
(
(
(
(
(
(
(
(
(
1)
Bottom
Connector
Cap (1)