Repair information 4-59
7510
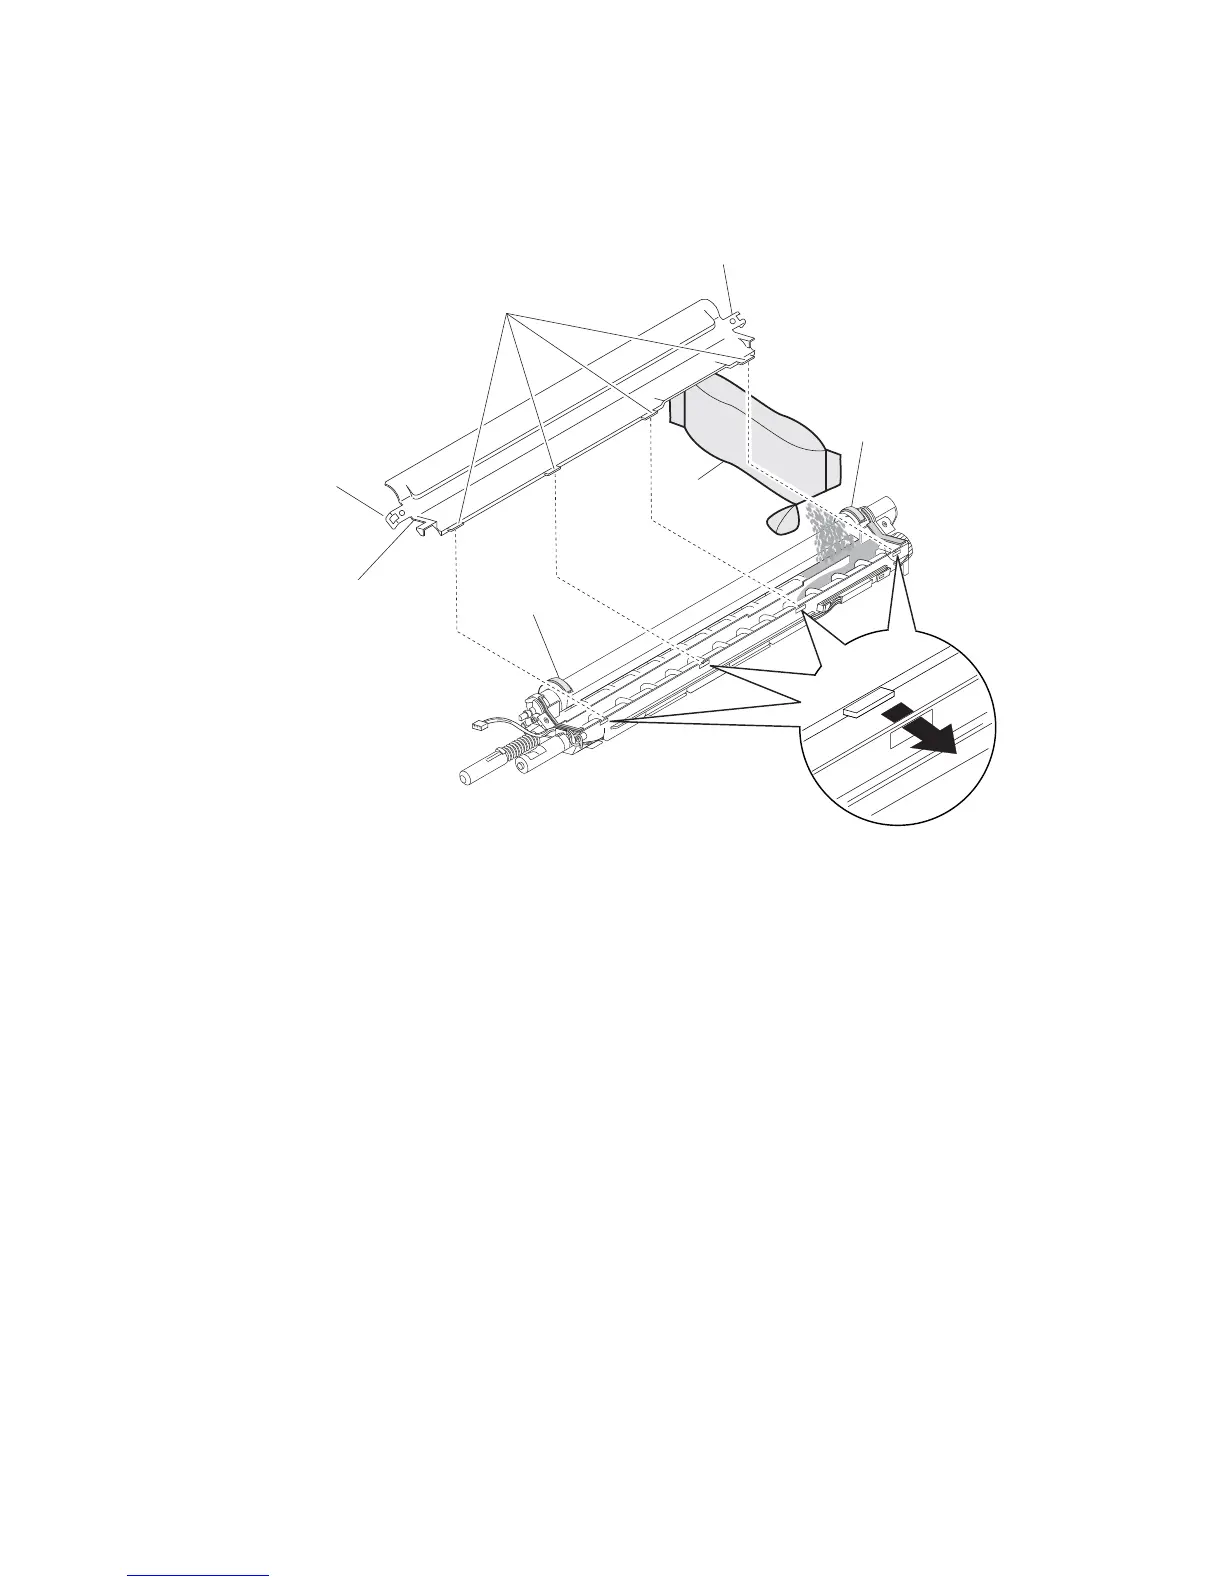
To install the new carrier (B):
Warning: Ensure that the carrier is installed evenly and uniformly in the assembly, or spillage may occur.
1. Open the appropriate bag, and dump the appropriate carrier into the appropriate assembly.
2. Rotate the gears in the assembly to evenly distribute the carrier (B).
Warning: Ensure that the two seals are properly positioned in the assembly before replacing the top cover (A),
or spillage may occur which may lead to print quality problems.
Warning: Ensure that the four plastic tabs in the top cover (A), are inserted into the four holes in the developer
unit or the carrier (B) will be ejected from the developer unit assembly which will result in carrier contamination
and print quality problems.
3. Replace the top cover (A).
4. Perform the ATC sensor setup and adjustment. Go to “Sensor (ATC) setup” on page 4-253.
5. Perform the color registration (RegCon) setup and adjustment. Go to “Color registration (RegCon)” on
page 4-257.

 Loading...


