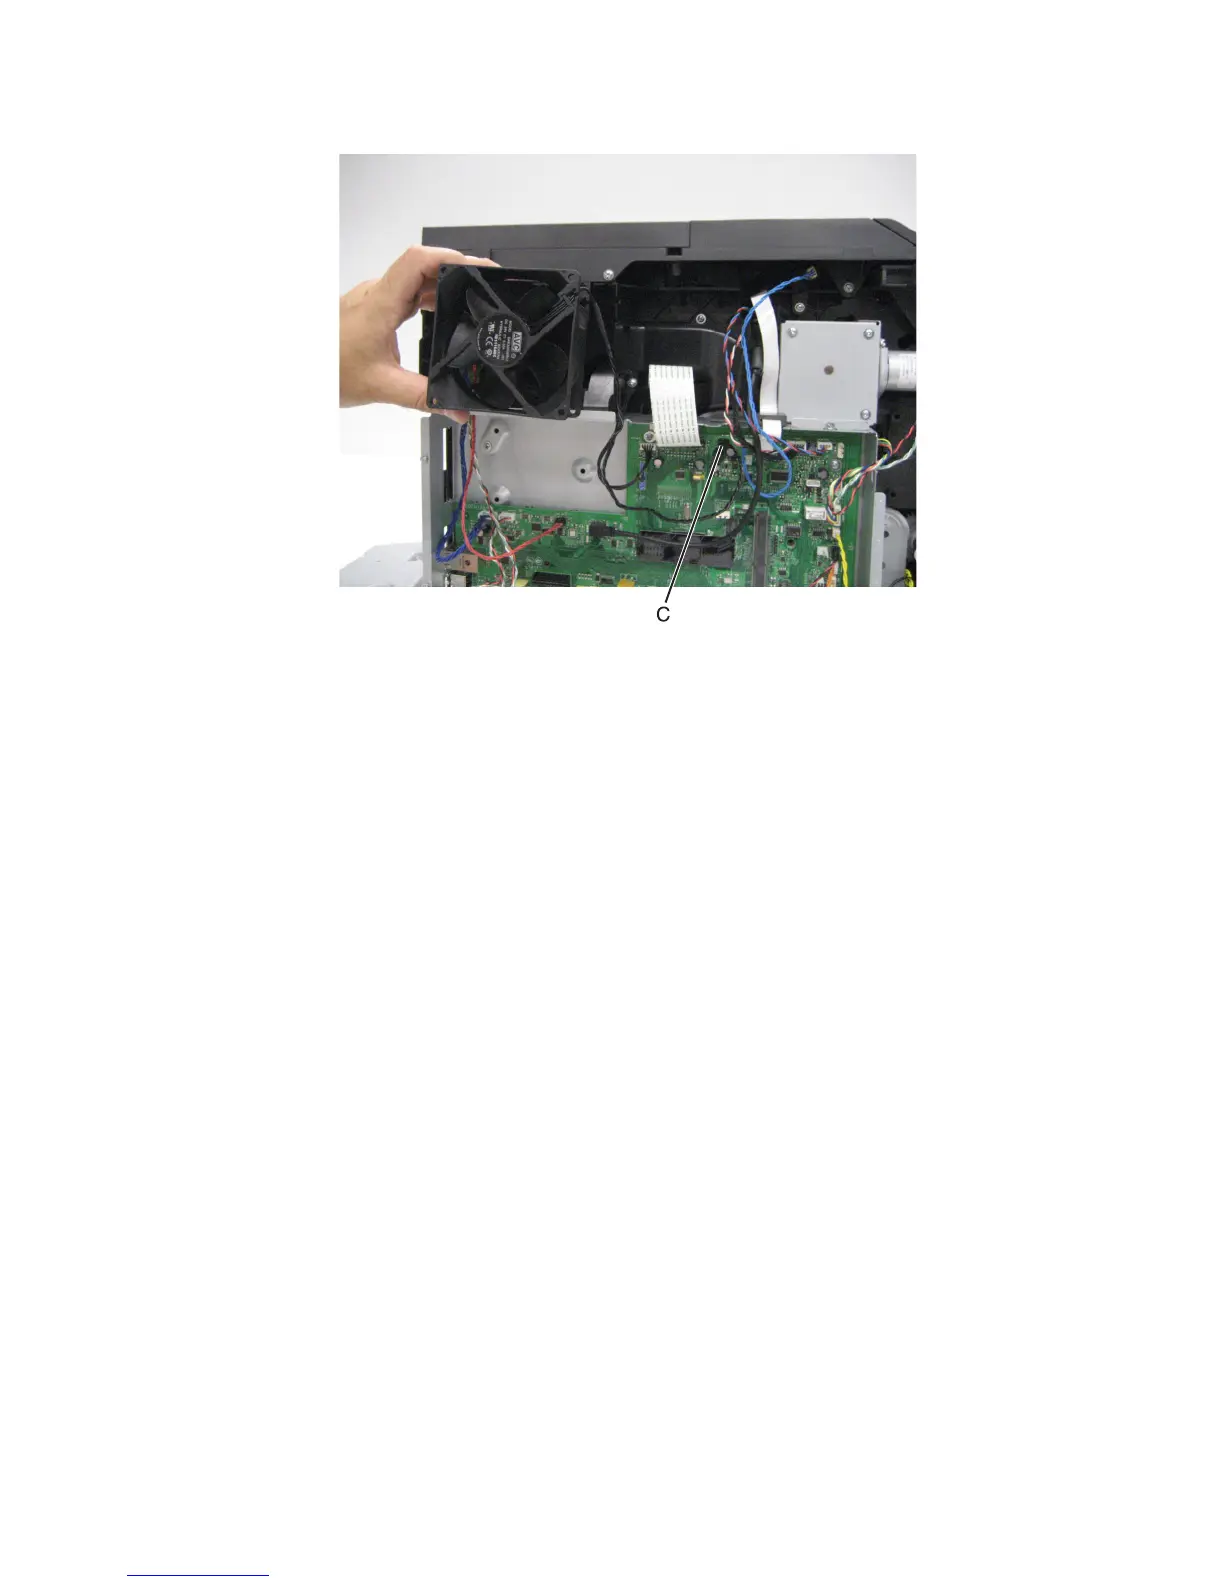
4 Disconnect the cable (C) from the controller board, and remove the main cooling fan.
Main drive motor removal
Installation warning: When replacing the main drive motor, make sure that the control panel door is in the closed
position or the main drive motor will not align properly, and damage will occur.
1 Remove the imaging unit from the machine.
2 Remove the right cover. See “Right cover removal” on page 505.
3 Remove the rear lower cover. See “Rear lower cover removal” on page 454.
4 Remove the LVPS. See “LVPS removal” on page 511.
5 Remove the left cover. See “Left cover removal” on page 489.
6 Remove the PCBA housing. See “PCBA housing removal” on page 500.
7 Remove the harnesses from the clamp (A).
4063
Repair information
497
 Loading...