4-144 Service Manual
7510
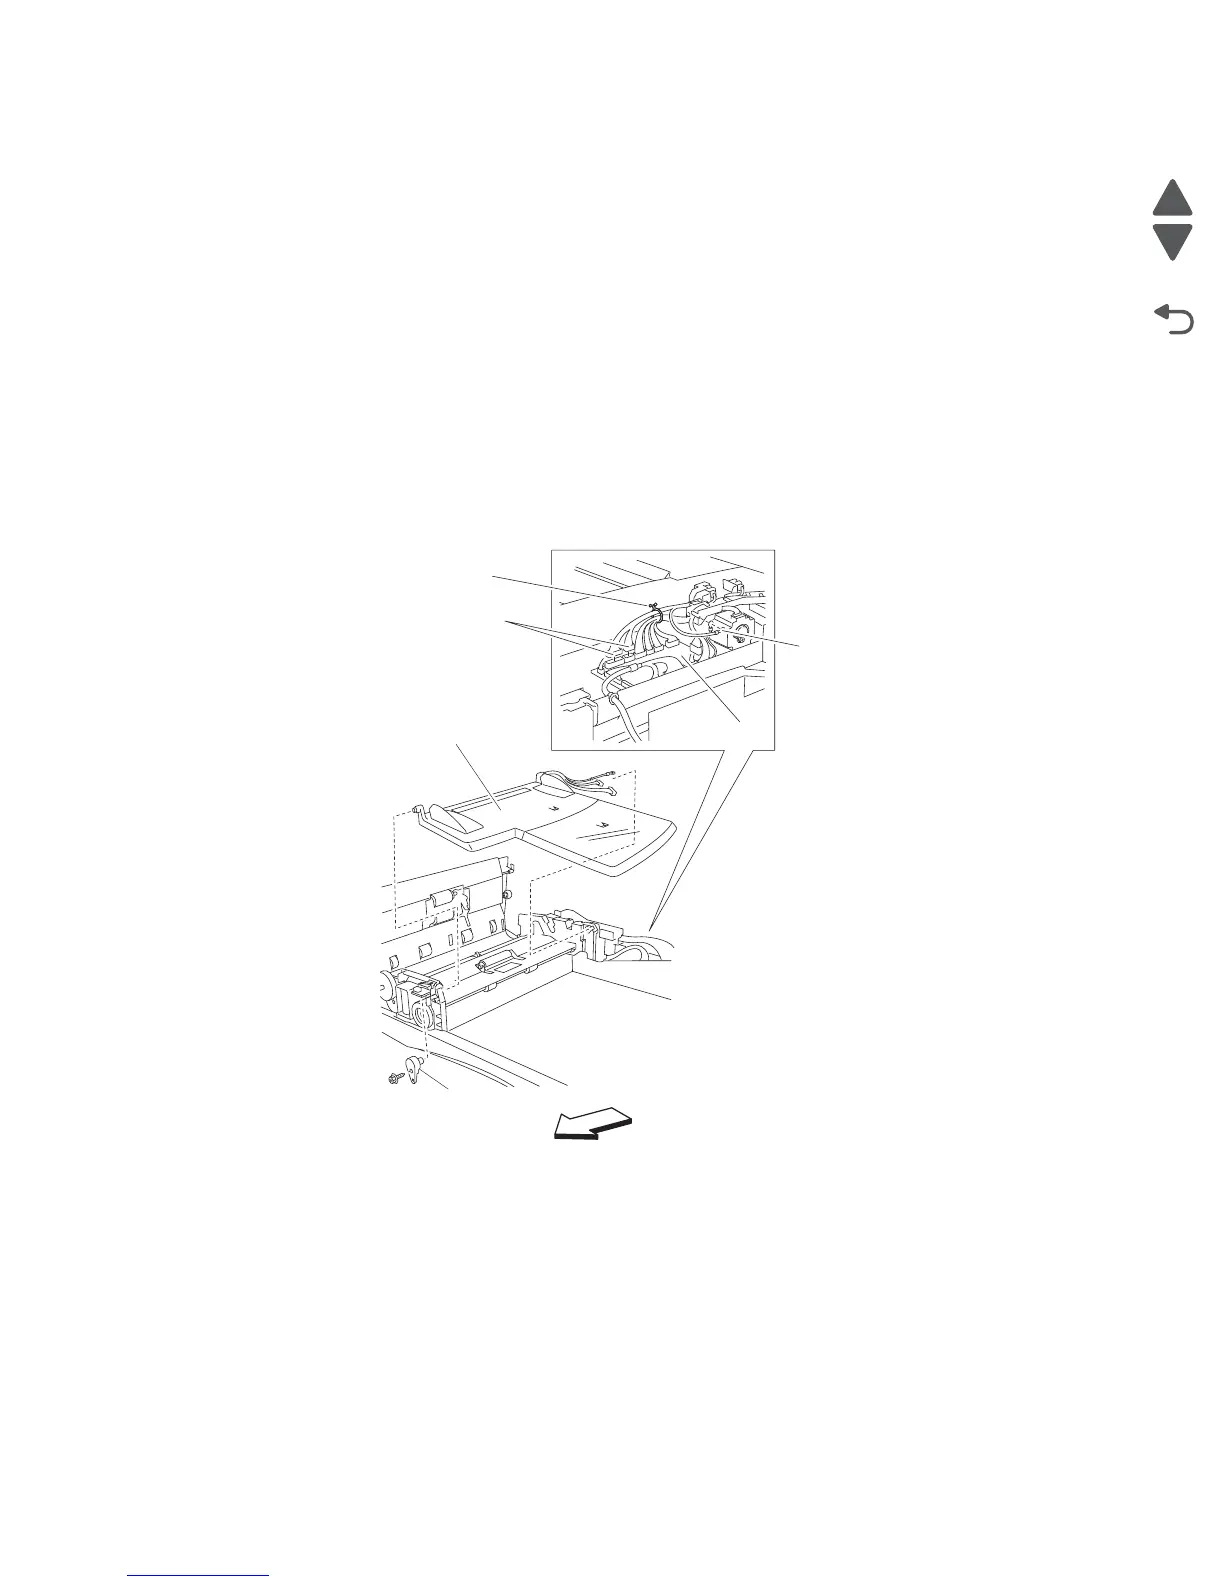
Document tray assembly removal
1. Remove the ADF front cover assembly. See “ADF front cover assembly removal” on page 4-138.
2. Remove the ADF rear cover. See “ADF rear cover removal” on page 4-138.
3. Open the ADF left cover assembly.
4. Release the wire clamp (A) that binds the harnesses together.
5. Disconnect the two connectors P759 and P760 from the ADF controller card assembly (B).
6. Remove the screw securing the green ground wire (C).
7. Remove the screw securing the document tray hinge (D).
8. Remove the document tray hinge (D).
9. Move the document tray assembly (E) upward to detach it from the ADF.
10. Remove the document tray assembly (E).
11. Remove the harness from the round opening in the ADF.
Replacement note: Before reinstalling the document tray assembly, ensure all connections are properly
reconnected.
Replacement note: Ensure the green ground wire (C) is reconnected.

 Loading...


