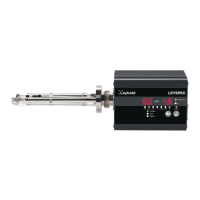
2.4 Supply and socket
connections on the rear
All supply connections and sockets are located on the
rear. These are shown in Fig. 7.
2.4.1 AC power supply
Connection to the AC power and selection of a different
line voltage setting and exchanging the line fuse of the
CM 31 is described in Section 2.2.
2.4.2 Connection of the
THERMOVAC gauge
The THERMOVAC gauge heads for measurement chan-
nels TM 1 and TM 2 are connected to sockets (7/4) and
(7/10) respectively.
2.4.3 Connection of the
PENNINGVAC gauge
The PENNINGVAC sensor is supplied
with a high tension via socket (7/9).
(3.3 kV ignition voltage, 1.6 kV operating
voltage; R
i
= 7.7 MΩ)
This socket is wired as follows:
Inner conductor Positive high voltage
Outer conductor Return and screen
2.4.4 Screw terminal outputs for the THER-
MOVAC channels
The connections are carried via two terminal strips. One
4-way terminal strip (7/6) or (7/7) above, and one 8-way
terminal strip (7/3) or (7/12) under the gauge head
connector. Those terminal strips which are above each
other are always related to one THERMOVAC channel.
The wiring is the same for both measurement channels
but the numbering of the pins is different.
16
Key to fig. 7
1 Ground (potential equalization for CM 31)
2 Connection for RS 232 C interface
3 Connection for channel TM 1 (triggers 1
and 2 and ready indicator)
4 Connection for THERMOVAC gauge head
(TM 1 channel)
5 AC power socket
6 Connection for channel TM 1
(Chart recorder output)
7 Connection for channel TM 2
(Chart recorder output)
8 Connection for channel PM (Chart recor-
der output and external HV ON/OFF)
9 Connection for PENNINGVAC gauge head
10 Connection for THERMOVAC gauge head
(TM 2 channel)
11 Connection for channel PM (triggers 1 and
2 and ready status indicator)
12 Connection for channel TM 2 (triggers 1
and 2 and ready status indicator)
S1 = TM 1 channel
S2 = TM 2 channel
Note
The designations of the terminals shown in this
illustration correspond to the DIN regulations.
Due to limited space the figures are neither
indicated at the back of the instrument nor on
the terminal strip.
Fig. 7 CM 31 - Rear view
CE
 Loading...