EasyManua.ls Logo

LFE 2000 Series - Page 71

LFE 2000 Series
155 pages
Print Icon
To Next Page IconTo Next Page
To Previous Page IconTo Previous Page
Loading...
959-3
I
REt/.
B
l'
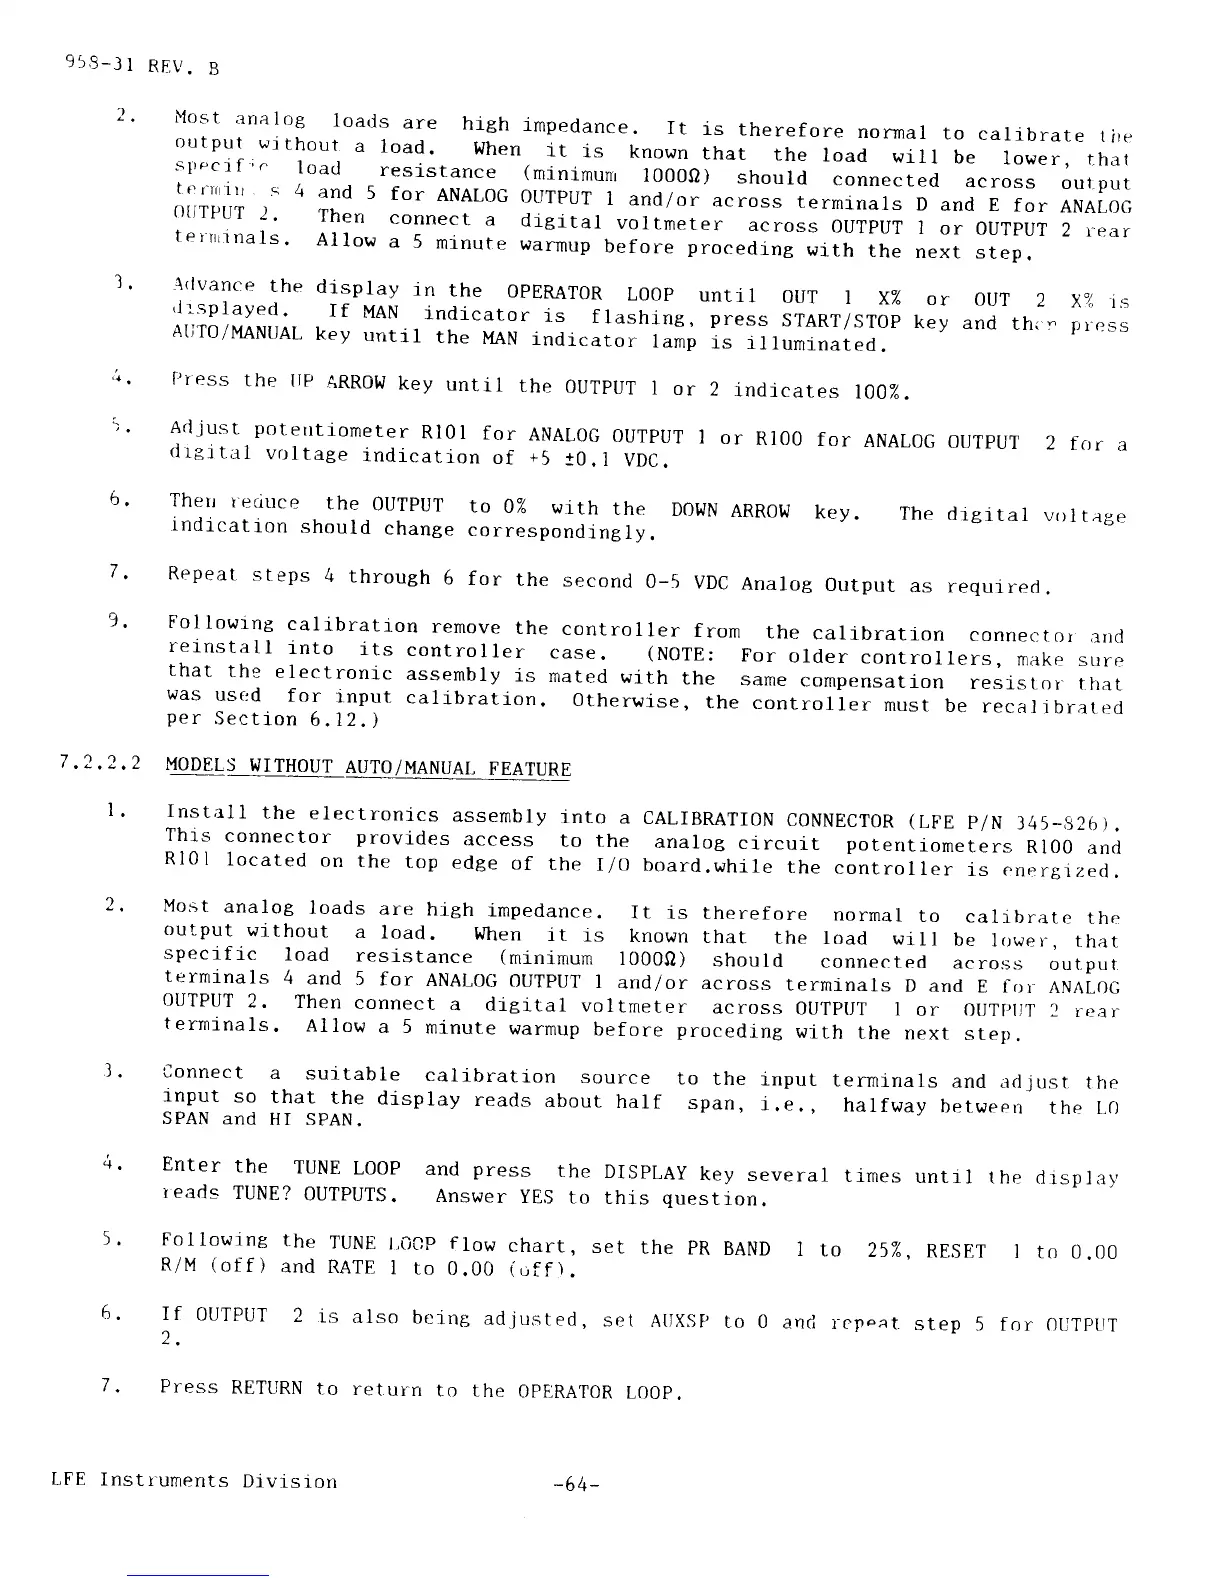
Most
analog
loads
are
high
impedance.
It
is
therefore
normal
to
calibrate
tire
output
wl
thout
a
load.
trlhen
rt
is
known
that
the
load
wrll
be
lower,
t_hat
sP'cif
;
'
load
resistance (minirnunr
10000)
should
connected
across
our-put
rr-'rlrr
rrr
s
4
and
5
for
ANALOG
ouTPUT
1
and/or
across
terminals
D
and E
for
ANALoc
OIITPUT
2'
Then
connect
a
digital
voltneter
across
ourpur
I
or
ourpur
2 rear
tei'trr
inals'
Allow
a
5
minute
warmup
before proceding
with
the
next
step.
l.
OUT
2
XZ
is
and
thi'r
p
ress
Adjust'
poterttiorneter
RlOl
for
ANALoc
ourpur
I
or
Rl00
for
ANALOG
ourpur
2
fctr
a
drgrtal
voltage
indication
of
+5
t0.l
VDC.
Arlvance
the
display
in
the
''ERAT'R
L00p
untir
our
I
xT"
or
'ir'splayed.
If
MAN
indicator
is
f
lashing, press
srART/srOp
key
AIir'/MANUAL
kev
untir
the
MAN
indicator
tarnp
is
itt"n.l..i"il'
l'tess
the
IiP
ARRow
key
untll
the
OUT'UT
I
or
2
indicates
l0O%.
7
7
.2.2.2
l.
6.
5.
I f
OUTPUT
z.
Repeat
steps
4
through
5
fon
the
second
0-5
VDC
Analog
Output
as requrred.
Followrng
calibration
remove
the
controller
from
the
calibration
connector
ancl
rernstall
into
its
controller
case.
(NOTE:
For
older
controllers,
make
sure
that
the
electronic
assembly
is
mated
with
the
sane
conpensation
reslsLor.
that
was
use:d
for
input
calibration.
0therwise,
the
controller
must
be
recal
rbrated
per
.Section
6.12.)
MODELS
WITHOUT
AUTO/MANUAI,
FEATURE
Install
the
electronics
assernbly
rnto
a
GALIBRATION
C0NNECT0R
(LFE
p/N
345-s26).
This
connector provides
access
to the
analog
circuit potentiometers
Rl00
and
RlOl
located
on
the
top
edge
of
the
I/o
board.whlle
the
controller
1s enerBrze6.
Most
analoB
loads
are
high
impedance.
It
is
therefore
normal
to
calibrate
the
output
wrthout
a
load.
When
it
rs
known
that
the
load
will
be
lower,
that
specific
load
resistance
(minimum
1000Q)
should
connected
acros.s
output
terminals
4
and
5
for
ANAI-0G
0UTPUT
I
and/or
across
terrninals
D and
E frrr
ANALoc
OUTPUT
2.
Then
connect
a
dleital
voltmeter
across
oUTptJT
I
or
oUTpllT
2
rr:ar
terrninals.
Al1ow
a 5
minute
warnup
before proceding
with
the
next
ste[).
connect
a
suitable
calibration
source
to
the
input
termlnals
and
adjust
the
lnput
so
that
the
display
reads
about
half
span,
i.e.,
halfway
betweerr
the t,0
SPAN
and
HI SPAN-
Therr
.eciuce
the
0UTpur
to
0%
wlth
the
D'wN
ARRot^/
key.
r.ndrcation
should
change
correspondingly.
Enter
the
TUNE
L00p
and
press
the
reads
TUNE?
0UTpltTS.
Answer
yES
to
The
dieital
volt.rg,e
DISPLAY
key
several
times
untrl
the
clrsplav
this
question.
25%,
RESET
1
Followlng
the
TUNE
l,00p
flow
chart,
set
the
pR
BAND
I
to
R/M
(off
)
and
RATE
I to
0.00
(r,ff
).
I
to 0.00
f o r OUTPtlT
2
is
also
be
ing,
ad.just
ed
set
AIIXSP
to 0
and
r-cpo2L
step
5
Press
RETURN
to
return
to the
OPERAT0R
LOOP.
LFE
Instr-uments
Divi-si.on
-64-