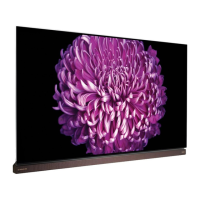
Do you have a question about the LG SIGNATURE OLED65G7 Series and is the answer not in the manual?
| Screen Size | 65 inches |
|---|---|
| Display Type | OLED |
| Resolution | 3840 x 2160 (4K UHD) |
| Smart TV | Yes |
| Operating System | webOS |
| HDMI Ports | 4 |
| USB Ports | 3 |
| Wi-Fi | Yes |
| Bluetooth | Yes |
| Refresh Rate | 120 Hz |
| Sound Output | 60W |
| Dolby Atmos | Yes |
| HDR Support | HDR10, Dolby Vision |
| Smart Features | LG ThinQ AI |
| Dimensions (W x H x D) | 57.1 x 32.7 x 1.8 inches |
Avoid placing the TV in environments with direct sunlight, heat, moisture, or near water.
Follow instructions for power plugs, cables, and avoiding electric shock hazards.
Do not store flammable substances near the product or insert foreign objects into it.
Avoid water spray and flammable cleaners; contact service for damage or repairs.
Avoid touching TV during storms or gas leaks; ensure ventilation.
Do not disassemble; contact service for damage, smoke, or strange smells.
Use authorized accessories; handle adapters carefully; ensure proper cord connection.
Install on stable surfaces; prevent overturning; ensure adequate distance from power lines.
Mount bracket securely; keep batteries away from children.
Ensure sufficient cable length for external devices; avoid using power plug for switching.
Maintain 10 cm ventilation space; avoid blocking vents; be aware of hot openings.
Protect cords from damage; avoid scratching or pressing on the screen.
Unplug to disconnect power; grab plug, not cord; move in pairs.
Unplug before cleaning; use soft cloth; avoid harsh chemicals; refer servicing to professionals.
TV initialization may take time; OSD and menus may vary by model.
Use compatible HDMI/USB devices with correct bezel dimensions; use certified HDMI cables.
Use extension cables for Companion Box; avoid pressing on the speaker.
Ensure screws are fastened; protect screen from scratches during installation.
Use original packaging; disconnect all cables before moving.
Hold TV firmly by the frame; avoid screen contact and cable holders.
Attach AV box fixing supporter before lifting to prevent finger injury.
Operate TV functions using the physical button on the unit.
Control TV power, volume, and switch between programmes using buttons.
Install wall brackets with eye-bolts and rope, ensuring secure attachment.
Place TV upright on a table with 10 cm ventilation space.
Ensure children do not climb; use a strong platform; avoid heat sources and foreign substances.
Attach optional bracket carefully; consult professionals for non-standard walls.
Use VESA standard screws and brackets; refer to table for dimensions.
Fold AV box and attach supporter/spacer before wall mounting.
Check wall material; use appropriate anchors, screws, and drill bits.
Avoid plasterboard/MDF; install into concrete or use a separate hanger.
Ensure wall supports load; use correct drill bit size for concrete.
List of necessary tools for wall mounting, including drill and driver.
Drill Ø 8 mm holes to 80-100 mm depth and clean them.
Insert sealed wall mounting anchor into the hole using a hammer.
Set wall mount on wall, align to hole, and adjust angle upwards.
Align and tighten wall mounting screws to specified torque (45-60 kgf/cm).
Prevent children climbing; use strong platform; wear safety gloves.
Locate Kensington security system connector at the rear of the Companion Box.
Connect various external devices like HD receivers, DVD players, and PCs.
Adjust settings for PC mode noise; some resolutions may not work.
Connect TV to antenna/satellite dish using RF cable; improve quality with amplifiers.
Insert CI module correctly; connect USB devices directly if USB Hub fails.
Connect external devices via HDMI cable; ensure proper cable separation.
Configure HDCP settings and check supported audio formats (DTS, Dolby).
Replace batteries when low; ensure remote points to TV sensor.
Position Access Point >0.2m from TV to prevent remote interference.
Replace 1.5 V AA batteries by opening cover and pointing remote at TV sensor.
Ensure AP is >0.2m from TV to avoid frequency interference.
Describes POWER, STB PWR, number, alphabet, space, LIST, Screen Remote, QUICK ACCESS, AD buttons.
Describes HOME, RECENTS, STB MENU, Wheel, Navigation, BACK, EXIT, GUIDE buttons.
Press voice button; speak when display window appears for search.
Pair the Magic Remote by pointing at TV and pressing the Wheel (OK) button.
Unpair the Magic Remote by pressing BACK and HOME buttons simultaneously.
Details on supported licenses and open source software information.
Check remote sensor, obstacles, battery, and power cord connections.
Verify TV power, cord connection, and wall outlet functionality.
Check power settings, timers, or reconnect HDMI for PC connection issues.
Addresses flicker, pixel variations, image sticking, and horizontal lines.
Interprets blinking indicator lights on the Companion Box (AV Box).
Explains 'cracking' noise from thermal contraction and circuit humming/buzzing.
Details Wireless LAN/Bluetooth specs and CI Module environment conditions.
Details Digital TV (DVB-T, DVB-T2, DVB-C, DVB-S/S2) and Analogue TV standards.
Specifies frequency ranges for different TV channel bands.
Indicates maximum storable programs and external antenna impedance.