FLARING WORK AND CONNECTION OF PIPING
16
Outside diameter
Torque
mm inch N
.
m
Ø6.35 1/4 16±2
Ø9.52 3/8 38±4
Ø12.7 1/2 55±6
Ø15.88 5/8 75±7
Ø19.05 3/4 110±10
Check
- Compare the flared work with figure below.
- If flare is noted to be defective, cut off the
flared section and do flaring work again.
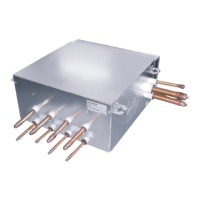
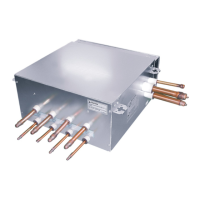
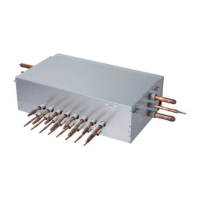
Connection of piping - Outdoor
Align the center of the piping and sufficiently
tighten the flare nut by hand.
Connecting pipe order
1) ROOM A~E gas side pipe
2) ROOM A~E liquid side pipe
Finally, tighten the flare nut with torque wrench
until the wrench clicks.
- When tightening the flare nut with torque
wrench ensure the direction for tightening fol-
lows the arrow on the wrench.
Inclined
Inside is shining without scratches.
Smooth all round
Even length
all round
Surface
damaged
Cracked Uneven
thickness
= Improper flaring =
Ø12.7(1/2 inch) Connector
tdoor unit
Main gas
side valve
Main liquid
side valve
Gas side piping
ROOM A
ROOM B
ROOM C
ROOM D
ROOM E
ENGLISH

 Loading...