27
Starting the mixer
Follow the indications below to switch on the mixer:
• For the model with fixed head, the safety grid of the bowl must be lowered;
• For the model with rising top, the bowl must be housed in its seat and the top must be lowered and locked with the
appropriate locking handles;
• Position the timer (if provided) on the necessary time;
• Press 1 on the start/stop button;
• For the 2-speed machines, set the necessary speed using the 1-0-2 switch;
• For the variable speed machines, use the potentiometer to adjust the necessary speed.
Mixing phase
Before starting each work cycle, make sure the machine is perfectly clean, in particular the surfaces of the bowl, of the spiral
and of the dough splitter in contact with the foodstuff. If necessary, carry out the cleaning according to the procedures described
in Chapter 7.
After having lifted the protection, pour inside of the bowl the necessary ingredients type and quantity.
Lower the grid, set the timer for a defined time and press the button 1 to start.
The action performed by the spiral, whose motion is synchronised with the rotation of the bowl, allows to obtain the mixture of
flour, water, salt, yeast and any other foodstuffs until the necessary consistency of the dough is obtained.
To slightly modify the characteristics and/or the consistency of the initial mixture, pour the ingredients in the bowl through the
safety grid.
The raising top machine version with removable bowl, despite being functionally identical to the version with fixed head and
bowl, differs from the latter as regards the possibilities offered at the end of each work cycle, i.e. a greater ease in the
discharging of the dough and easier cleaning phase.
To raise the top and remove the bowl follow the indications below:
- Stop the machine by pressing the stop button;
- Remove the plug from the power socket;
- Raise completely the mobile protection;
- Pull the locking knobs of the head;
- Raise the head by means of the underlying piston;
- Unblock the bowl by turning the tub block disc;
- Raise the bowl.
After cleaning the machine, fit back the bowl by proceeding in reversed order.
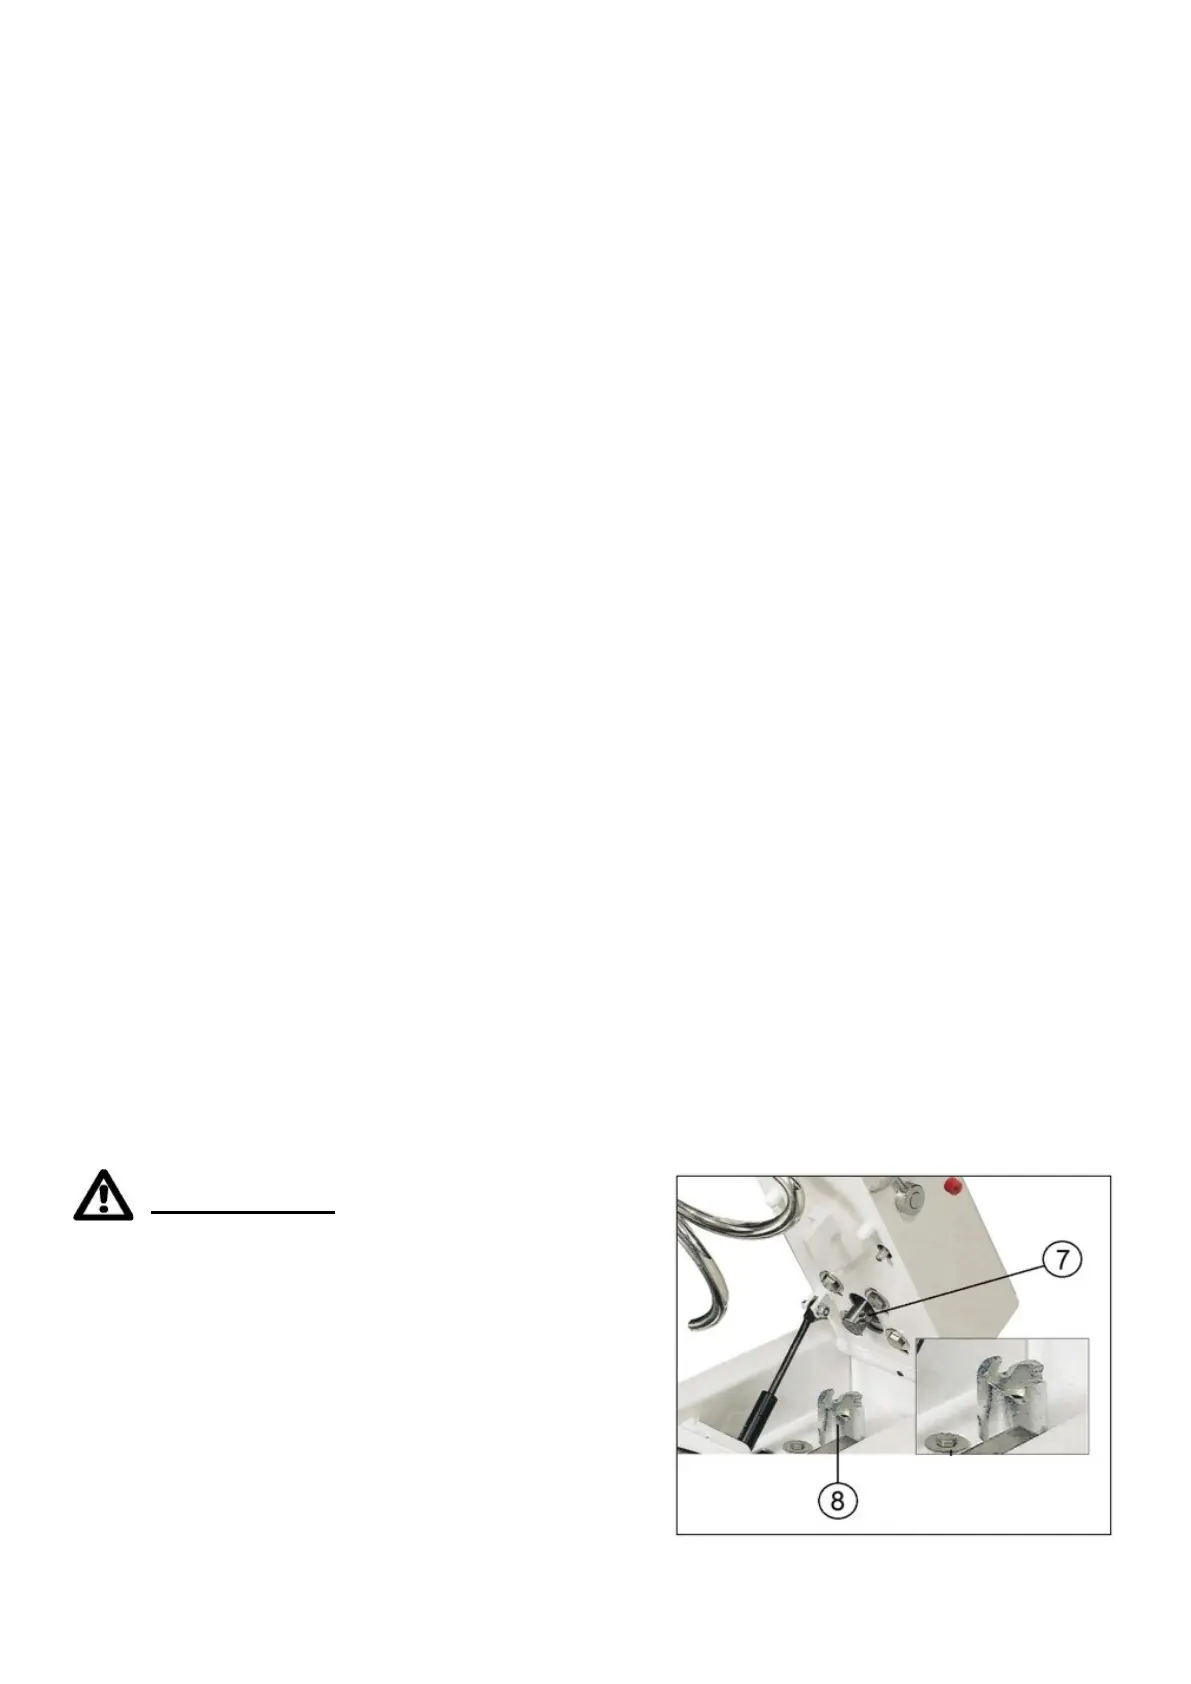
ATTENTION
For products with liftable head, when closing the head, check the
correct alignment between the CONNECTION PLUG (7) and the
TRANSMISSION JOINT (8).
A CLOSURE WITH THE COMPONENTS MISALIGNED WILL LEAD
TO ABNORMAL WEAR/BREAK OF THE ROTATION
TRANSMISSION COMPONENTS.
 Loading...