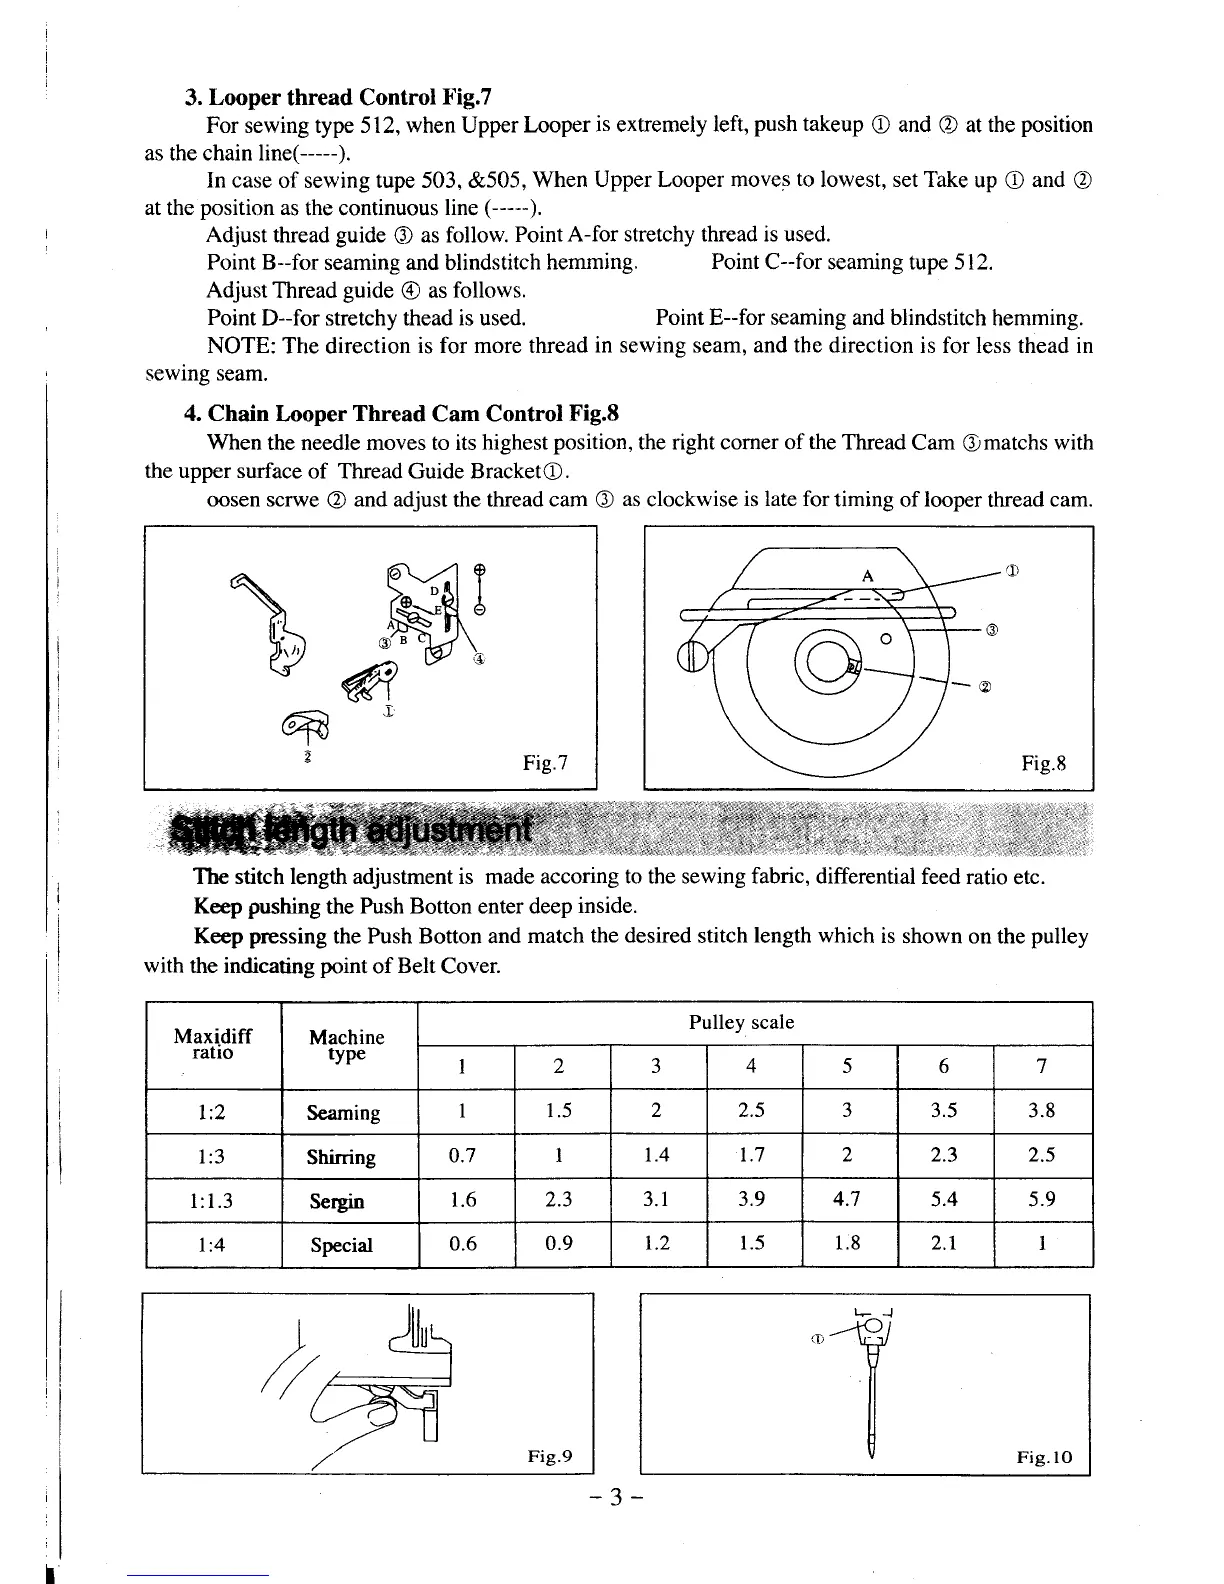
3.
Looper
thread Control
l'ig.7
For sewing type 512,
when
Upper
Looper
is extremely left,
push
takeup
O
and
(D
at
the
position
as the chain line(-----).
In case
of sewing tupe 503, &505,
When
Upper Looper moves
to
lowest, set Take
up
O
and
O
at the
position
as
the continuous
line
(-----).
Adjust thread
guide
G)
as follow.
Point
A-for stretchy thread is used.
Point B--for
seaming and blindstitch
hemming.
Point
C--for seaming tupe 512.
Adjust
Thread
guide
@
as
follows.
Point
D--for stretchy thead is used.
NOTE:
The direction
is for more thread
in
sewing seam.
4. Chain
Looper
Thread
Cam Control
Fig.8
When
the needle moves to its
highest
position,
the right corner of
the
Thread
Cam
Omatchs
with
the upper surface
of Thread Guide BracketO.
oosen scrwe
@
and adjust
the
thread cam
O
as
clockwise
is late for
timing
of
looper
thread
cam.
Point E--for seaming and blindstitch
hemming.
sewing seam, and the direction
is for less thead in
\
b
@
2
Fig.7
The stitch length adjustment is made
accoring to the sewing fabric, differential
feed ratio
etc.
Keep
pushing
the
Push Botton
enter
deep
inside.
Keep
pressing
the Push Botton and
match
the desired
stitch
length which
is
shown on the
pulley
with
the indicating
point
of
Belt
Cover.
Maxidiff
ratio
Machine
type
Pulley scale
I
2
J 4
5 6 7
l:2
Seaming
I 1.5
2 2.5
J
3.5 3.8
l:3
Shirring
0.7
I
1.4 1.7 2 2.3 2.5
1:1.3
Sergin
1.6
2.3 3.1 3.9 4.7
5.4 5.9
l:4 Special
0.6
0.9
r.2 1.5 1.8 2.1
I
Fig.9
Fig. lO
-3-



 To Next Page
 Loading...