4. Installation and parts list
Carefully take out the treadmill from the shipping
carton. Ensure that none of the parts is not
missing (picture no. 1).
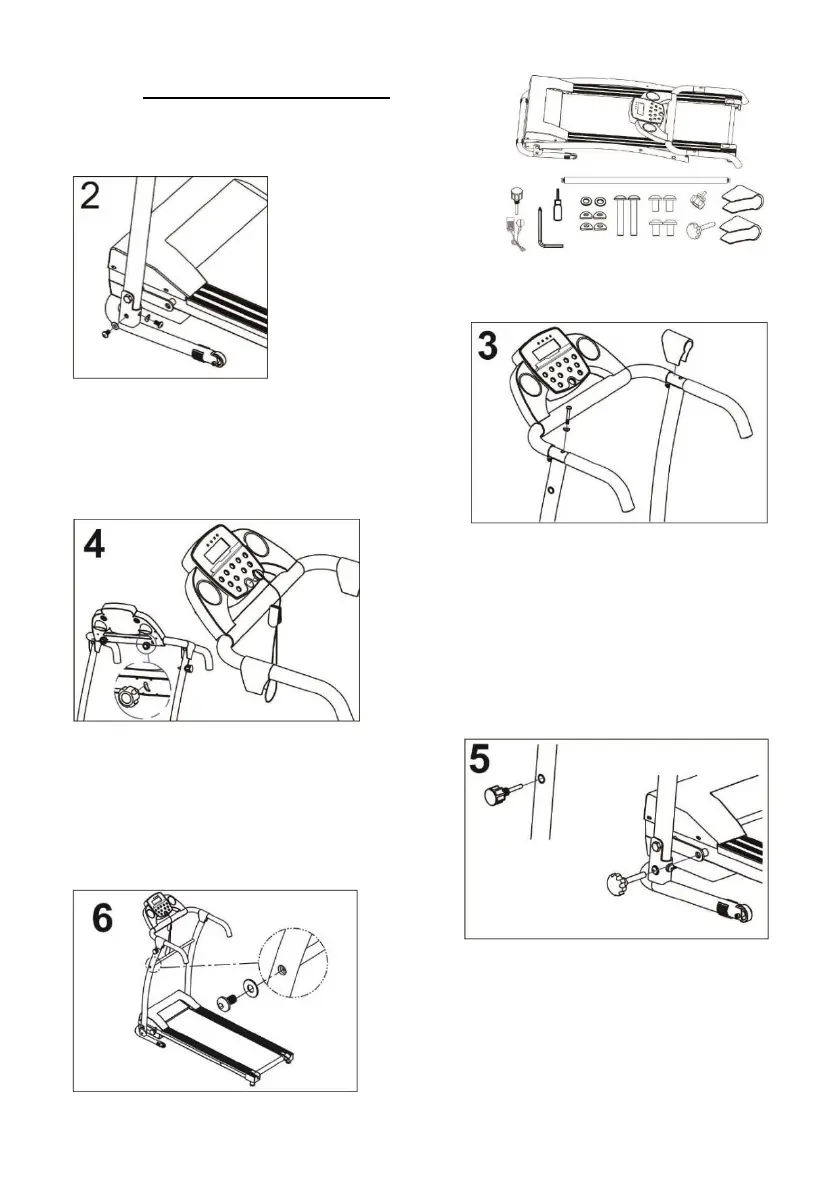
Take 4 short screws and
washers and attach the
left and right vertical beams to the part of treadmill. Do not
tight the screws fully before complete the installation.
There are two cable
connections at the top of the right vertical
beam. Make sure they are properly conect in.
Using 2 long screws, secure the frame to the
vertical beams and make sure cables are not
pinched. Attach the plastic covers to the joint.
Using a screw, secure the control panel at a
suitable angle to the frame so that the panel
does not rotate, causing damage to the cables.
Place the red security key with the magnetic side
at the marked position on the control panel.
Note: The machine can only be started with the
safety key located in the correct position. Keep
the safety key away from children.
Fix the the screw to left side upright post. Fix
the running frame with base tube with the
next knob.
Use the screws attached to put on the middle
bar between the left and right support post
before tightening any remaining / loose bolts.
This completes assembly.
Note: Ensure that all screws are firmly tightened
and that you have no leftover parts.
 Loading...