40
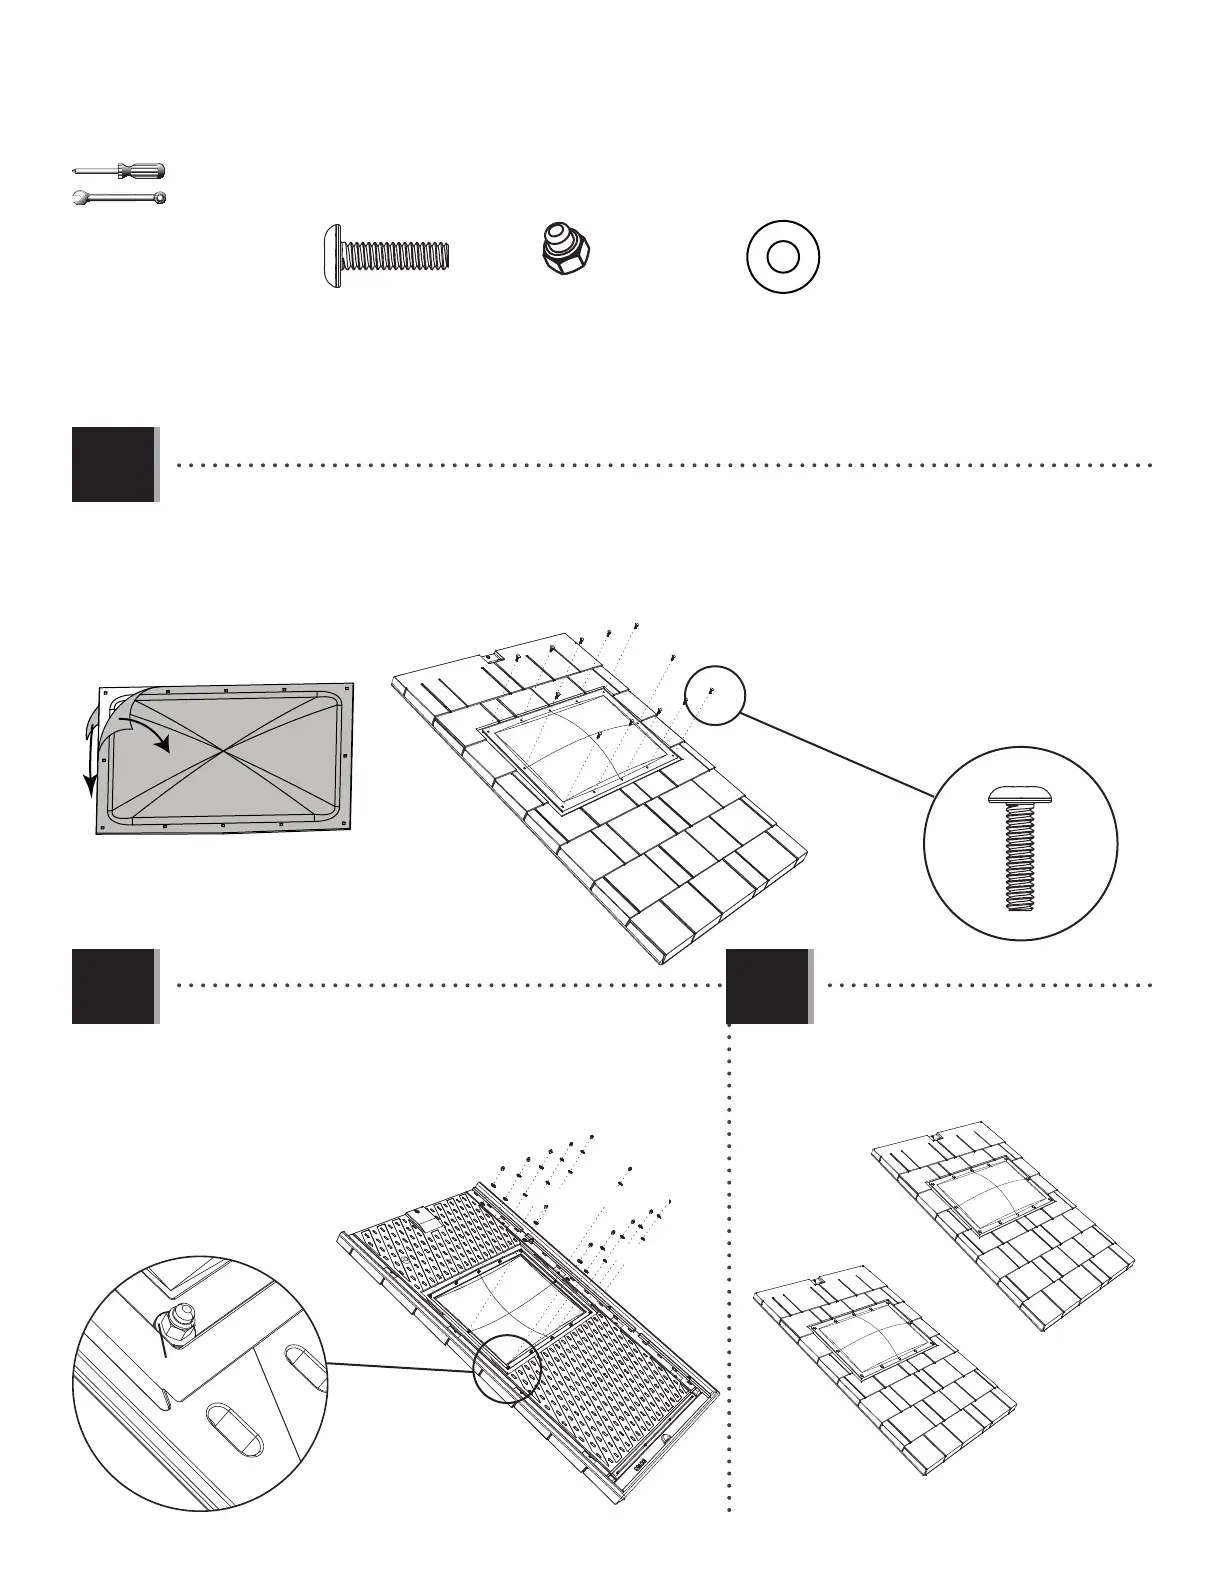
TOOLS AND HARDWARE REQUIRED / OUTILS ET QUINCAILLERIE REQUIS / INSTRUMENTAL Y HERRAJE REQUERIDOS
X SECTION 6 (CONTINUED) / SECTION 6 (SUITE) / SECCIÓN 6 (CONTINUACIÓN)
• Secure the Skylight using the hardware provided. Do not overtighten.
• Attachez bien la lucarne à l’aide de la quincaillerie incluse. Ne pas
trop serrer.
• Sujete el tragaluz usando el herraje incluido. No apriete demasiado.
ADK (x24)
AEE (x48)
3/8 in/po
(10 mm)
ADK
ADK
ADK
ADK
AEE (x2)
AEE (x2)
AEE (x2)
AEE (x2)
EFA (x24)
EFA
• Remove the protective plastic from both sides of the Skylight (AGB). Align the holes in the Domed Skylight with
those in the Roof Panel, and insert the Screws (EFA).
• Retirez la pellicule protectrice des deux côtés de la lucarne (AGB). Alignez les trous dans la lucarne avec ceux du
panneau de toit, et insérez les vis (EFA).
• Retire el protector de plástico de las dos caras del tragaluz (AGB). Alinee los agujeros en el tragaluz con los del
panel de tejado, e inserte los tornillos (EFA).
AGB
• Repeat this sección for the second Skylight.
• Répétez cette section pour la deuxième
lucarne.
• Repita esta sección para el segundo tragaluz.
6.5
6.6 6.7