28
TOOLS AND HARDWARE REQUIRED / OUTILS ET QUINCAILLERIE REQUIS / INSTRUMENTAL Y HERRAJE REQUERIDOS
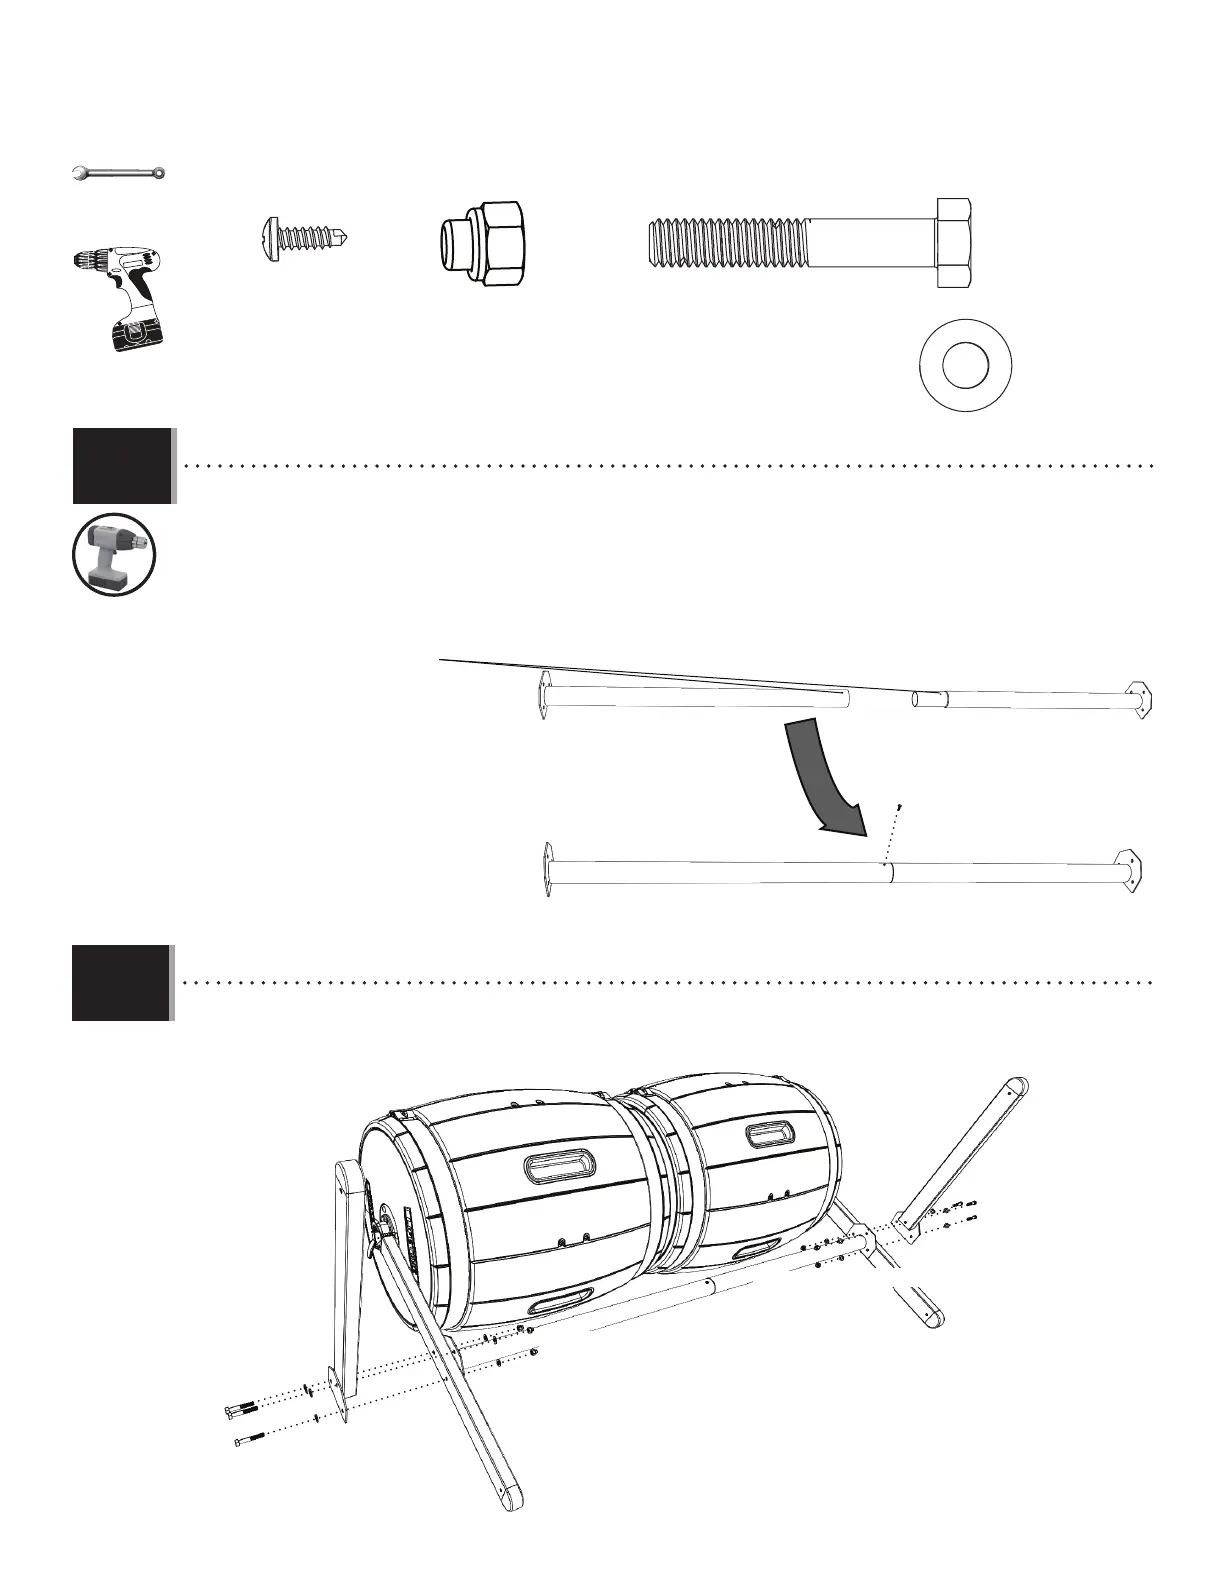
• Connect the two Front Legs (DEJ) to the Rear Legs using the hardware provided.
• Attacher bien les deux pieds avant (DEJ) aux pieds arrière à l’aide de la quincaillerie incluse.
• Sujetar las dos patas delanteras (DEJ) a las patas traseras usando el herraje incluido.
DEL
BHJ (x1)
AAN (x6)
BHO (x12)
DEN (x6)
BHJ
DEM
2
• Orient the two Cross Tubes (DEL and DEM) as shown. Use an electric drill to insert the Self-Tapping Screw (BHJ) into the
two Cross Tubes.
• Orienter les deux tubes transversaux (DEL et DEM). Employer une perceuse électrique pour insérer la vis
autotaraudeuse (BHJ) dans les deux tubes transversaux.
• Orientar los dos tubos transversales (DEL y DEM) como se muestra. Usar un taladro eléctrico para introducir el tornillo
autoroscante (BHJ) dentro de los dos tubos transversales.
• Align these two holes.
• Aligner ces deux trous.
• Alinear estos dos agujeros.
X SECTION 2 (CONTINUED) / SECTION 2 (SUITE) / SECCIÓN 2 (CONTINUACIÓN)
BHO (x3)
DEN (x3)
DEJ
DEJ
BHO (x3)
AAN (x3)
AAN (x3)
BHO (x3)
BHO (x3)
DEN (x3)
2.21
2.22
13 mm (x2)
(1/2 in/po) (x2)