12
TOOLS AND HARDWARE REQUIRED / OUTILS ET QUINCAILLERIE REQUIS / INSTRUMENTAL Y HERRAJE REQUERIDOS
X SECTION 1 (CONTINUED) / SECTION 1 (SUITE) / SECCIÓN 1 (CONTINUACIÓN)
1.4
1.5
AMZ
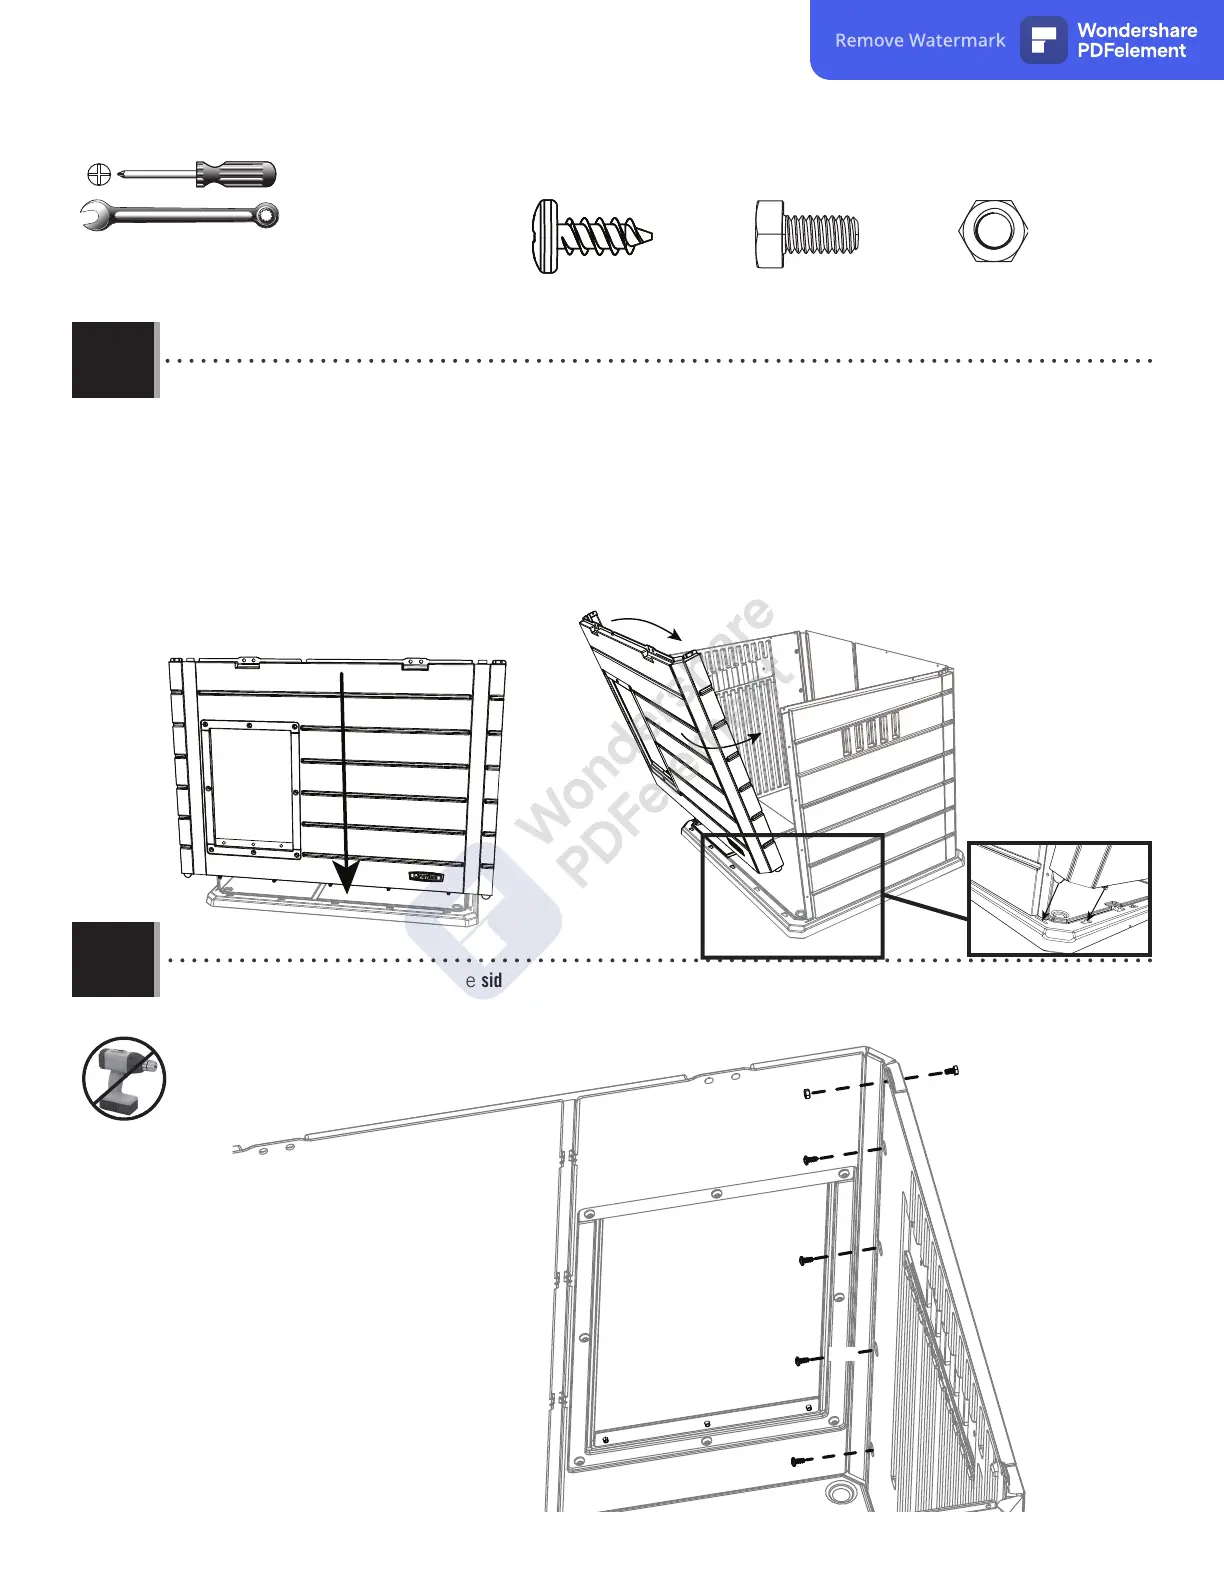
• Insert the fi ve (5) center tabs of the front wall panel (AMZ) into the slots in the fl oor panel. Slide the panel to the left
all the way to the end. Fold the outside edges of the front wall to line up the tabs on the bottom corners with the
slots in the fl oor panel. Press the ends to lock them in place.
• Insérer les cinq (5) languettes centrales du panneau de plancher (AMZ) dans les fentes dans le panneau de plancher.
Faire glisser le panneau à gauche jusq’au bout. Plier les bords extérieurs du mur avant afi n d’aligner les onglets
des coins inférieurs avec les fentes du panneau de plancher. Pressioner les extrémités pour les bloquer en place.
• Inserte las cinco (5) lengüetas centrales del pared frontal (AMZ) en las ranuras en el panel de piso. Deslice el panel
a la izquierda hasta donde pueda llegar. Doble los lados del muro delantero para alinear las lengüetas al fondo
del muro con las ranuras en el panel de piso. Presionar los extremos para fi jarlos bien en su lugar.
• Attach the front wall (AMZ) with the side wall (FKC) with the hardware indicated.
• Fixer le mur avant (AMZ) au mur latéral (FKC) avec des quincailleries indiqué.
• Una la pared frontal (AMZ) con la pared lateral (FKC) con los herraje indicados.
AMZ
ADZ
FKC
ADZ
ADZ
ADZ
BER
ADZ (x4)
BES
FKC
BER (x1)
BES (x1)
7/16" (≈11 mm)
(x1)
Remove Watermark
Wondershare
PDFelement