35
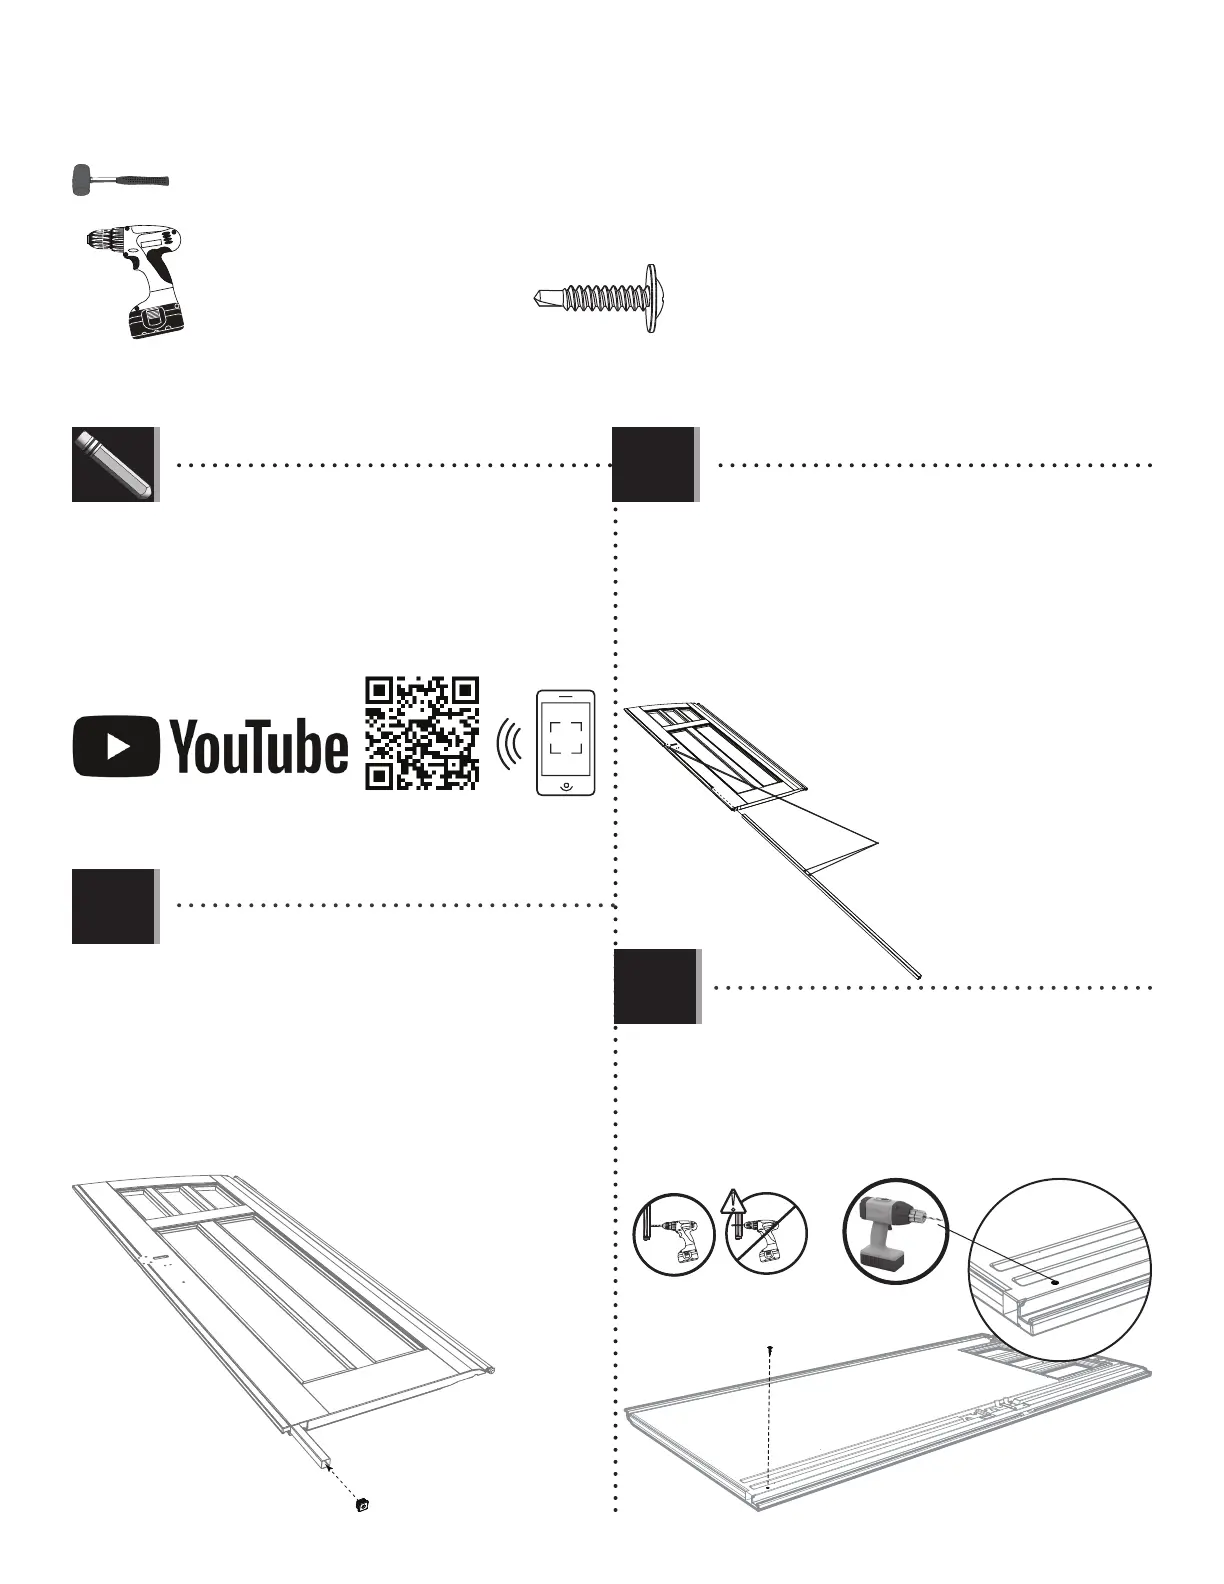
TOOLS AND PARTS REQUIRED / OUTILS ET QUINCAILLERIE REQUIS / INSTRUMENTAL Y HERRAJE REQUERIDOS
X SECTION 5 (CONTINUED) / SECTION 5 (SUITE) / SECCIÓN 5 (CONTINUACIÓN)
• If you have trouble with this section, follow the code below
to view a how-to video on this section.
• En cas de problèmes avec cette section, suivre le code en
bas pour voir un vidéo sur l’assemblage dans cette section.
• En caso de algun problema con esta sección, seguir el
código debajo para ver un video sobre el ensamble en esta
sección.
5.1
LIFETIME
©
EDW
BDK
• Slide a Long Tube (EDW) into the hole in the Door
until six inches remain out of the Door (BDK).
• Faire glisser le tube carré (EDW) à travers le trou
dans le bord inférieur de la porte jusqu’à ce qu’il
dépasse quinze centimètres de la porte (BDK).
• Deslizar el tubo cuadrado (EDW) adentro del agujero
en la puerta hasta que el tubo cuelgue quince
centímetros de la puerta (BDK).
• Insert an End Cap (BBH) into the end of the Tube,
and fi nish inserting the Tube until fl ush with bottom
of Door.
• Insérer un capuchon (BBH) dans l’extrémité du
tube, et continuer d’insérer le tube jusqu’à ce qu’il
soit à ras du bord inférieur de la porte.
• Insertar un tapon (BBH) adentro del extremo del
tubo, y seguir con la inserción del tubo hasta que
esté al ras del borde inferior de la puerta.
BDK
BBH
• Align these holes in the next step
• Aligner ces trous dans l’étape suivante
• Alinear estos agujeros en el paso
siguiente
5.2
5.3
!
• Drill through the divot and into the Tube. Insert
the Screw (CHK) to secure the Tube in place.
• Percer à travers la marque et dedans le tube.
Insérer la vis (CHK) pour attacher le tube en place.
• Taladrar por la marca y dentro del tubo. Insertar el
tornillo (CHK) para sujetar el tubo en su lugar.
CHK
CHK (x1)
http://go.lifetime.com/ 20’ x 8’ Outdoor Storage Shed Sec5