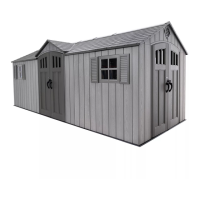
80
TOOLS AND PARTS REQUIRED / OUTILS ET QUINCAILLERIE REQUIS / INSTRUMENTAL Y HERRAJE REQUERIDOS
X SECTION 10 (CONTINUED) / SECTION 10 (SUITE) / SECCIÓN 10 (CONTINUACIÓN)
AHE
AHE
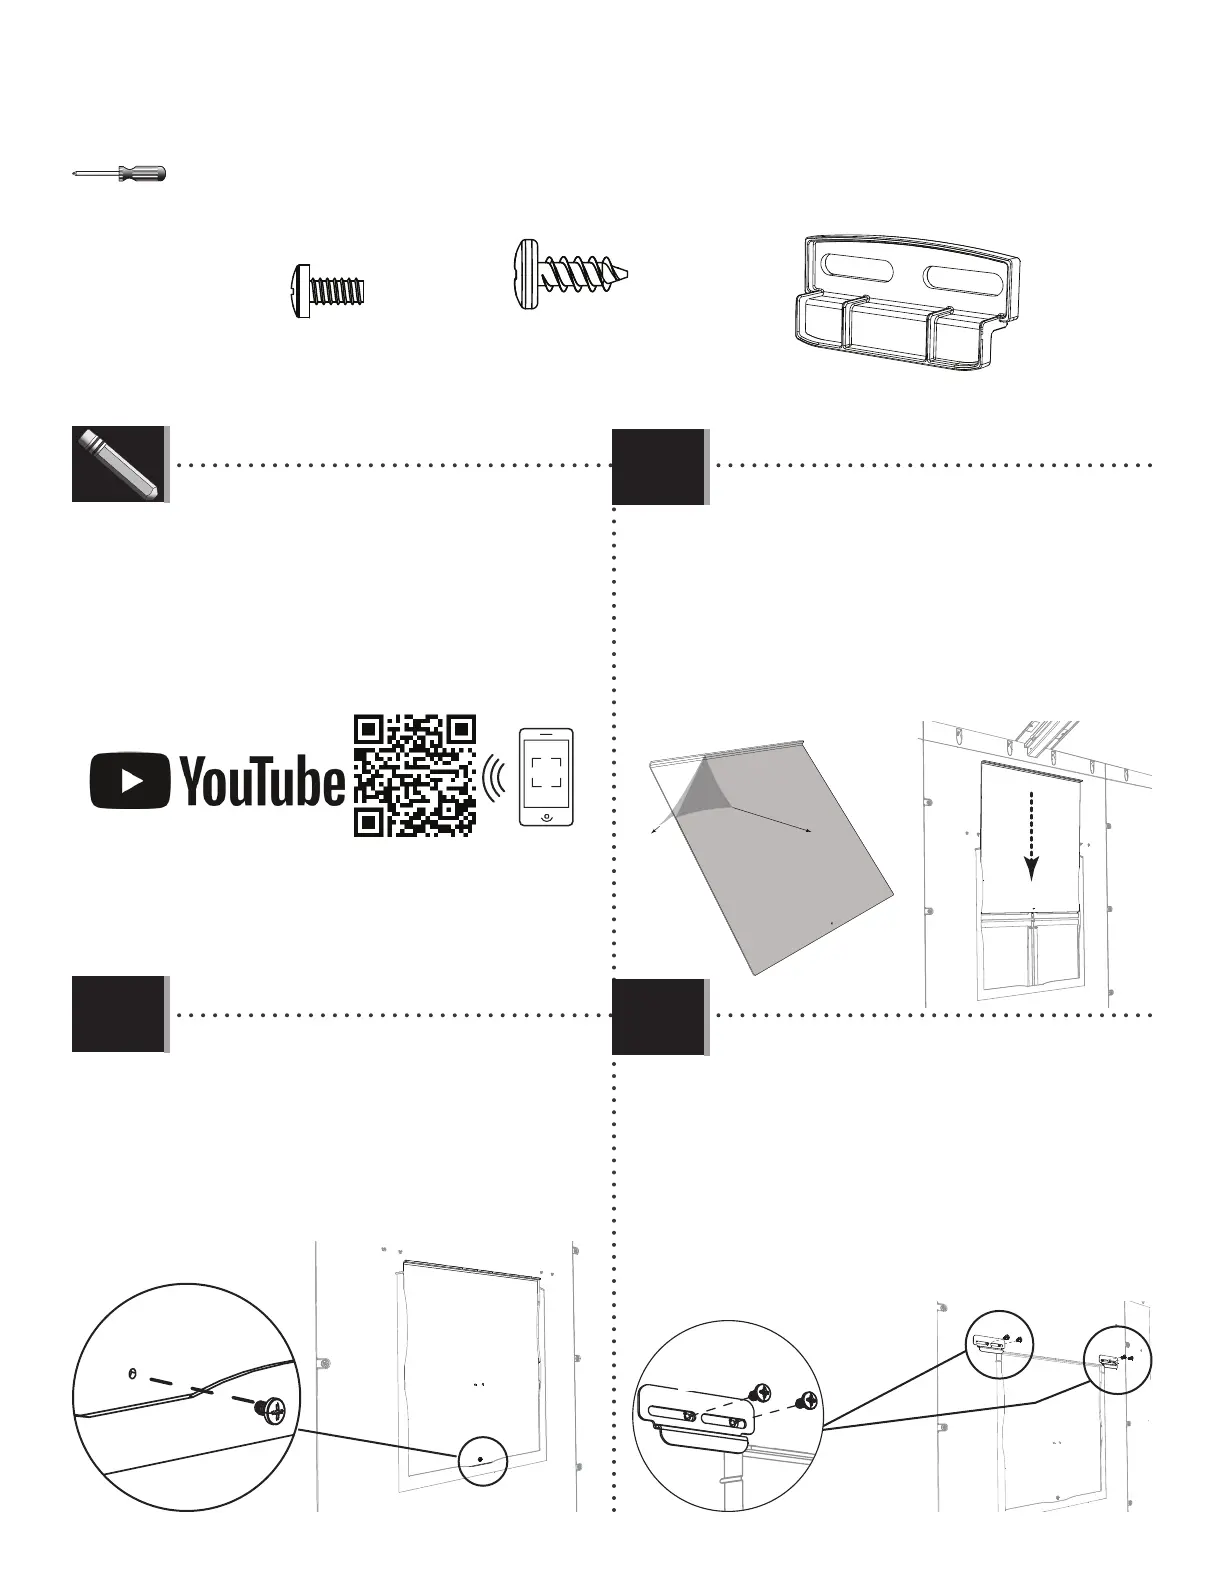
• Peel off the protective plastic from both sides of the
Window Pane (AHE). With the curved edge at the top
and facing toward you, slide the Window Pane down
into the opening.
• Enlever la pellicule protectrice des deux côtés du
carreau (AHE). Avec le bord courbé vers le haut et
faisant face de vous, faire glisser le carreau en place.
• Retirar la pelicula protectora de las dos caras de la
hoja de ventana (AHE). Con el borde curvado hacia arriba
y el interior, deslizar la hoja en su lugar.
ADY (x2)
ADY
• Insert a Screw (ADY) into the hole at the bottom of
the Window Pane. This helps keep the Window Pane up
when open.
• Insérer une vis (ADY) dans le trou au bord
inférieur du carreau. Cela aide à maintenir en haut le
carreau lorsqu’il est ouvert.
• Insertar un tornillo (ADY) en el agujero al borde
inferior de la hoja. Esto ayuda a prevenir la cierre de la
Hoja.
10.1
10.2
10.3
• If you have trouble with this section, follow the code below
to view a how-to video on this section.
• En cas de problèmes avec cette section, suivre le code en
bas pour voir un vidéo sur l’assemblage dans cette section.
• En caso de algun problema con esta sección, seguir el
código debajo para ver un video sobre el ensamble en esta
sección.
LIFETIME
©
AIS (x4)
ADZ (x8)
• Secure the two (2) Window Latches (ADY) at the top
corners of the Panel opening. The Latch should move
freely. Repeat steps 10.1–10.3 for the second Window
Pane.
• Fixer les deux (2) loquets (ADY) aux angles
supérieurs de l’ouverture du panneau. Le loquet doit
se déplacer librement. Répéter les étapes 10.1 – 10.3 pour
le deuxième carreau.
• Fijar los dos (2) cerrojos (ADY) a las esquinas
superiores de la abertura del panel. El cerrojo debe
mover libremente. Repetir los pasos 10.1–10.3 para la
segunda hoja de ventana.
ADZAIS
http://go.lifetime.com/20’ x 8’ Outdoor Storage Shed Sec10