TOOLS AND HARDWARE REQUIRED / OUTILS ET QUINCAILLERIE REQUIS / INSTRUMENTAL Y HERRAJE REQUERIDOS
u SECTION 1 (CONTINUED) / SECTION 1 (SUITE) / SECCIÓN 1 (CONTINUACIÓN)
8
FNX
FNQ
FNX
FTT
FTT
FNX
FNX
EVV
EVV
EVV
FNI
FNI
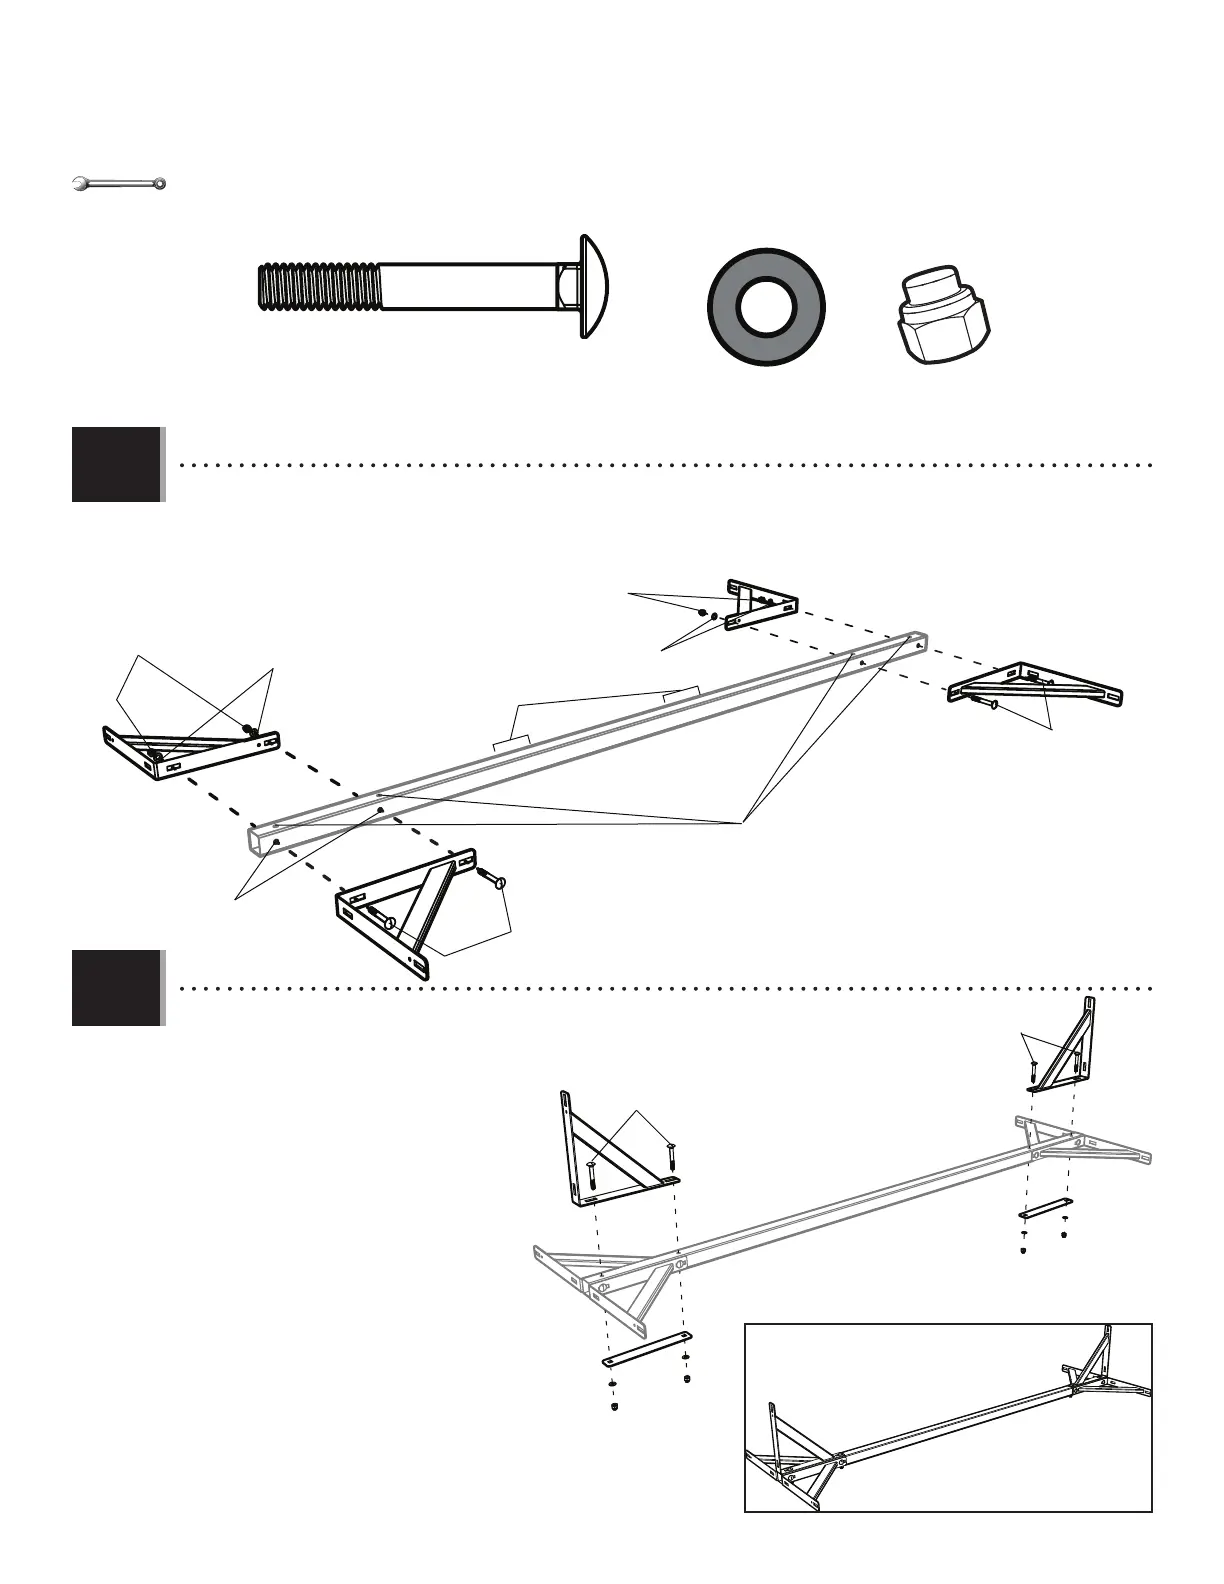
• Attach four Triangular Gussets (FNX) to the Horizontal Base Square Tube (FNQ) using the hardware indicated. Finger tighten only.
• Attacher quatre goussets triangulaires (FNX) à un tube carré horizontal (FNQ) à l’aide de la quincaillerie indiquée. Serrer à la main
seulement.
• Sujetar cuatro pletinas triangulares (FNX) a un tubo cuadrado horizontal (FNQ) usando el herraje indicado. Apretar sólo a mano.
• Note these four top holes in relation to the four side holes.
• Noter les quatre trous supérieurs iau regard des quatre trous latéraux.
• Notar los cuatro agujeros superiores en relación con los cuatro agujeros laterales.
• Attach a Gusset and a Long Brace Plate
(FNY) at each end of the Base Square
Tube as shown using the hardware
indicated. Finger tighten only.
• Attacher un gousset et une plaque de
renfort longue (FNY) à chaque extrémité
du tube carré comme illustré à l’aide de
la quincaillerie indiquée. Serrer á la main
seulement.
• Sujetar una pletina y una placa de
soporte larga (FNY) a cada extremo
del tubo cuadrado como se muestra
usando el herraje indicado. Apretar sólo
a mano.
1.1
1.2
EVV (x8)
FTT (x8)
FNI (x8)
FNY
FNY
EVV
EVV
EVV
EVV
FTT
FTT
FTT
FTT
FNI
FNI
1/2"
(13 mm)
• Side Holes
• Trous latéraux
• Agujeros laterales
• No holes here
• Aucun trou ici
• Ningún agujero aquí