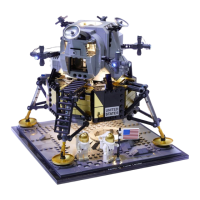
Do you have a question about the LIGHT MY BRICKS LEGO NASA Apollo 11 Lunar Lander and is the answer not in the manual?
| Category | Light Kit |
|---|---|
| Power Source | USB |
| Lighting Type | LED |
| Compatibility | LEGO NASA Apollo 11 Lunar Lander (10266) |
| Light Color | Warm White |
| Included Components | Connecting Cables, Expansion Boards, USB Power Cable |
| Installation | DIY installation with step-by-step guide |
Explains the correct orientation for connecting cable connectors to expansion board ports.
Shows how to correctly place Bit Lights under or between LEGO bricks, ensuring correct LED orientation.
Guides on disconnecting and preparing the jet section for light installation.
Details how to loop and secure a Bit Light cable around a technic bar within the jet component.
Connects the Bit Light to a Flicker Effects Board and then to a 6-Port Expansion Board.
Details how to access the rear of the Lander by disconnecting specific grey plates.
Guides on inserting batteries and connecting the battery pack cable to the expansion board.
Instructions to turn on the battery pack to test the blue jet light's functionality.
Explains how to position and secure the battery pack on the Lander's exterior.
Covers attaching the battery pack to the outside of the Lander using adhesive squares.
Places a Cool White Bit Light underneath the Lander and secures it with a clear plate.
Installs another Cool White Bit Light on the right side, securing it with a clear plate.
Places another Cool White Bit Light on the bottom left, securing it with a clear plate.
Details installing an Orange Bit Light into the upper shuttle's jet piece, ensuring correct orientation.
Ensures all installed lights are working correctly before final assembly.