Adjusting the Contactor
A
fter all the connections are made and your layout is powered up, the Contactor must be
adjusted so that the train will properly trigger the accessory.
1. Stop the train several sections away from the Contactor so that it does not press on the
Contactor plate.
2. Turn the adjustment nut either up or down until the accessory’s lights change from green to
red. Refer to Figure 1 on page 3 for the location of the adjustment nut.
3. Back up the adjustment nut just enough to cause the lights to change from red to yellow.
Operating the Mainline Color Position Signal
W
hen properly adjusted, the 153C Contactor will respond to light pressure on the track. The
lights will change from green to red as long as any part of the train is passing over the
Contactor plate. After the train has cleared the Contactor, the signal will change from red to
yellow for a few seconds to indicate that a train is in the block ahead.
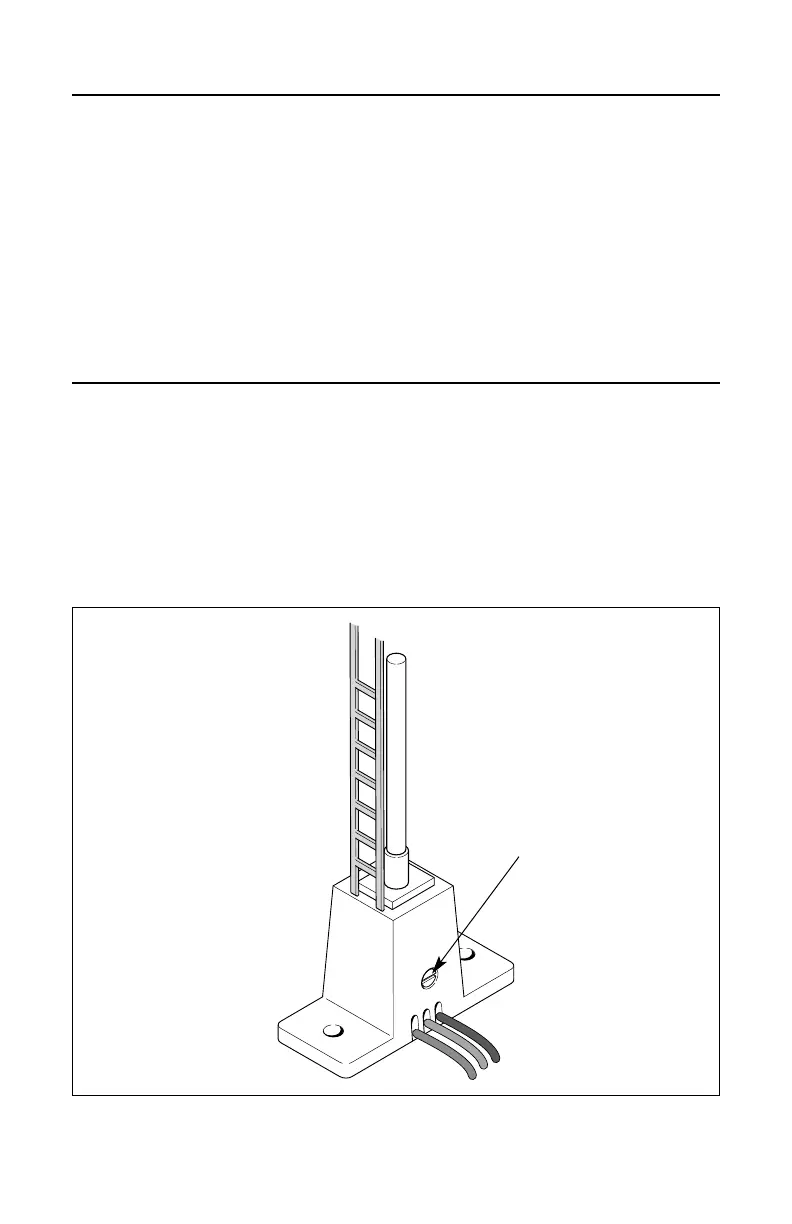
To adjust the length of time that the yellow lights are illuminated, use a small flat-head
screwdriver to rotate the internal adjustment screw on the side of the base. Rotate the screw
clockwise to increase the duration or counter-clockwise to decrease the duration. Refer to Figure 3.
5
Figure 3. Adjustment screw location
Adjustment screw
 Loading...