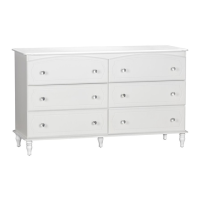
Do you have a question about the Little Seeds Rowan Valley Laren 6 Drawer Dresser and is the answer not in the manual?
| Brand | Little Seeds |
|---|---|
| Model | Rowan Valley Laren 6 Drawer Dresser |
| Category | Indoor Furnishing |
| Language | English |
Provides essential tips, assembly needs, and preparation advice before starting.
Outlines pre-assembly checks, tool requirements, and safety cautions.
Detailed explanation of the cam lock system used throughout the assembly process.
Visual guide to identify all wooden panels and their specific part numbers.
Comprehensive list of all hardware, including codes, descriptions, and counts.
Connects drawer sides (N, M) using screws and cam locks (TWK0032, TWK0009).
Secures the drawer bottom panel (P) to the assembled drawer sides.
Adds support (Q) to the drawer sides (N) using screws and cam locks.
Connects the top drawer panel (I) to the drawer assembly using specific hardware.
Installs the decorative drawer front panel (I) using knobs and screws.
Connects the second top drawer panel (J) to the assembly.
Installs the second decorative drawer front panel (I) with knobs and screws.
Attaches the main top panel (L) to the dresser frame using specific hardware.
Installs the third drawer front panel (J) with knobs and screws.
Connects the fourth top drawer panel (R) to the assembly.
Installs the fifth drawer front panel (R) with knobs and screws.
Installs drawer rails (F, T, G) using screws (TWK0007).
Connects side panels (D) and rails (F, G, T, S) using cam locks and screws.
Attaches drawer supports (B, C) and rails (F, G, T) to the main frame.