EasyManua.ls Logo

Little Tikes My First Light Up Slide User Manual

Little Tikes My First Light Up Slide
24 pages
To Next Page IconTo Next Page
Page #1 background imageLoading...
Page #1 background image
ASSEMBLY INSTRUCTIONS
My First Light Up Slide
XIM656040 - 11/20
1
Adult assembly required. Approx. assembly time: 20min.
Look for video of assembly at
littletikes.com/videoinstructions
#656040M
#656040MX1
1
1
/
2-6
years
Question and Answer IconNeed help?

Do you have a question about the Little Tikes My First Light Up Slide and is the answer not in the manual?

Little Tikes My First Light Up Slide Specifications

General IconGeneral
BrandLittle Tikes
ModelMy First Light Up Slide
CategorySports & Outdoors
LanguageEnglish

Summary

Important Information & Warnings

Key Information You Should Know

Essential pre-assembly advice and points to note before starting.

Critical Safety Warnings

Mandatory safety precautions and hazard alerts for product use and assembly.

Maintenance and Disposal

Maintenance Guidelines

Routine checks and upkeep instructions for product longevity and safety.

Product Disposal Instructions

Procedure for safely dismantling and discarding the product.

Safety, Battery, and Compliance

Battery Safety Precautions

Detailed instructions for safe battery installation, use, and disposal.

FCC Compliance Statement

Regulatory compliance details concerning radio frequency emissions.

Assembly Preparation

Pre-Assembly Checklist

Advice and checks to perform before starting the assembly process.

Tools and Parts Identification

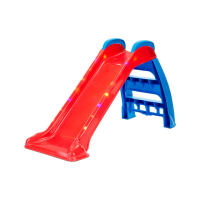
Lists necessary tools and identifies all components included in the package.

Assembly Step 1: Battery Installation

Adult Battery Installation

Procedure for adult-only battery installation into the light-up module.

Assembly Step 2: Add Lights

Attaching the Light Module

Securing the light-up module to the underside of the slide.

Assembly Step 3: Clip LED Strips

Securing LED Strips

Clipping the LED strips into place using clips and screws on the slide.

Assembly Step 4: Install Steps

Inserting the Slide Steps

Inserting the steps into the main slide structure.

Assembly Step 5: Attach Handles

Fitting the Handles

Inserting the front and back sections of the handles into the notched slide areas.

Assembly Step 6: Confirm Handle Security

Checking Handle Attachment

Ensuring handles are secure by checking for clicks and pulling.

Assembly Step 7: Operate Lights

Operating Lights and Modes

Instructions for turning on the lights and selecting different illumination modes.

Assembly Step 8: Store Slide

Storing the Slide Components

Procedure for detaching and storing the steps when the slide is not in use.

Related product manuals