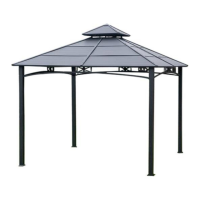
Do you have a question about the Living Accents 8014537 and is the answer not in the manual?
| Frame Material | Steel |
|---|---|
| Cushion Color | Beige |
| Category | Outdoor Furnishing |
| Weight Capacity | 250 lbs |
| Assembly Required | Yes |
| Material | Steel |
Follow all safety precautions regarding children, pets, assembly area, sharp edges, and equipment handling.
Ensure level ground, check bolt tightness, adhere to local regulations, and consider weather conditions.
Read instructions, verify parts, use soft surfaces for assembly, and handle the heavy item with care.
Assemble posts (A) with base covers (C) and bases (B) using specified bolts and washers.
Connect beam connectors (D1, E1) and top screens (F1, F2) to posts (A) and each other.
Install mosquito netting pipe (Z) and support bars (G) to the assembled frame.
Fix the big top bar (H1) to the big top connector (J1) using bolts (CC) and flat washers (BB).
Connect top slanting bars (N1) to big top connectors (J1) and slanting bar connectors (D1).
Attach top beams (P1) to the big top bar (H1) and beam connectors (E1).
Install small top support beams (K1) to connectors (M1, J1) and attach hook (S).
Fix big roof top beams (Q4, Q5, Q6) to top beams (P1) and slanting bars (N1).
Fix small top roof panels (T1) and covers (L, R) to support beams (K1) and connectors (M1).
Attach big roof panel covers (U1, V3, V4, W3, W4) to slanting bars (N1) and top beams (P1).
Insert and fix corner (X) and middle (Y) big roof panel covers to the frame.
Lift base covers (C) and insert stakes (HH) through base (B) holes for ground securing.
Clean the gazebo with a dry towel, keep away from heat, and apply automotive wax for frame maintenance.
Details on limited half-year warranty coverage, exclusions, and requirements for claims.
Contact information for questions or concerns via phone or email.
 Loading...