Do you have a question about the Loewe ViewVision 6306 H and is the answer not in the manual?
Expresses gratitude for purchasing a Loewe product and outlines the company's philosophy.
Explains how to navigate the manual and interpret its instructions and symbols.
Details essential safety measures to protect the video recorder from damage and ensure safe operation.
Instructions for inserting batteries and notes on proper disposal of used batteries.
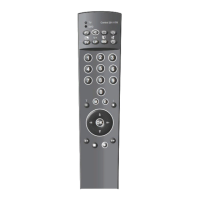
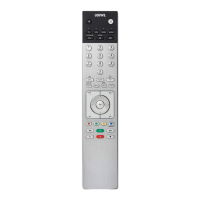
Explains how to switch between VTR and TV control modes using the remote.
Connects the antenna lead to the video recorder and TV for signal reception.
Connects the recorder to the TV using a Scart cable for optimal audio/video quality.
Details on connecting the video recorder to the mains power supply for operation.
Sets up TV for monitoring recorder output and searches for broadcast channels.
Covers switching, program selection, sound modes, front controls, and cassette management.
Details on playback, slow motion, picture search, and fast forward/rewind operations.
Instructions for recording programs manually or via direct recording from TV.
Guides for setting up timed recordings using the Easy Timer and ShowView functions.
Information on timer advice, managing timer programs, and recording audio only.
Utilizes tape counter and index search to find specific recordings or segments.
Adds, removes, and manages cassettes within the recorder's archive system.
Edits recorded titles, manages archive data, and transfers it between recorders.
Copies TV channels, sorts, cancels, and assigns names to programs.
Manually locates new broadcast stations and utilizes Digital Link Plus features.
Manages the display of information on the TV screen, including switching it off.
Explains the various symbols and information shown on the recorder's built-in display.
Sets and corrects the recorder's date and time, essential for timer recordings.
Configures child lock, aspect ratio, clock display, and auto standby settings.
Sets up AV connections, decoder, and Digital Link for remote control integration.
Adjusts picture sharpness, cleans video heads, and performs audio dubbing.
Sets RF converter, language, country, colour, and receiving systems for optimal performance.
Provides solutions for problems like no function, poor reception, or remote control faults.
Resets the recorder to initial mode and enables continuous repeat playback.
Details about the available front cover colors and the design of the recorder's facade.
| mains voltage | 220-240 V AC |
|---|---|
| frequency | 50 Hz |
| power consumption | 18 W |
| standby power consumption | 6/4 W |
| operating temperature | 5 – 40 ºC |
|---|---|
| operating humidity | 35 – 80% |
| weight | 4.3 kg |
|---|---|
| dimensions | 435 x 93 x 290 mm |
| mains voltage | 220-240 V AC |
|---|---|
| frequency | 50 Hz |
| power consumption | 18 W |
| standby power consumption | 6/4 W |
| operating temperature | 5 – 40 ºC |
|---|---|
| operating humidity | 35 – 80% |
| weight | 4.3 kg |
|---|---|
| dimensions | 435 x 93 x 290 mm |
| mains voltage | 220-240 V AC |
|---|---|
| frequency | 50 Hz |
| power consumption | 18 W |
| standby power consumption | 6/4 W |
| operating temperature | 5 – 40 ºC |
|---|---|
| operating humidity | 35 – 80% |
| weight | 4.3 kg |
|---|---|
| dimensions | 435 x 93 x 290 mm |