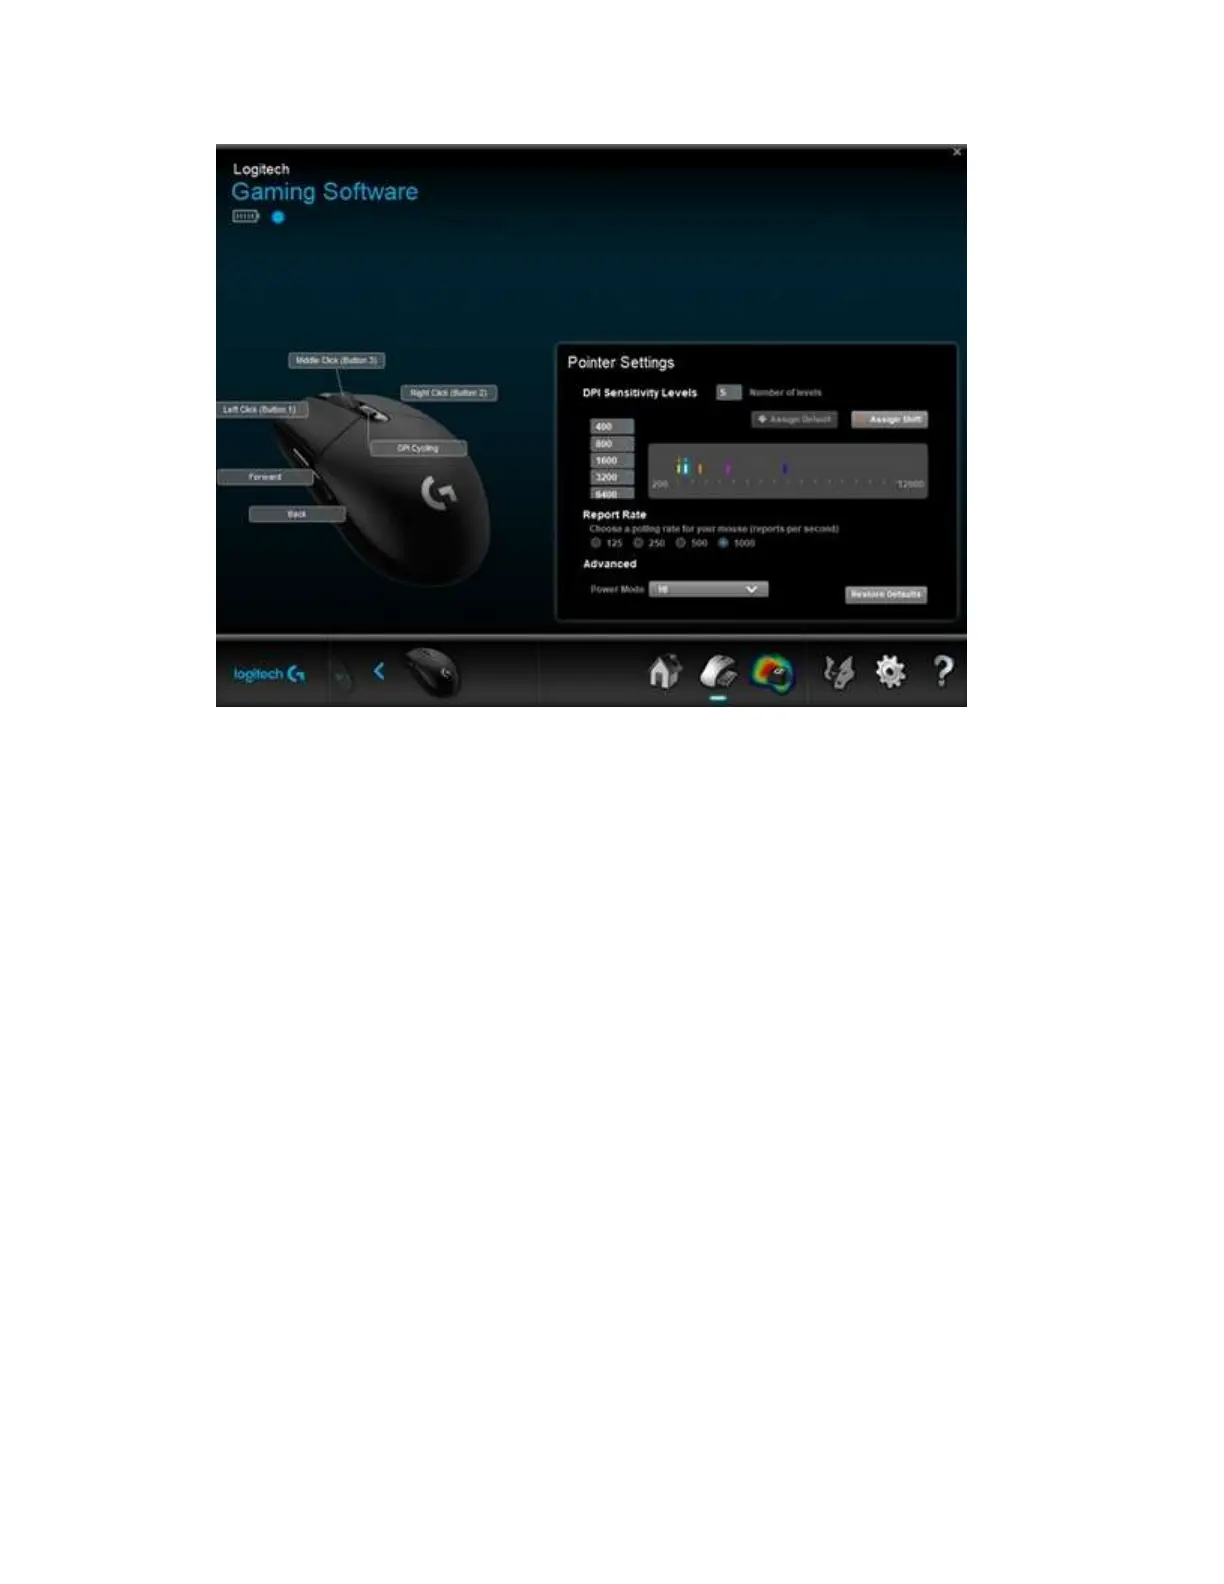
3. Under DPI Sensitivity Levels, drag the tick marks along the graph. For each DPI level,
you'll see a tick mark with a unique color. The LED on top of the mouse shows the
unique color of the active level while using the DPI Cycling mouse function. You can set
up to five sensitivity levels:
o Assign Default — One DPI level must always be the default. To change the
default, click a DPI level that doesn't have a blue diamond above it, and then click
Assign Default. This is the DPI level the mouse will return to when you:
Press the default DPI button
Switch between profiles
Power up the computer
Wake the computer from sleep mode
o Assign Shift — You can quickly activate a DPI level when you press the DPI
Shift button. For example, you can set Assign Shift to a low DPI value, which
will temporarily give you extreme precision. When you release the button, the
mouse will revert back to the current DPI level. To set the Shift DPI, select a DPI
level that isn't highlighted in orange, and then click Assign Shift.
TIP: Buttons you assign as DPI Up, DPI Down, DPI Shift and DPI Cycling will
enable you to change between DPI levels rapidly.
4. In Performance Mode, change the Report Rate, if you prefer something other than the
default of 1000 reports/second (1ms response time). The Report Rate controls how often
your mouse updates its position to the computer.
NOTE: The report rate setting cannot be adjusted while the gaming mouse is in
endurance mode. Switch to performance mode if you want to change the report rate.
The possible range is from 125/sec (8ms response time) to 1000/sec (1ms response time).
You can: