01
05
06
02
04
03
Remove the appliance covers
(Figure 2).
Connect the Pressure Relief Device
(PRD) to the unit (Fig1) Note:
IMPORTANT – do not discard
this step. A PRD must be
installed.
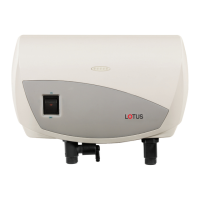
Connect the water inlet hose to the entry point of the heater (left side inlet), and connect
the outlet hose to the water outlet. Use a hose that can withstand a minimum pressure of
4 bars. Using any other type of hose will cause damage (Figure 5).
Residential plumbing systems with unstable pressure or pressure above 5 bar require
the application of a pressure stabilizer valve, set to 4 – 5 bars.
Do not install the appliance with water inlets and outlets at the top (Figure 6)
Mount unit to wall with 4 screws at the marked
points (Figure 4)
The appliance must be mounted horizontally, with
water inlets and outlets at the bottom (Figure 5)
1. Mount ground plate to wall.
2. Pull wires through.
3. Cut out hole in back of unit
(Right/Left back) and pass
wires through
(Figure 3)
Assembly Instructions
3
 Loading...