Do you have a question about the LOUQE RAW S1 and is the answer not in the manual?
Lists the contents found inside the plastic bag, including screws and tools for assembly.
Instructs to place the computer case in an upside-down orientation on a protective cloth.
Details steps to detach the USB-C extension cable by lifting a lock and pulling it out.
Explains how to detach the power button by lifting a lock and applying inward pressure.
Guides the user to remove four screws located in the corners of the computer case.
Instructs to carefully extract the internal core assembly from the main chassis.
Describes installing the motherboard's I/O shield into the case chassis.
Align and screw in the motherboard, then connect the PCI-e riser cable.
Guides connecting the power button's switch cables to the motherboard's designated pins.
Instructs to detach the PSU bracket by removing four specific screws.
Details securing the power supply unit onto the PSU bracket with four screws.
Connects PSU cables and motherboard power connectors (24-pin, CPU 8/4-pin).
Covers unscrewing the GPU knob, inserting the card, securing it, and connecting power.
Describes the optional step of attaching a 120mm fan in an exhaust configuration.
Guides the user to carefully slide the assembled internal components back into the main chassis.
Details reattaching the power button by slotting it in and securing it with a quick lock.
Explains re-connecting the USB-C extension cable by inserting it and pushing down the quick lock.
Guides re-installing the screws in the corners of the case to secure the assembly.
| Motherboard Support | Mini-ITX |
|---|---|
| PSU Support | SFX, SFX-L |
| Drive Bays | 2x 2.5" |
| Expansion Slots | 2 |
| Material | Aluminum |
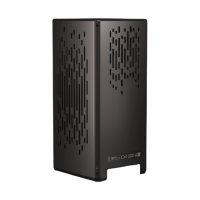
| Case Type | Mini Tower |
| GPU Support | Dual-slot |
| Front I/O | 1x USB Type-C |