Installation Instructions
2 | P a g e v 1 . 0 ( 0 7 / 2 0 2 0 )
3. Remove the mounting bracket by pressing the button (A) and pulling (B).
4. Use the mounting bracket as a template to mark the screw position on the wall.
5. Remove the cord anchorage by loosening the two screws. Insert the supply cable through the cable entry.
6. Install the mounting bracket on the wall by using appropriately sized mounting screws and anchors.
7. Ensure the screws and anchors used are suitable for mounting surface and the surrounding environment.
NOTE: It is recommended that a non-corrosive bead of silicone be applied before installation onto the wall,
ensuring that no water can run down into the cabling.
8. Connect the mains supply wire to the luminaire using the terminal block provided. Ensure that the wires are secure
and no bare wires are exposed.
Mains Supply Wire Terminal block
Earth – Yellow/Green Yellow/Green or
Live – Brown or Red Live (L)
Neutral – Blue or Black Neutral (N)
Install the cord anchorage back and ensure the supply cable is firmly clamped.
9. Install the luminaire back onto the mounting bracket.
10. Retighten the screw on the bottom part of the luminaire.
11. Adjust the angle of the camera according to your need.
12. Adjust the angle of the luminaire and the PIR sensor according to your need.
13. Make any final adjustments to the luminaire and check that all parts are secured tightly before turning the power on.
14. Turn on the power and set up the wireless & in-app control according to the ‘Lucci CONNECT user guide’.
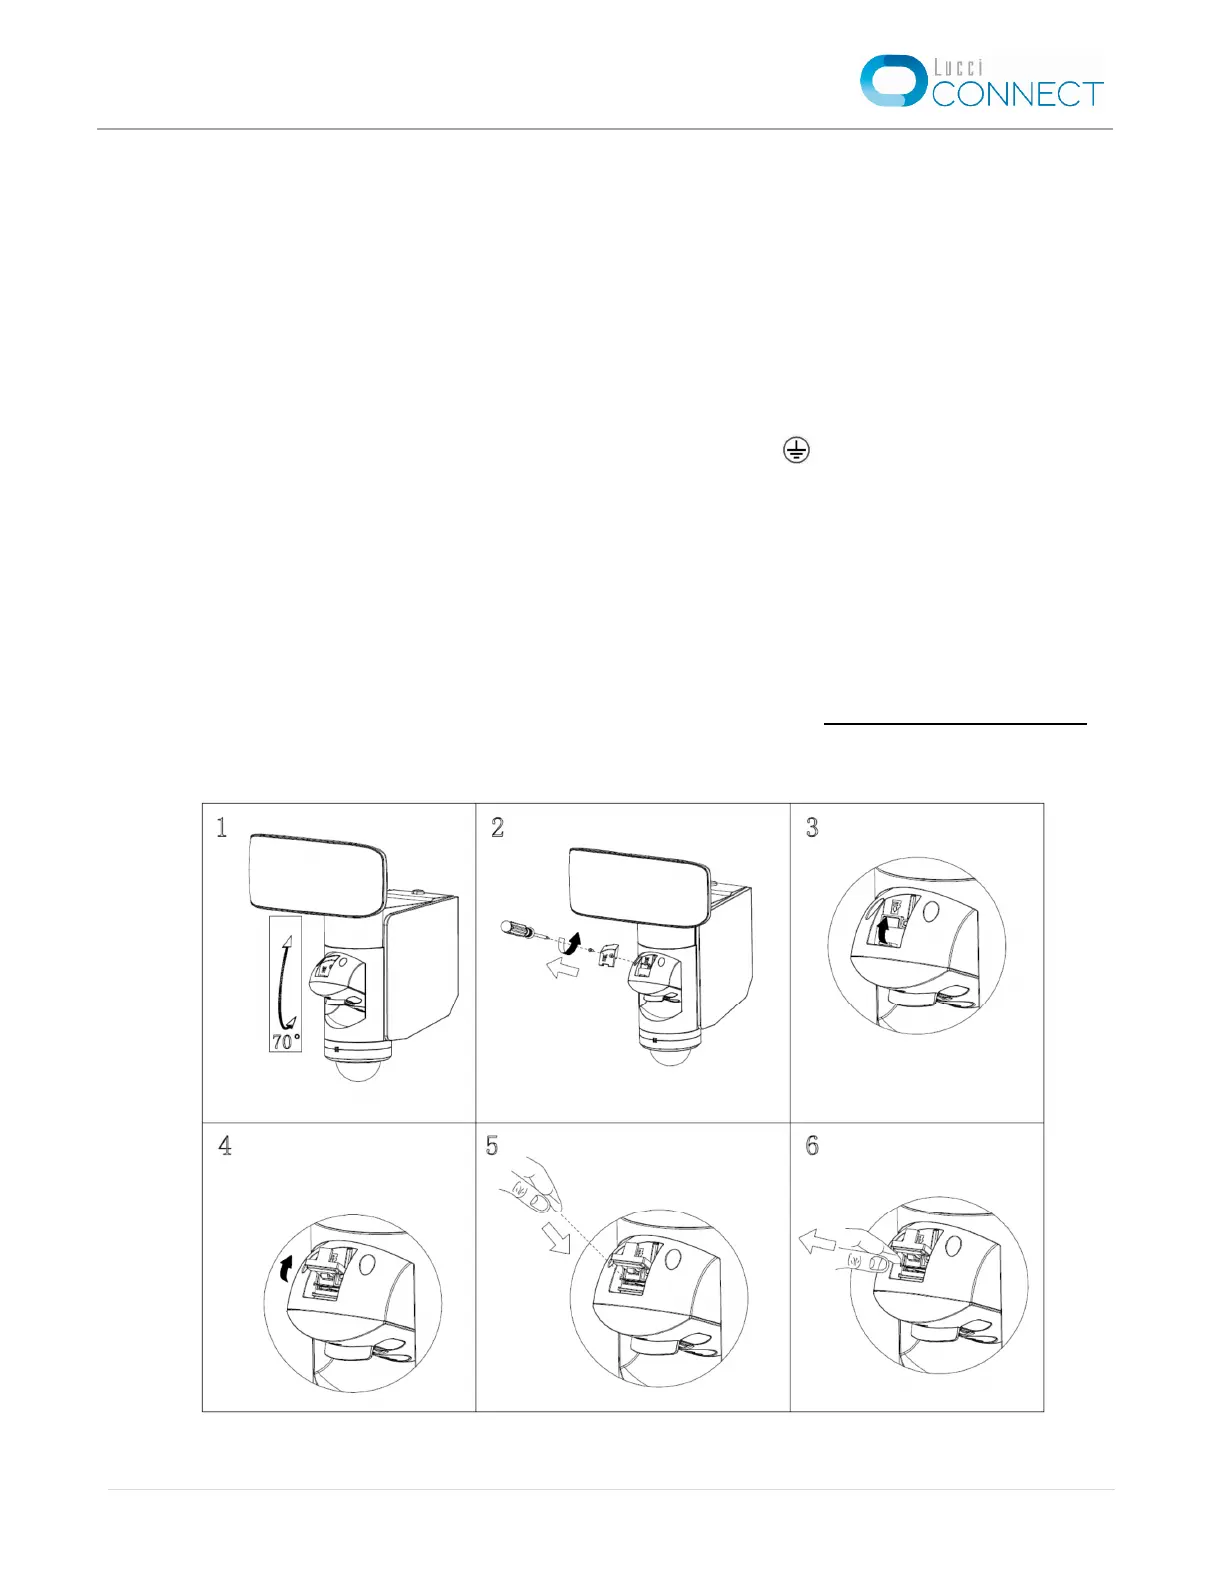
Figure A – Installation of the micro SD card
 Loading...