30
10
20
12
3
6
9
12
2
4
6
8
10
1
11
3
5
7
9
15
60
30
45
21
21
30
10
20
12
3
6
9
12
2
4
6
8
10
1
11
3
5
7
9
15
60
30
45
21
21
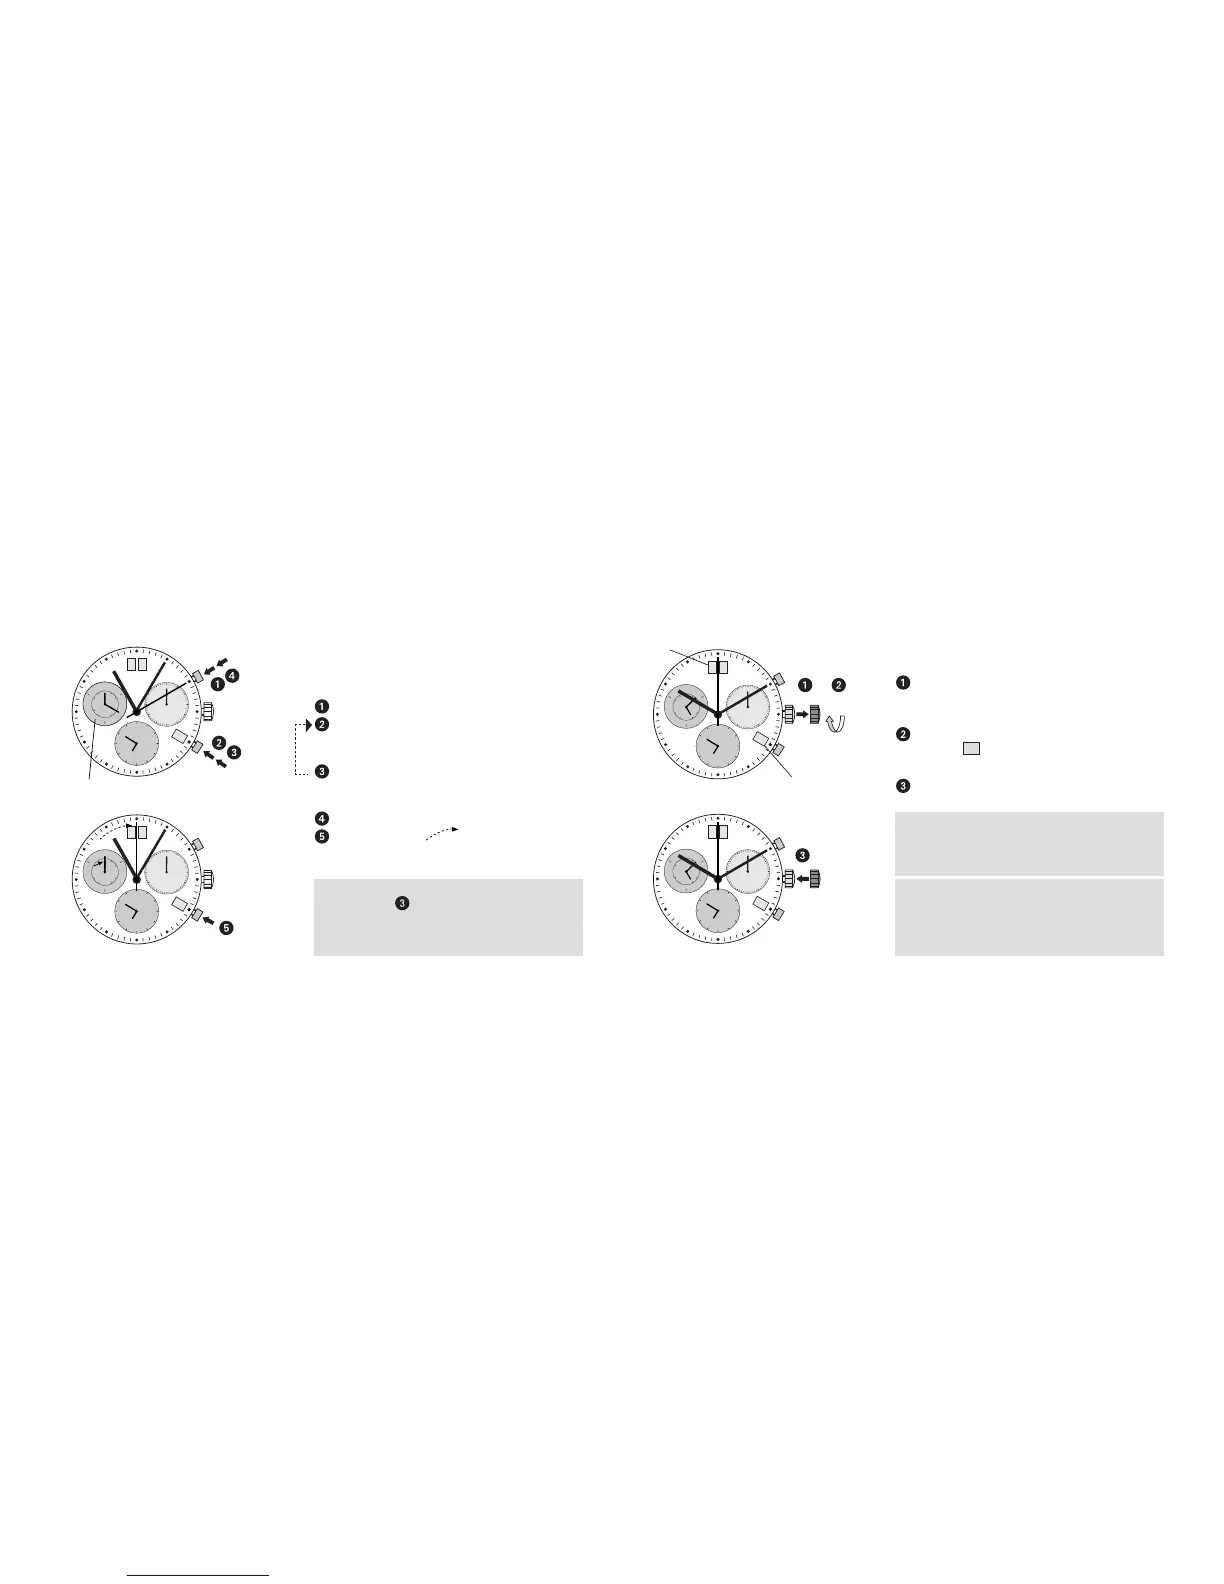
PulsadorB
Contador de minutos
Pulsador A
Pulsador B
Cronógrafo:
Medición parcial o ratrapante
Ejemplo:
Iniciar: (iniciar la medición del tiempo)
Mostrar tiempo parcial:
p.ej. 10 minutos 10 segundos (el tiempo sigue
acumulándose pero sin mostrarse)
Recuperar el tiempo medido:
(los 3 contadores del cronógrafo avanzan
rápidamente al tiempo medido actual).
Parar: (Se muestra el tiempo final)
Poner a cero:
Los 3 contadores del cronógrafo vuelven
a su a su posición cero.
Nota:
* Después de
, pulse el pulsador B para
mostrar tiempos paraciales adicionales
(mostrar tiempo parcial / recuperar
tiempo medido, ...)
*
III
30
10
20
12
3
6
9
12
2
4
6
8
10
1
11
3
5
7
9
15
60
30
45
01
01
III
30
10
20
12
3
6
9
12
2
4
6
8
10
1
11
3
5
7
9
15
60
30
45
31
31
Fecha 5130.B
Fecha 5130.D
Poner la fecha (modo rápido)
Extraiga la corona a la posición II (el reloj sigue
funcionando).
Gire la corona hasta que aparezca la fech
correcta
01
.
Devuelva la corona a la posición I.
Nota:
la fecha del día siguiente debe ajustrase en la
fase de cambio de calendario entre las 9 de
la noche y medianoche.
Si se pone de la fech demasiado rápido en el
modo rápido, puede mostrarse la fecha incoreccta.
Para restablecer la sincronización, cambie la
la fecha entre 01 y 31 (posición II).
 Loading...