11
Maintenance & Filter Change
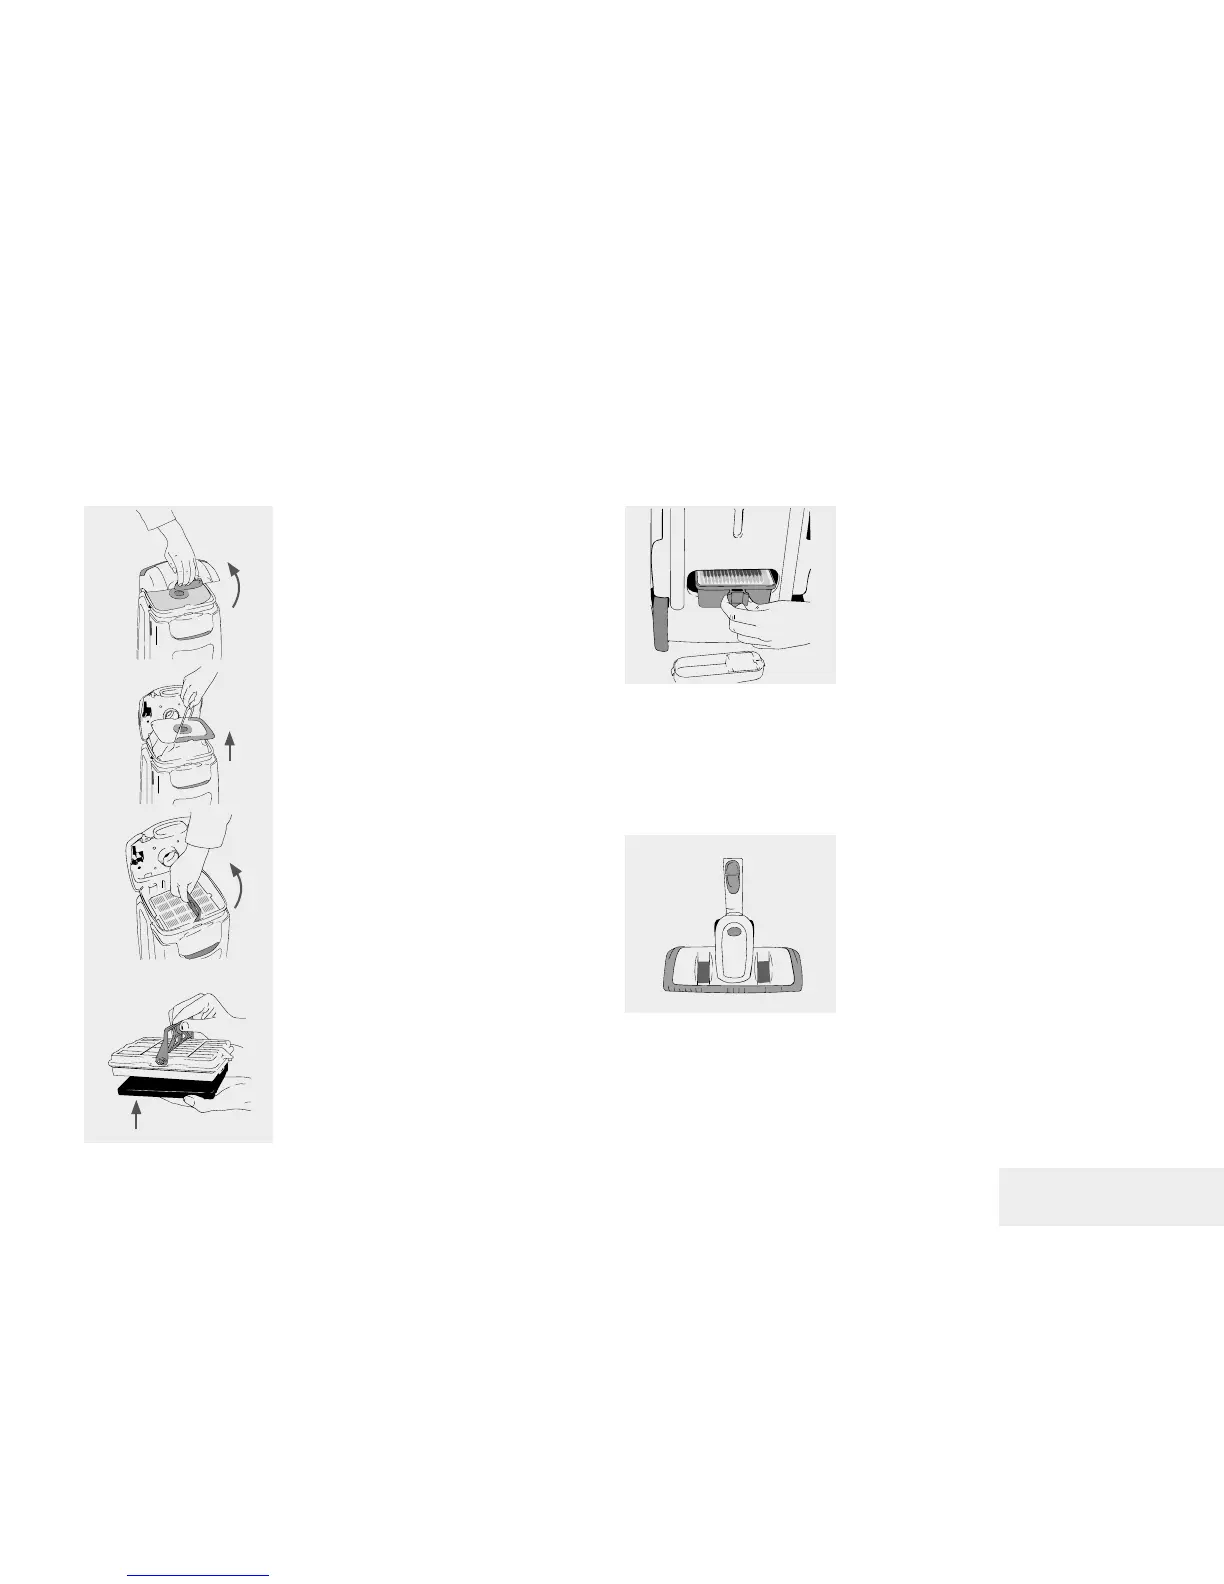
Opening the Device
Turn off the device and remove the plug
from the electricity supply. Open the lid
using the mounted locking button.
Removal / Changing the Dust Bag
Remove the dust container using the paper
handle and dispose of it. Insert a new dust
bag. If the bag is not inserted correctly, the
front panel cannot be closed.
Changing the Swiss HEPA Filter and
Active Carbon Filters
To replace the HEPA H13 lter and the
activated carbon lter, set the handle to
the HEPA H13 lter, pull the lter out and
dispose it. Click the new activated carbon
lter into the framework of the new HEPA
H13 lter. Insert the lter and ensure that it
is in the right position. Turn the handle of the
HEPA H13 lter into the correct position and
snap it into place.
Changing the Long-Term HEPA Filters
Open the lid on the back of the S115
vacuum cleaner. The HEPA 2 Long-Term
lter usually lasts several years before it
has to be replaced.
Maintenance of Autocomb
nozzle
In order to ensure consistent cleaning
services and to preserve the life of the
Autocomb nozzle, clean the nozzle
regularly.
Remove any hairs and dust particles
from the brush ring and the wheels of the
nozzle.
Only use Lux ORIGINAL spare parts, accessories and consumables.
EN