IMPORTANT NOTE: Before your operator is installed, be sure the door has been properly aligned, balanced, and is working
smoothly.
INSTALLATION
LDT, LDTB
FIGURE 4
FIGURE 3
WARNING
4
Moving parts on the operator could cause possible SERIOUS INJURY. Install the
operator at least 8 feet above the oor to keep people away from the moving parts.
Mounting Wall Mount
The trolley operator is generally mounted over
the center of the door. Some instances require
the operator to be off center. If mounting off
center refer to the door manufacturing for proper
lifting point. (Torsion spring doors may allow off
center lifting but Extension spring doors require
center lifting.)
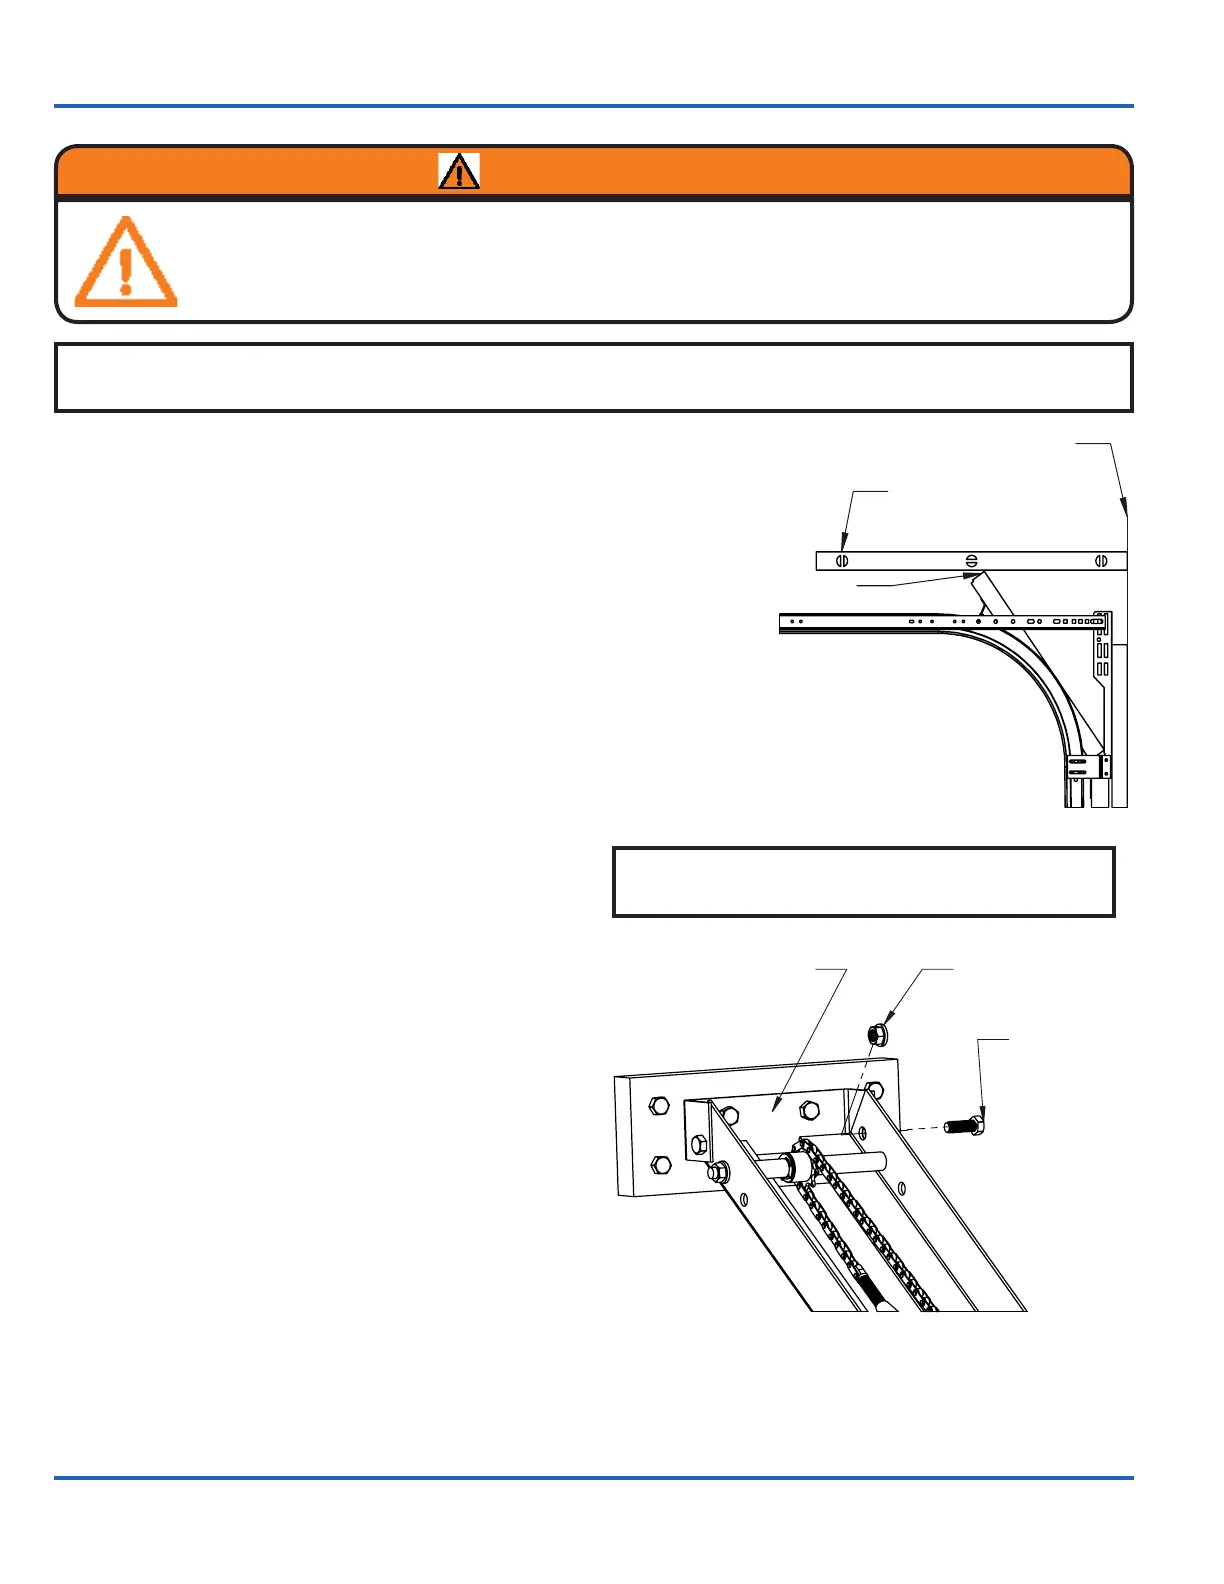
1. Mark a vertical line on the header above the
door that is centered on the door.
2. Determine the highest point of door travel.
Slowly raise the door until the top section reach-
es its highest point. Use a level to project this
line to the header where you marked the center
of the door. (Figure 3)
3. Ensure the header is suitable to mount the
wall mount to. If necessary, reinforce the wall/
header with a mounting pad or suitable mounting
brackets.
4. Install the wall mount using suitable hardware.
The wall mount should be centered on the verti-
cal line that was drawn and 1"-2" above the line
that was drawn from the highest point of door
travel.
Mount Operator
1. Raise the front end of the rail assembly to the
wall mount and loosely install two 5/16 bolts and
nuts to act as pivot points.(Figure 4)
2. Swing the operator to a horizontal position and
temporarily secure it with suitable rope, chain, or
support from the oor.
3. Tighten the pivot bolts/nuts.
4. Slowly open the door being careful not to disrupt the temporary support.
5. With the door fully open, place a level on top of the rail and use shims across the top section of the
door to support the track assembly in a horizontal position.(Figure 5)
IMPORTANT NOTE: To aid installation, see page 17
(Shop Drawing) for mounting consideration.
Carpenter's Level
Header Wall
High Point of Travel
 Loading...