9
9. CHORD: Press this button to activate Chord Mode.
EDIT: Hold SHIFT and press this button to edit the Chord Mode settings.
10. SCALE: Press this button to activate Scale Mode.
EDIT: Hold SHIFT and press this button to edit the Scale Mode settings.
11. 1/4 [1/4T], 1/8 [1/8T], 1/16 [1/16T], 1/32 [1/32T] (Time Division Buttons): Use these buttons to
select the keyboard’s time division setting for the note repeat and arpeggiator functions.
Each press of one of these buttons alternates between the standard timing listed above the
button and the triplet timing listed (beneath the button).
A solid red LED shows that a standard timing is selected, while a flashing LED shows that a
triplet timing is selected.
See Operation to learn more about the features mentioned above.
Central Buttons
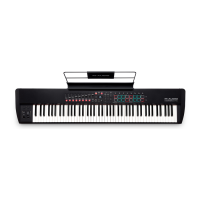
12. ● DAW: Press this button to set Hammer 88 Pro to operate in DAW
Mode.
- SELECT: Press and hold the button to open the DAW Select menu on
the Display.
EDIT: Hold SHIFT and press this button to edit and create your own DAW
preset. After editing the User DAW, press the button again to Save your
changes to the User DAW.
See Operation for information on mapping the User preset.
13. ● PRESET: Press this button to set Hammer 88 Pro to operate in Preset
Mode.
- SELECT: Press and hold the button to open the Preset Select menu on the Display.
EDIT: Hold SHIFT and press this button to edit a preset.
After editing one of the presets, press the button again to save your changes to the current
Preset.
See Operation for information on mapping a preset.
14. Display: The main Display screen shows the status of the last used control.
Use this screen to monitor parameter levels as you adjust controls on the keyboard.
Also, use the Display along with the Select/Scroll Encoder to view and edit keyboard settings.
15. Select/Scroll Encoder: If you are entered into one of the Display’s Edit menus, turn this
encoder to change settings/parameters and press the encoder to confirm a selection.
If you are not viewing any of the edit menus, turning the encoder and pressing the encoder will
each function as separate MIDI controls.
When operating with a DAW, the assigned controls will be predetermined.
When operating with a preset or the User DAW selected, the controls can be edited.
16. BACK: If entered into one of the Display’s Edit menus, press this button to go back to the main
Display screen.
DELETE: Hold the SHIFT button and press the Back button to delete a letter.
If you are not viewing one of the Edit menus, this button will be assigned to a control.
When operating with a DAW, the assigned control will be predetermined.
When operating with a preset or the User DAW selected, the control can be edited.
17. SHIFT: Hold the SHIFT Button while moving or pressing controls or buttons on the keyboard to
access their secondary functions.
 Loading...
