3. CAPACITOR ASSEMBLIES ONTO LONGER 3/8” TUBES
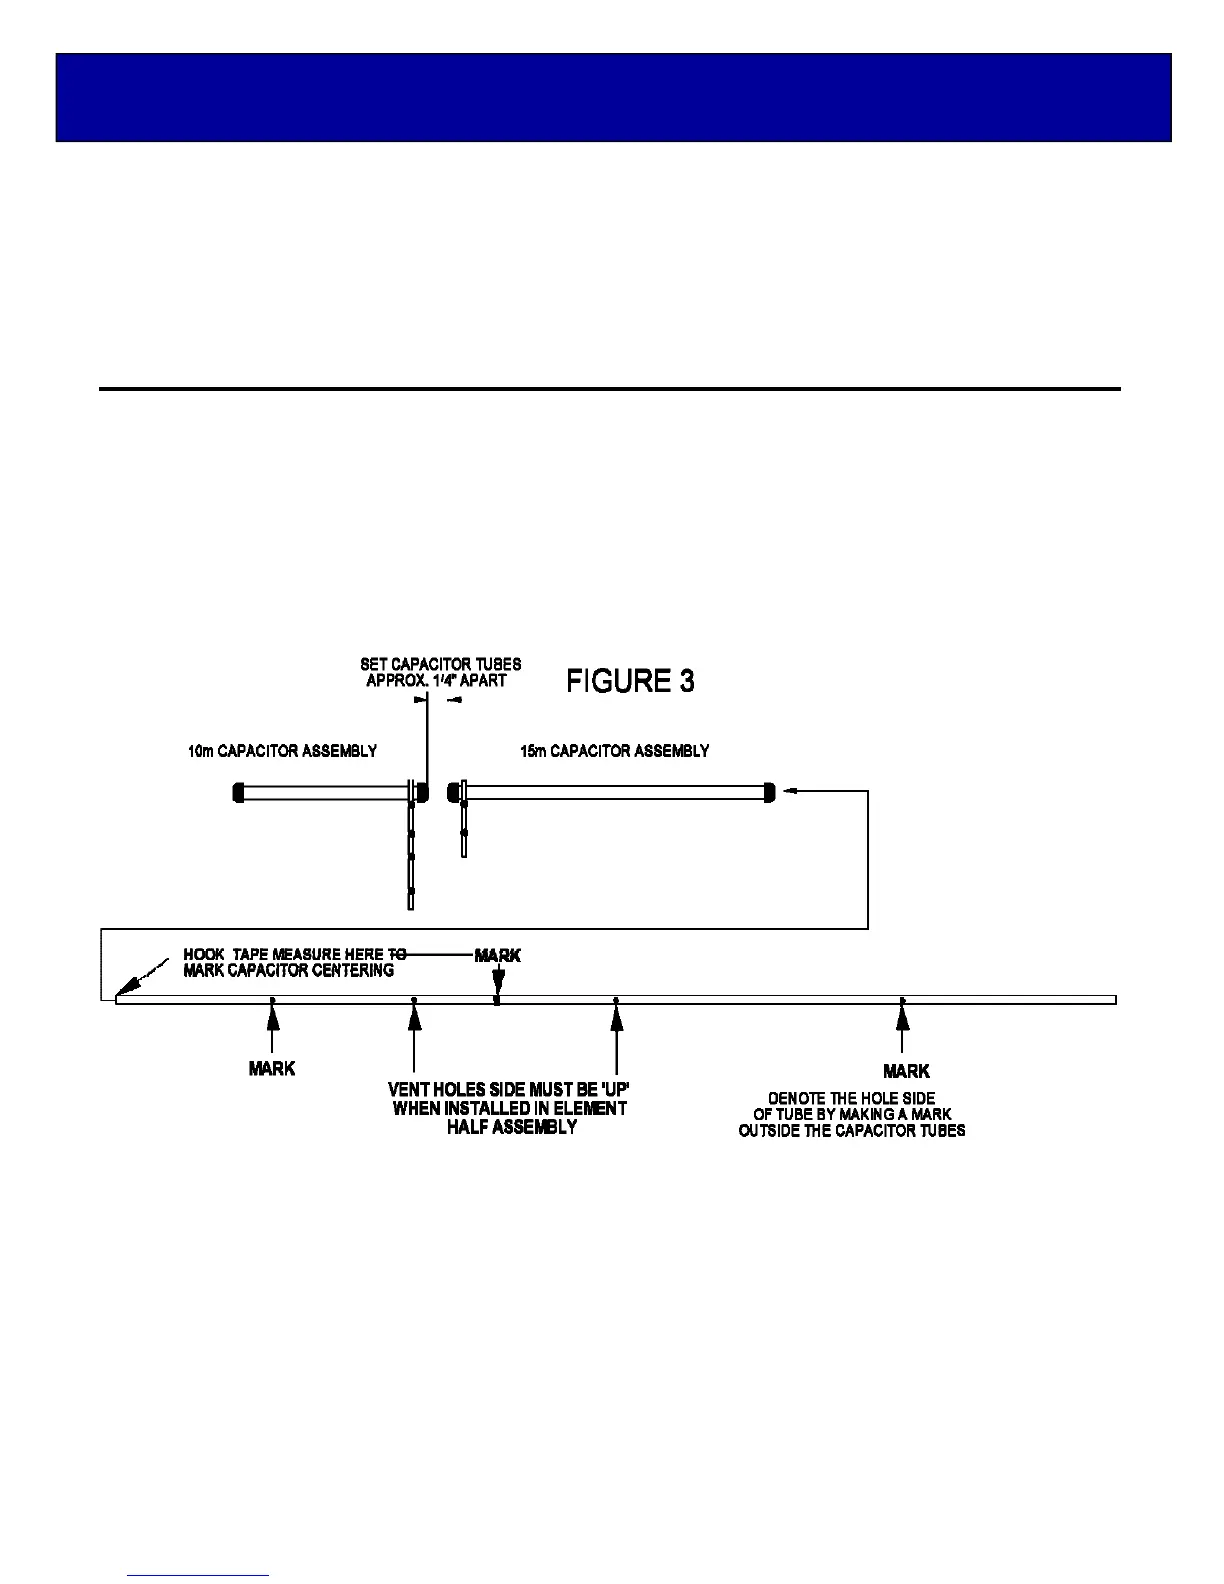
Locate the ten longer 3/8” diameter tubes. Upon inspecting the tubes, you’ll notice there are two holes drilled on
one side only. The holes are to prevent moisture build up inside the capacitor tubes and to provide pressure
equalization. Denote the hole side of the tube by making a identifying mark on the tube ends, with a pen or
marker. Following the information in Table 1, make another mark on the hole side of the tube indicating the
location of where to initially
center the two capacitor
tubes. As shown in Figure 3 below, make this measurement from the side that has the shorter distance from
hole to tube end. Now pair up the capacitor assemblies with the correct 3/8” tube sizes using the first three
columns of Table 1.
For each set of capacitor tube assemblies and 3/8” tubes, insert the 3/8” tube as shown in Figure 3 into the back
end of the 15m capacitor assembly. Move the capacitor up the length of the tube until the face of the black
capacitor cap ON THE SHORTING BAR SIDE of the capacitor assembly is 1/8” to 1/4” from the mark you made.
Now slide on the 10m capacitor tube assembly up the length of the tube in the same fashion, making sure that
the face of the capacitor cap is also 1/8” to 1/4” from the mark. There should now be a 1/4” to 1/2” separation
distance between the two capacitor assemblies. This is not a critical dimension it provide a gap between the two
caps to prevent water wicking.
Installation of Capacitor Assemblies
ELEMENT 10m CAPACITOR
TUBE
15m CAPACITOR
TUBE
3/8” DIA. TUBE
CENTER CAPACITOR
TUBES ON 3/8” DIA TUBE
REFLECTOR 10” 16” 80” 29-3/16”
REAR DRIVEN 8” 16” 80” 30-3/4”
FRONT DRIVEN 8” 16” 72” 26-15/16”
1ST DIRECTOR 8” 16” 74” 29-3/16”
3RD DIRECTOR 8” 16” 74” 28-3/4”
Table 1. Capacitor Tube Assembly & Starting Setup Dimensions (Not Critical)
KT36XA ASSEMBLY MANUAL
 Loading...