M48 48V Power Supply
4
M48 48V Power Supply
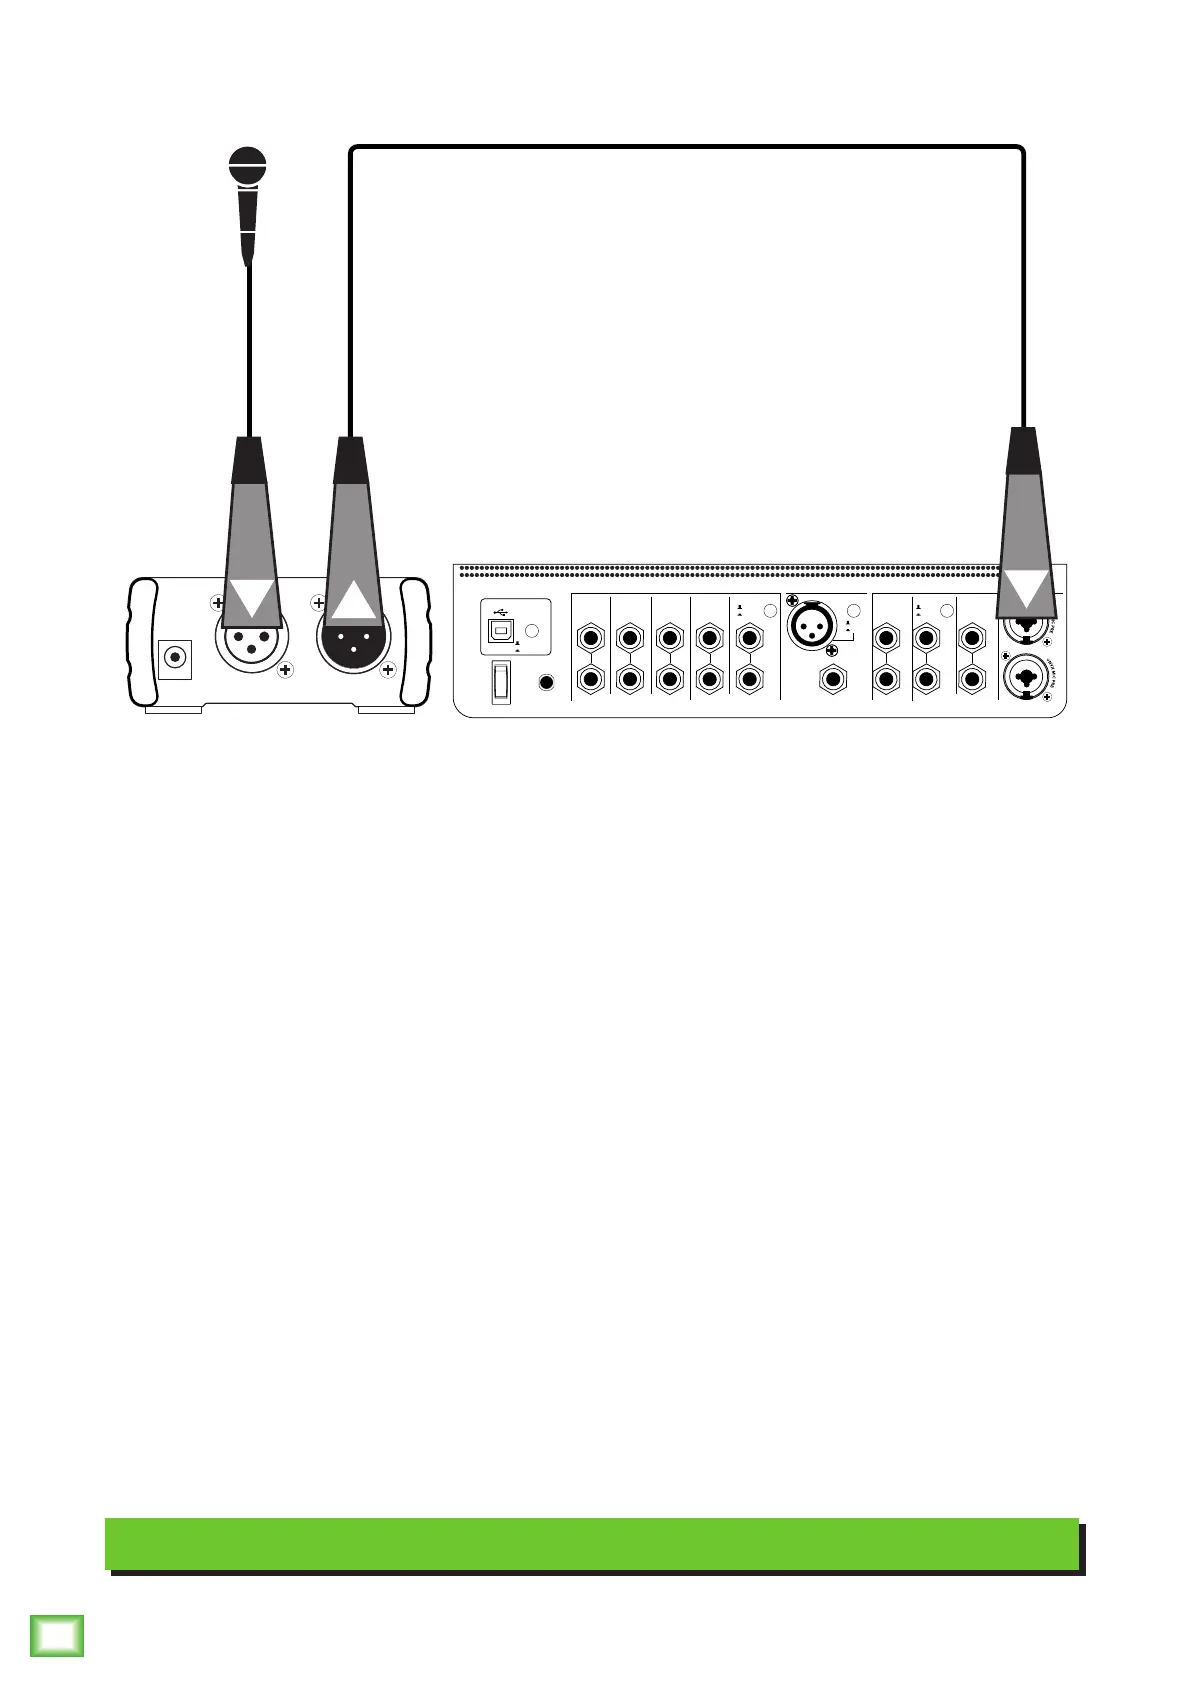
Hookup Diagram
The M48 48V Power Supply is the perfect solution for anyone using a condenser microphone (or other
equipment) that requires phantom power. Let’s take a look at the hookup diagram.
Start by turning the down the main output level of the audio interface. In this example it’s a Mackie Big Knob
Studio+. Next, connect a condenser microphone to the M48’s input jack using a balanced XLR cable. Now,
you will want to connect a balanced XLR cable from the M48’s output jack to the audio interface’s input jack.
Finish up by slowly raising the level of the audio interface’s output knob.
Note: While an audio interface may be the most common use, you could connect a mixer in lieu of an audio
interface to the M48.
Note: If the audio interface or mixer has built-in phantom power, do not engage it while using the M48!
Typical M48 Setup
CUE IN
AUX
MIX
SOURCES INPUTS
1(L)3/45/62-TRACKSTUDIO/
PHONES
AMP
USB
2(R)
FOOTSWITCH
MIC
L
(MONO)
R
L
(MONO)
R
L
R
L
R
BAL / UNBALBAL / UNBAL
L
R
BAL / UNBAL
L
R
BAL / UNBAL
L
R
BAL / UNBAL BAL / UNBALBAL / UNBAL
L
(MONO)
R
BAL / UNBAL
REC SRC
SELECT
TALKBACK
MONITOR
C
MONITOR
B
MONITOR
A
EXT
INT
INPUTS 1/2
2-TRACK
OUTPUTS
+18VDC
1.5A
POWER
-10dB
+4dB
-10dB
+4dB
OUTPUTINPUT
+9V DC