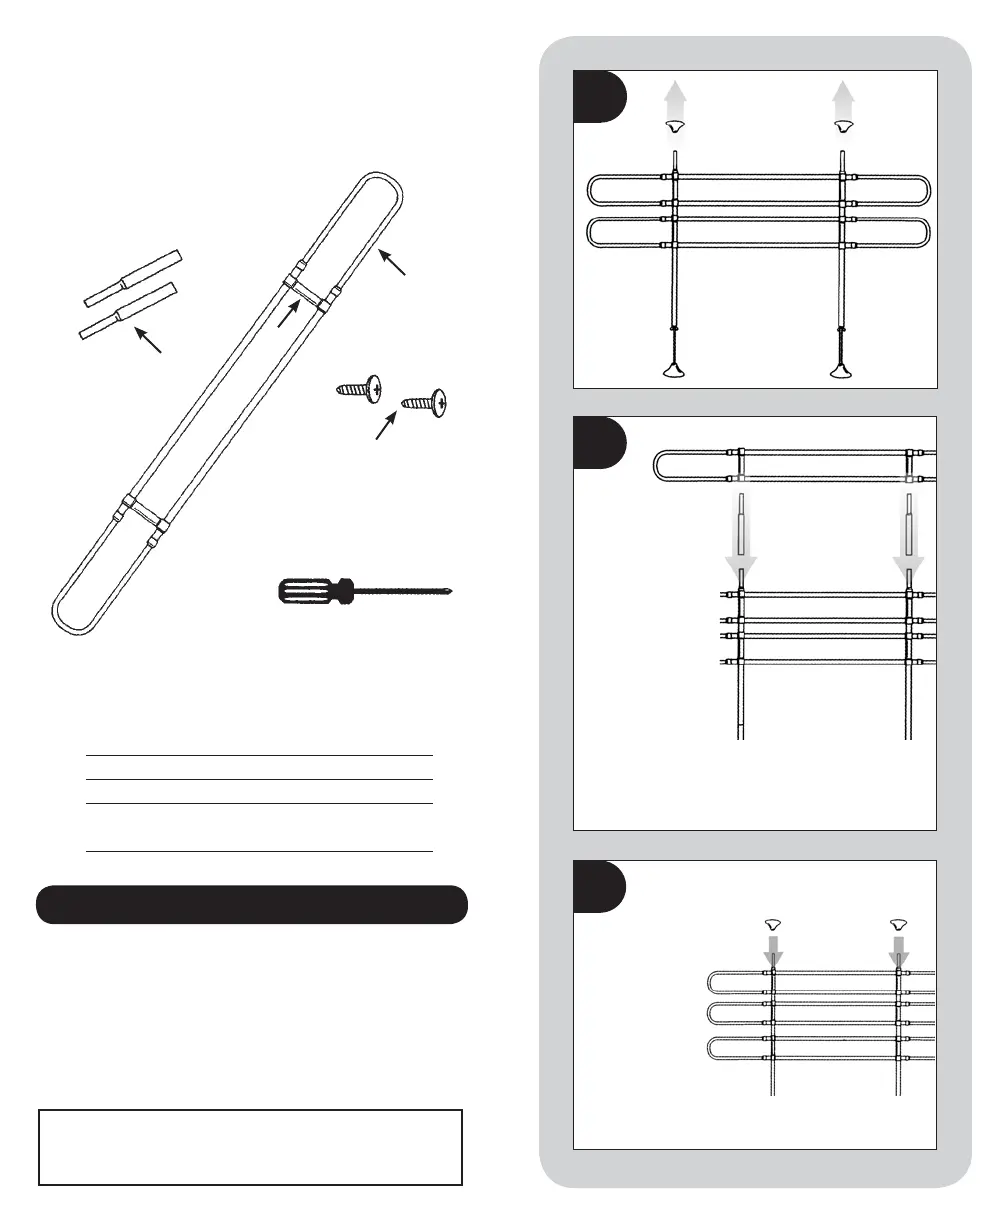
Re-install the
Support Feet
to the top of
the barrier.
Adjust the Hoop
Assemblies
vertically and
horizontally as
necessary for
your application.
3
Remove the
support feet
from the top of
the barrier.
1
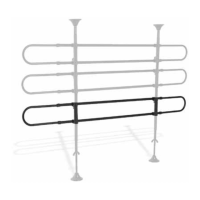
• Thank you for purchasing the WeatherTech
®
Pet Barrier
Extension. We are confident that this product is the best
on the market, and will exceed your needs.
• Please take a moment to familiarize yourself with all of
the included parts listed above. If anything is missing,
contact your dealer immediately.
B EFO R E Y O U B EGI N
OUR GU A R ANTEE :
This product is guaranteed against defects in manufacturing for
one (1) year from the date of original purchase.
PARTS LIST
Letter Description Quantity
A Telescoping Hoop Assembly 1
B Plastic Vertical Brackets 2
C Vertical Extension Tubes
2
Parts Included With The
WeatherTech
®
P e t B a r r i e r E x t e n s i o n
YOU WILL NEED:
A phillips-head screwdriver
A
D
C
B
Insert the Vertical
Extension Tubes
(C) onto the two top
ends. Then add the
extra Telescoping
Hoop Assembly to
the Upright Tubes
as shown. Use the
included Screws (D)
to lock the Plastic
Vertical Brackets
(B) in place on the
newly installed
Hoop Assembly (A).
2
Refer to the notes section on the
reverse side of this sheet.