14
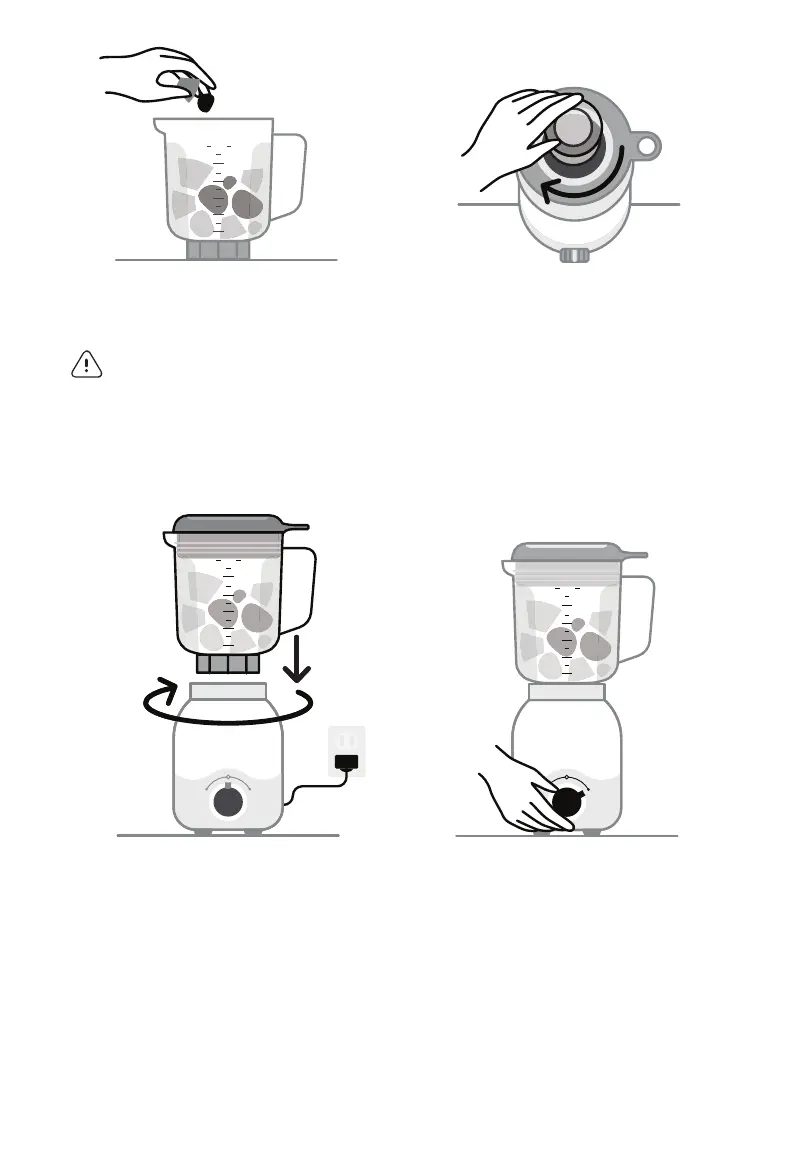
3 Add ingredients to
the Pitcher.
warnin g! DO NOT exceed
the MAX line!
5 Place the Pitcher upright
onto the Motor Base so the
Blade meets the Motor
Base and gently twist it
clockwise to lock into place.
You will feel a “click” when
the blender is secured.
Plug the power cord into
an outlet.
4 Place the Lid on top of the
Pitcher and press down
fi rmly to snap into place.
Place the Lid Cap over the
Lid opening, then press
down and twist to lock it
in place.
6 Run the desired blending
program: twist the Power
Control Knob to LOW or
HIGH or keep in the HOME
position and press the dial
button to PULSE.
If the blender won’t run,
double check to ensure the
Pitcher is locked in place.
MAX
LIQUID
MAX
48 6
40 5
32 4
24 3
16 2
8 1
24 3
16 2
8 1
Add ingredients to the Pitcher
Place the Lid on top of the Pitcher and press down firmly to snap into place.
Place the Lid Cap over the Lid opening, then press down and twist to lock it in place
MAX
LIDQUID
MAX
48 6
40 5
32 4
24 3
16 2
8 1
MAX
LIDQUID
MAX
48 6
40 5
32 4
24 3
16 2
8 1
PULSE
LOW HIGH
PULSE
LOW HIGH
Place the Pitcher upright onto the Motor Base so the Blade meets the Motor Base and
gently twist clockwise to lock it into place
MAX
LIDQUID
MAX
48 6
40 5
32 4
24 3
16 2
8 1
MAX
LIDQUID
MAX
48 6
40 5
32 4
24 3
16 2
8 1
PULSE
LOW HIGH
If using the HIGH or LOW blending cycle, return the Power Control Knob to the HOME
position after the cycle completes. If ingredients require further blending, return the
Power Control Knob to the HOME position first before beginning the next cycle of
blending (HIGH, LOW, or PULSE).
MBFXX100_Blender_UG_F240118.indd 14 1/18/24 11:02 AM