15
1.
$'-867,1*7+(029$%/(72(.,&.02'(/'(3(1',1*
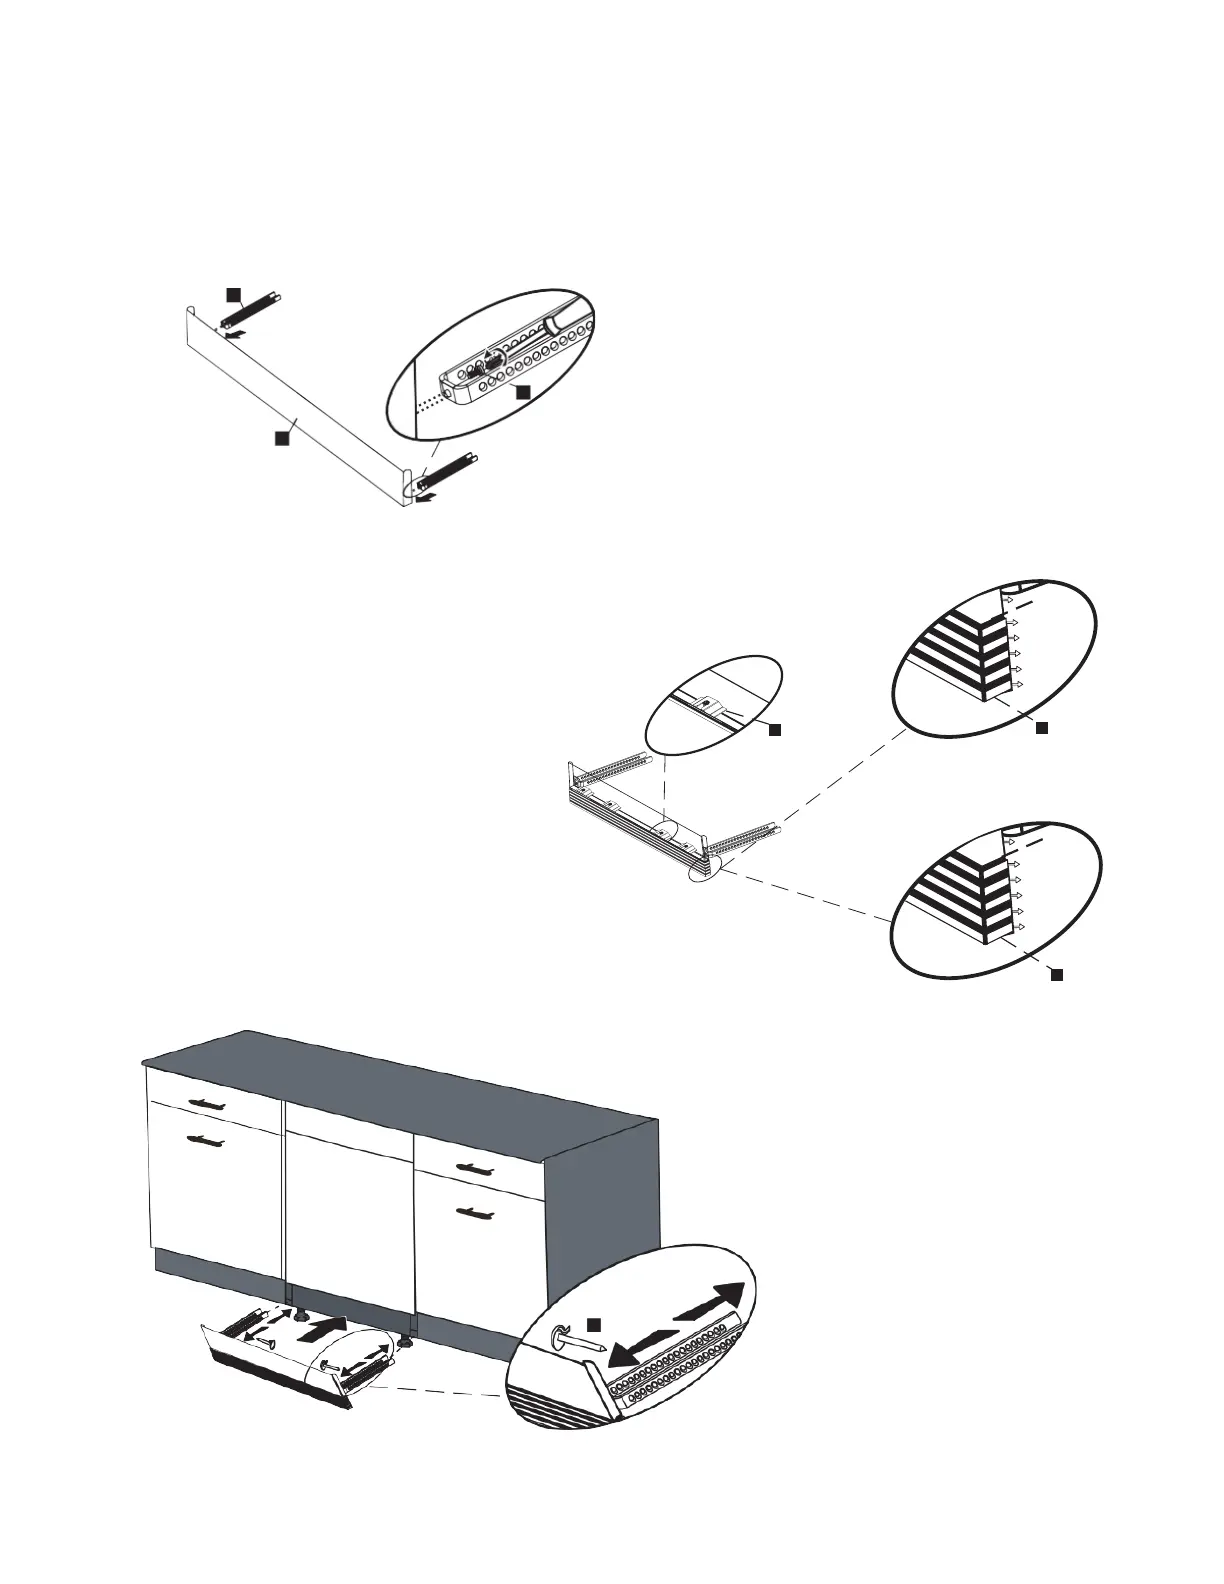
Now that you have successfully installed the dishwasher, you need to attach the toe kick to the dishwasher. The
two-piece toe kick can be adjusted to the height and depthQHHGHGIRU\RXU NLWFKHQ
$ ,IWKHKHLJKWLVWR(860mm-910mm)
and use short supports; adjustable plinth metal with
80 mm length (v), toe kick brackets(o) are installed.
Mounting is done using Screws Ø 5/32” x 7/32” (Ø
4mm x 6mm) with a Philips Screwdriver.
B. A. If the height is above 35 7/8" (910mm) and use
short supports; adjustable plinth metal with 130 mm
length (v), toe kick brackets(o) are installed. Mounting
is done using Screws Ø 5/32” x 7/32” (Ø 4mm x 6mm)
with a Philips Screwdriver.
2. The adjustable plinth number is
determined according to the required
distance and assembled to each other.
3. As shown in the Figure, the cylindrical feet
of the adjustable plinth are attached to the
plinth fixing metal parts and shifted through
the cavity of the part.
Depending on the desired depth, plinth
locking(y) is attached to the toe kick bracket(o).
,QRUGHUWRSODFHWKHSOLQWKLQWRWKH
PDFKLQHWKHORRVHHGJHVVKDOOEHSUHVVHG
ILUPO\WRZDUGVHDFKRWKHU
)LQDOO\7RHNLFNEUDFNHWVRDUHDWWDFKHG
WRWKHJDSVXQGHUWKHPDFKLQHDQGWKH
LQVWDOODWLRQLVFRPSOHWHG
\
S
W
U
V
870x1
880x2
890x3
900x4
[
V
870x1
880x2
890x3
900x4
[
8
8
 Loading...