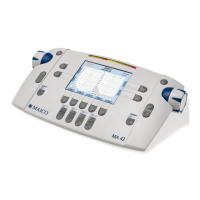
After switching on the device the right ear and phone is selected as
transducer. Use button (9) or (17) to switch to left ear or both ears. The
appearing screen can vary depending on the user settings.
The transducer can be selected by the button (10). The level is changed
by the corresponding Level control dial (1). The frequency is increased or
decreased by the frequency buttons (4) or (5). The tone is presented or
interrupted by button (2). Follow your preferred procedure to obtain the
hearing threshold. Press the button (3) to save the value.
Switch on the contra lateral masking by button (11) or (15) of the other
ear, if required.
Use button (18) to switch from tone to speech.
The transducer can be selected by the button (10) or (16). The level is
changed by the corresponding dial (1). Follow your preferred procedure.
Toggle to the required signal by button (11) or (15). Select SRT, MCL,
WRS, UCL or MHA by using button (13); if Speaker is selected as the
transducer Aided can be selected to record aided sound field test results.
Score words using the button (4) (correct) or (5) (incorrect) and/or press
the button (3) to save the value.
Switch on the contra lateral masking by button (11) or (15) of the other
ear, if required.
Talk Forward / Monitor and Talk Back / Calibrating VU for Mic and CD
Talk forward: Press and hold (8). You adjust the level of your voice using
dial (1) while button (8) is pressed.
Monitors and Talk Back: Press button (6) on the left side of screen and
adjust monitor of Channel 1 and 2 using the corresponding dial (1). To
adjust the talkback using the button (4) (increase) or (5) (decrease).
Preferences for monitors and talkback can be changed using the soft keys
at the bottom of the screen. Press OK (6) to save your changes.
Calibrating VU: Select Mic or CD by using button (11) and press (6) to
get to the monitor settings. Press button (17) and play input: voice or Cal
tone on CD. Use dial (1) to adjust input signal until VU is green. Press OK
(6) and OK (7) again.
Saving/Printing Test Results
Press button (19) to switch to the user menu. To save the data to a PDF file
on SD card or USB flash drive press button (11). Button (13) allows you to
print the results to an approved connected printer. Press Button (15) to enter
the Patient list, save the results under a patient name on the unit.
NOTE: If results are saved under Patients, results will still need to be
saved as a PDF in order to print out a paper copy. The patient’s name
will then be included on the printout.
MAICO Diagnostics GmbH, Sickingenstr. 70-71, 10553 Berlin, Germany, Tel.:+49 30 70 71 46-50 • Fax: +49 30 70 71 46-99
E-mail: sales@maico.biz • Internet: www.maico.biz
FOR NORTH- AND SOUTH AMERICA
MAICO Diagnostics, 10393 West 70
th
Street, Eden Prairie, MN 55344 USA, Tel.: +1 (888) 941 4201 • Fax: +1 (952) 903 4100
E-mail: info@maico-diagnostics.com • Internet: www.maico-diagnostics.com

 Loading...