EasyManua.ls Logo

Maier DQ Series - User Manual

Default Icon
2 pages
Print Icon
To Next Page IconTo Next Page
Loading...
Repair Instructions
Rotary Joints Series DQ / DQL ND 150 IDQ150_E.DOC
1 General information
Repair work is required during preventive maintenance, or when leaks are detected at the rotary joint housing, or when the oil level in the cooling unit KE / KEW
changes. Repair work may only be performed by trained staff.
Prior to repair work, let off the oil from the heat carrier and cooling circuits and dismantle the hoses.
Remove the screws at the K flange and dismount the rotary joint from the roller.
2 Dismantling the rotary joint
Place the rotary joint vertically.
Loosen the screw connections 430 and 450, dismantle elbow 150, main housing 30 and flat packings 360 and 370 - make sure not to damage the internal parts!
Loosen screws 100-100 and dismantle set screws 100-50.
Slightly turn and pull off packing unit - if unit cannot be removed this way:
Use threaded blind hole S to pull with threaded rod, flat steel piece and nuts. Evenly tighten the nuts in order to avoid damage.
Dismantle holding disk 140.
Carefully loosen screws 400 and 410 and centrically remove cover 120 (slightly spring-loaded) - make sure not to damage internal parts.
Dismantle bearing housing 40 - DQL: pull off securing ring and shaft sleeve 170.
Remove grooved nut 240 and tapered roller bearing 200 and 202 with distancer and fitting rings from rotor - the nut is easier removed if force F is applied at
bearing 200 in order to relieve springs 270.
3 Evaluating the parts
The quality of the sealing surfaces DF of axial face seals 100 and 110 is of particular importance. When new, they are
lapped - repair of sealing surfaces DF is only possible if they are carefully lapped and when the wear tolerance at the coal
parts is at least 1.5 mm!
Carefully remove deposits. If this is not possible, replace the sealing parts in question.
Information on replacing sealing parts:
Replace counter ring 110-10 as per detail Y: (not DQL)
Carefully pull the counter ring out of cover 120, using a suitable tool (e.g. hook). Apply force evenly (use hook at differ-
ent points). Clean the cover inside - particularly the O-ring seat.
Mount O-Ring 110-50 to counter ring 110-10. Use a soft holder to push the unit down in order to avoid damage to the
sealing surface DF! Make sure to use at least a protective piece.
Apply the press-down force at the center. Observe the correct alignment of locking pin and groove. The process is com-
plete when you feel a slight counterforce.
Replace rotating ring 110-20 as per detail Y: (not DQL)
Remove rotating ring 110-20, O-ring 110-60 and springs 110-40, check and replace, if necessary. Clean O-ring seat
and spring area.
Replace counter ring 102 as per detail X :
Push out counter ring by means of suitable tool (e.g. pin and hammer). Apply force evenly (use pins at different points)
and watch out for position of locking pin.
Remove profile ring 100-70 with screw driver - clean sealing surface.
Mount profile ring 100-70 to counter ring 102. Use a soft holder to push the unit down in order to avoid damage to the
sealing surface DF! Make sure to use at least a protective piece. Apply the press-down force at the center in order to
ensure minimum run-out tolerance at sealing surface DF.
Maximum run-out tolerance ± 0,05 mm.
Observe position of locking pin.
The process is complete when holding disk 140 evenly contacts the surface of bearing housing 30.
Always replace flat packings 360, 370, profile sealing 100-70 and O-rings 350, 110-50, 110-60.
Clean or replace tapered roller bearings 200 and 202, depending on condition.
DQL: new lubrication of bearing 200 (480 ccm) and bearing 202 (240 ccm).
Required lubricant quality: Lubcon TURMO TEMP LP 5002 by Lubricant Consult GmbH (phone.: ++49-6109-62018).
Can with 1 kg grease with Maier ordering no.: 3118219
Remove deposits from rotor and housing parts by means of sand paper (grain 300).
DQL: also check sealing surface at shaft sleeve 170. Repair or re-
place. Always replace shaft seal 130.
Rotary joint version B2 : Reducing bushing 190 with grooves in running surface must be replaced.
Spare part
Wearing part
Question and Answer IconNeed help?

Do you have a question about the Maier DQ Series and is the answer not in the manual?

Overview

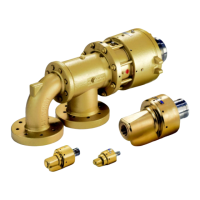
This document describes the DQ/DQL and ND 150 rotary joints manufactured by Christian Maier GmbH & Co. Maschinenfabrik. These rotary joints are designed for various industrial applications, facilitating the transfer of fluids (such as water, steam, or thermal oil) between a stationary supply and a rotating machine part.

Function Description

The rotary joint's primary function is to maintain a sealed connection while allowing rotational movement. It consists of several key components working in conjunction to achieve this. The core mechanism involves a rotating sealing unit (100) that interfaces with a stationary counter ring (102). This interface is crucial for preventing fluid leakage during operation.

The rotary joint is equipped with tapered roller bearings (200, 202) that support the rotating components and ensure smooth, low-friction rotation. These bearings are pretensioned using springs (270) and secured by a grooved nut (240). A shaft sleeve (170) with O-ring (340) connects the rotating part to the rotor (80), further enhancing the sealing integrity.

Pressure springs (110-40) are incorporated to maintain constant contact between the sealing surfaces, compensating for wear and minor misalignments. Various O-rings (110-50, 110-60, 340, 350) and flat packings (360, 370) are strategically placed throughout the assembly to provide multiple layers of sealing and prevent fluid escape.

The design includes a main housing (30) and a cover (120) that enclose the internal components, protecting them from the external environment and containing the fluid. The assembly is secured using screws (400, 410, 450) and locking brackets (180).

Important Technical Specifications

The document references specific part numbers, indicating a modular design. Key components include:

  • Rotating Sealing Unit (100): The primary sealing element, including a profile ring (100-70).
  • Counter Rings (102, 110-10): Stationary sealing surfaces that mate with the rotating unit.
  • Bearings (200, 202): Tapered roller bearings for rotational support.
  • Seals: Shaft seal (130), O-rings (110-50, 110-60, 340, 350), and flat packings (360, 370).
  • Pressure Springs (110-40): Essential for maintaining sealing contact.

The ND 150 designation likely refers to a nominal diameter or size specification for the rotary joint, indicating its capacity or the size of the pipe it connects to. The materials used for sealing surfaces are critical for performance and are often specified for different fluid types and operating conditions (e.g., carbon graphite, silicon carbide).

Usage Features

The rotary joints are designed for applications requiring continuous fluid transfer to rotating machinery. They are suitable for various media, including water, steam, and thermal oil, depending on the specific configuration and sealing materials chosen.

The modular design, indicated by the detailed parts list and assembly instructions, allows for customization and replacement of individual components. This contributes to the longevity and adaptability of the rotary joint across different industrial settings.

The assembly process emphasizes precision, particularly regarding the pretensioning of bearings and sealing units, to ensure optimal performance and prevent premature wear or leakage. The instructions highlight the importance of clean sealing surfaces and proper alignment during installation.

Maintenance Features

The document provides comprehensive instructions for repair and maintenance, focusing on disassembly and reassembly. This indicates that the rotary joints are designed to be serviceable, allowing for component replacement rather than full unit replacement in many cases.

Disassembly:

  • The process begins with securing the rotary joint to prevent rotation and draining any remaining fluid.
  • Specific tools are required for removing components like the elbow (150), main housing (30), and various screws (430, 450, 100-50, 100-100).
  • Detailed steps are provided for removing the rotating sealing unit (100), counter ring (102), and bearings (200, 202).
  • The instructions emphasize careful handling of sealing surfaces and components to avoid damage.
  • Inspection of all components for wear, damage, or deposits is a critical step, with specific guidance on what to look for (e.g., grooves on sealing surfaces, worn O-rings).

Reassembly:

  • Reassembly is the reverse of disassembly, with crucial steps highlighted for proper function.
  • Cleaning of all components, especially sealing surfaces, is paramount.
  • Lubrication of O-rings and other moving parts with appropriate lubricants (e.g., silicone grease) is specified.
  • Correct placement and pretensioning of bearings and springs are essential for smooth operation and sealing integrity.
  • The document stresses the importance of aligning sealing surfaces correctly and tightening screws evenly to prevent distortion.
  • A final check for leaks after reassembly is recommended to ensure proper function.

Spare Parts Recommendation:

  • The document includes a "Spare part (S) / Wearing part (W)" list, clearly identifying components that are expected to wear out or may need replacement. This proactive approach to maintenance helps users stock necessary parts, minimizing downtime.
  • When ordering spare parts, users are advised to specify the part number and the complete type designation of the rotary joint.

Overall, the design and documentation emphasize ease of maintenance, extended service life through component replacement, and reliable performance when proper installation and maintenance procedures are followed.

Maier DQ Series Specifications

General IconGeneral
BrandMaier
ModelDQ Series
CategoryPlumbing Product
LanguageEnglish

Related product manuals