1
Majestic • GL36MER, GL42MER Installation Instructions • 2502-931 Rev. B • 3/18
REQUIRED TOOLS
Screw gun equipped with 1/4 in (6 mm). socket or
1/4 in. (6 mm). wrench or socket
Small, at screwdriver
KIT COMPONENTS
(2) Side Glass Refractory Panels
(1) Rear Glass Refractory Panel
(1) Top Glass Refractory Panel
(2) Side Refractory Bracket
(1) Rear Refractory Bracket
(1) Rear Exhaust Bafe
(3) Screws
Leave this manual with party responsible for use
and operation.
Installation Instructions
1. Remove decorative front and logs.
2. Remove existing refractory or false back and discard,
if installed.
3. Remove ber refractory brackets (if so equipped) and
insert screws in the holes that remain. See Figure 1.
CAUTION! Risk of Cuts or Abrasions. Wear protective
gloves and safety glasses during installation.
NOTICE: Handle glass refractory panels with care.
Refractory may chip or crack if dropped or impacted.
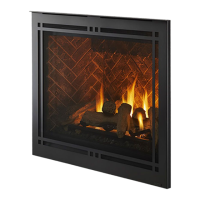
GLASS REFRACTORY KIT
GL36MER, GL42MER
Models: MERID36IN, MERID36IL, MERID42IN, MERID42IL,
MERIDPLA36IN, MERIDPLA36IL, MERIDPLA42IN, MERIDPLA42IL
Installation Instructions
CAUTION! Do not install damaged components.
DANGER
HOT GLASS WILL
CAUSE BURNS.
DO NOT TOUCH GLASS
UNTIL COOLED.
NEVER ALLOW CHILDREN
TO TOUCH GLASS.
A barrier designed to reduce the risk of
burns from the hot viewing glass is provided
with this appliance and shall be installed for
the protection of children and other at-risk
individuals.
Figure 1. Remove Fiber Refractory Brackets. Install Screw.
INSTALL SCREW
WARNING! Risk of Asphyxiation! DO NOT leave
holes open! Screws from ber refractory bracket removal
MUST be reinstalled in same holes as removed to main-
tain rebox seal.
4. Locate the six tabs on the basepan and bend upward.
They are circled in Figure 2. There are two tabs on
each side and two in the back.
Figure 2. Basepan Tab Locations
BEND 6 BASEPAN TABS
5. Using a small, at screwdriver, bend the ends of the
refractory brackets to a 90 degree angle as shown
in Figure 3. Break side refractory brackets apart by
bending back and forth.