11 ENGLISH
FUNCTIONAL
DESCRIPTION
CAUTION:
• Always be sure that the tool is switched off and
unplugged before adjusting or checking function
on the tool.
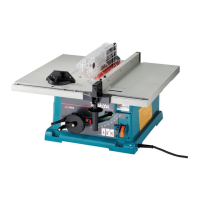
Adjusting the depth of cut
► Fig.13: 1. Handle
The depth of cut may be adjusted by turning the handle.
Turn the handle counterclockwise to raise the blade or
clockwise to lower it.
NOTE:
• Use a shallow depth setting when cutting thin
materials in order to obtain a cleaner cut.
Adjusting the bevel angle
► Fig.14: 1. Lock knob 2. Arrow pointer
Loosen the lock knob counterclockwise and the desired
angle (0° - 45°) is obtained. The arrow pointer indicates
the bevel angle.
After obtaining the desired angle, tighten the lock knob
clockwise to secure the adjustment.
CAUTION:
• After adjusting the bevel angle, be sure to
tighten the lock knob securely.
Switch action
CAUTION:
• Remove workpiece from the table.
• Before plugging in the tool, always be sure that
the tool is switched off.
► Fig.15: 1. Switch
To start the tool, press the ON ( I ) button.
To stop it, press the OFF ( O ) button or the switch
cover.
ASSEMBLY
CAUTION:
• Always be sure that the tool is switched off and
unplugged before carrying out any work on the
tool.
The tool is shipped from the factory with the saw blade
and blade guard not in the installed condition.
Removing or installing saw blade
CAUTION:
• Always be sure that the tool is switched off and
unplugged before installing or removing the
blade.
• Use only the Makita hex wrench provided to
install or remove the blade. Failure to do so may
result in overtightening or insufcient tightening
of the hex bolt. This could cause an injury.
• Use the following saw blade. Do not use saw
blades which do not comply with the character-
istics specied in these instructions.
Model Dia. Blade thickness Kerf
2712 315 mm 2 mm or less 2.8 mm or more
► Fig.16: 1. Hex wrench 2. Wrench 3. Loosen
To remove the saw blade, remove the table insert on
the table. Hold the outer ange with the wrench and
loosen the hex bolt clockwise with the hex wrench.
Then remove the outer ange.
► Fig.17: 1. Inner ange 2. Saw blade 3. Outer ange
4. Washer 5. Hex bolt
To install the saw blade, assemble the inner ange, saw
blade, outer ange, washer and hex bolt onto the arbor.
Make sure that the teeth of the blade are pointing down
at the front of the table.
CAUTION:
• Keep the ange surface clean of dirt or other
adhering matter; it could cause blade slippage.
Be sure that the blade is installed so that
the teeth are aligned in the cutting (turning)
direction.
To secure the blade in place, hold the outer ange with
the wrench, then tighten the hex bolt counterclockwise
with the hex wrench. BE SURE TO TIGHTEN THE HEX
BOLT SECURELY.
► Fig.18: 1. Hex wrench 2. Wrench 3. Hex bolt
4. Tighten
CAUTION:
• Be sure to hold the hex bolt carefully with the
hex wrench. If your grip should slip, the hex
wrench may come off the hex bolt, and your
hand could strike the sharp blade edges.
Installing blade guard
CAUTION:
• Before installing the blade guard, adjust the
depth of cut to its maximum elevation.
► Fig.19: 1. Blade guard 2. Riving knife
► Fig.20: 1. Blade guard 2. Riving knife
Place the blade guard into the groove on the riving
knife. Secure the blade guard by pivoting the lever on
the blade guard.

 Loading...