Do you have a question about the Makita DF030D and is the answer not in the manual?
Details steel, wood, screw capacities of the drill.
Lists no load speed, chuck capacity, overall length, net weight, and rated voltage.
Explains symbols and the tool's intended application for drilling and screw driving.
Provides noise levels and vibration values as per EN60745 standards.
Crucial safety advice for using power tools to prevent injury.
Declares product compliance with EU directives and standards.
Keep work area clean and well lit to prevent accidents.
Do not operate in explosive atmospheres due to spark ignition risk.
Keep children and bystanders away to maintain control.
Ensure power tool plugs match outlets to reduce shock risk.
Avoid contact with earthed surfaces to reduce shock risk.
Do not expose tools to rain or wet conditions.
Avoid cord abuse; keep away from heat, oil, and sharp edges.
Use suitable outdoor extension cords for outdoor use.
Use GFCI protected supply in damp locations.
Be alert and use common sense; avoid operating when tired or under influence.
Always wear eye protection and other PPE as needed.
Ensure switch is off before connecting power/battery.
Keep proper footing and balance for better control.
Do not wear loose clothing or jewellery; keep hair away from moving parts.
Ensure dust extraction facilities are connected and used.
Use the correct power tool for the application.
Do not use tools with faulty switches; they must be repaired.
Disconnect from power before adjustments or accessory changes.
Store idle tools out of reach of children and untrained users.
Maintain tools; check for misalignment or damage before use.
Keep cutting tools sharp and clean for easier control.
Use tool and accessories per instructions, considering working conditions.
Recharge only with the specified manufacturer's charger.
Use only specifically designated battery packs.
Keep battery away from metal objects to prevent shorting.
Avoid contact with battery liquid; seek medical attention if contact occurs.
Read instructions and cautionary markings on charger, battery, and product.
Do not disassemble the battery cartridge.
Stop operation if operating time becomes excessively shorter.
If electrolyte gets into eyes, rinse with water and seek medical attention.
Do not short terminals, store with metal objects, or expose to water.
Do not store tool/battery where temperature exceeds 50°C (122°F).
Do not incinerate battery cartridge; it can explode in a fire.
Be careful not to drop or strike the battery.
Charge the battery cartridge before it is completely discharged.
Stop operation and charge when tool power is noticeably low.
Never recharge a fully charged battery cartridge.
Have your power tool serviced by a qualified repair person using identical parts.
Follow instructions for lubricating and changing accessories.
Keep handles dry, clean and free from oil and grease.
Do not let familiarity replace strict adherence to safety rules.
Hold by insulated grips when contacting potential hidden wiring.
Always be sure you have a firm footing.
Hold the tool firmly.
Keep hands away from rotating parts.
Operate the tool only when hand-held.
Do not touch hot drill bits or workpieces immediately after operation.
Prevent dust inhalation and skin contact with chemicals.
Instructions for inserting and removing the battery cartridge.
How to operate the switch trigger for tool function.
Description of how to turn on and off the front lamp.
How to change the direction of rotation using the reversing switch.
How to slide the speed change lever for high or low speed.
Ensure speed change lever is fully in position to avoid damage.
How to adjust the fastening torque using the adjusting ring.
The clutch slips at set torque levels; test for application needs.
Instructions for installing bits using the sleeve mechanism.
Use specific bit types (A=12mm, B=9mm) for European/N. American countries.
Use specific bit types (A=17/12mm, B=14/9mm) for other countries.
Ensure battery cartridge is fully locked in place before use.
Hold tool firmly with one hand on grip, other on battery.
Adjust torque, place bit in screw head, apply pressure, and start tool.
Predrill pilot holes for easier driving and to prevent splitting.
Use center-punch for starting holes; use cutting lubricant for metals.
Excessive pressure damages bits, reduces performance, and shortens tool life.
Hold tool firmly and exert care when bit breaks through workpiece.
Use reverse rotation to remove stuck bits, holding tool firmly.
Always secure small workpieces in a vise or hold-down device.
Allow tool to rest for 15 minutes after battery discharge before recharging.
Switch off the tool and move the lock button to the locked position.
Use with fastening torque less than 12.5 Nm for convenient screwdriving.
Do not use for work requiring excessive force.
Thread belt through holster holder and lock tool with button.
Two bits can be retained at the front of the holster.
Turn off tool before placing in holster and close securely.
Ensure tool is off and battery removed before inspection or maintenance.
Repairs, maintenance, and adjustments should be done by authorized centers.
Use recommended accessories; others may pose injury risk.
Lists drill bits, screw bits, socket bits, bit piece, batteries, chargers, and holster.
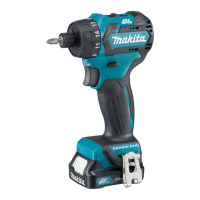
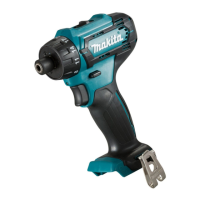
The Makita DF030D is a cordless driver drill designed for drilling and screw driving in wood, metal, and plastic. This instruction manual provides essential information for safe operation, maintenance, and optimal use of the tool.
The DF030D operates as a cordless driver drill, allowing for both drilling and screw driving applications. It features a reversing switch to change the direction of rotation, enabling both clockwise and counterclockwise operation. A speed change lever allows users to select between high and low speeds, adapting the tool to different tasks. The fastening torque can be adjusted in 18 steps using an adjusting ring, with a maximum setting for drilling. The tool also includes a front lamp to illuminate the work area. For added versatility, it can be used as a hand screwdriver for tasks requiring less fastening torque.
Battery Cartridge: The tool is powered by a battery cartridge. To insert, align the cartridge with the opening and push until it clicks into place. To remove, press the buttons on both sides and withdraw. It's crucial to ensure the battery cartridge is fully locked to prevent accidental detachment and potential injury. The manual emphasizes charging the battery cartridge before it's completely discharged and avoiding recharging a fully charged one to maximize battery life. Charging should occur at room temperature (10°C - 40°C).
Switch Action: The tool is operated by a switch trigger. Pulling the trigger starts the tool, and increasing pressure increases the speed. Releasing the trigger stops the tool.
Front Lamp: Pulling the switch trigger also activates a front lamp, which remains on while the trigger is pulled and turns off 10-15 seconds after release. Users are cautioned not to look directly into the light source.
Reversing Switch: A reversing switch lever allows for changing the direction of rotation. Depressing the lever from the 'A' side results in clockwise rotation, while depressing it from the 'B' side results in counterclockwise rotation. When the lever is in the neutral position, the switch trigger cannot be pulled, preventing unintentional starting. It is important to only use the reversing switch after the tool has come to a complete stop to avoid damage.
Speed Change: The speed change lever allows users to select between high (2) and low (1) speeds. The lever should be fully set to the desired position before operation to prevent tool damage. The speed should not be changed while the tool is running.
Adjusting Fastening Torque: The fastening torque can be adjusted in 18 steps by rotating the adjusting ring. The minimum torque is at setting 1, and the maximum is at the drill marking. The clutch is designed to slip at various torque levels from 1 to 18, but not at the drill marking. A trial screw drive is recommended to determine the appropriate torque level for specific applications.
Installing/Removing Bits: Bits with a specific inserting portion (12mm or 17mm for A, 9mm or 14mm for B, depending on region) are compatible. To install, pull the sleeve, insert the bit (and bit-piece if necessary), and release the sleeve. To remove, pull the sleeve and firmly pull out the bit. Ensure the bit is inserted deeply enough for proper securing.
Screwdriving Operation: Before screwdriving, adjust the torque ring to the appropriate level. Place the driver bit in the screw head, apply pressure, and start the tool slowly, gradually increasing speed. Release the trigger when the clutch cuts in. It is crucial to ensure the driver bit is straight in the screw head to prevent damage to the screw or bit. For wood screws, predrilling pilot holes is recommended to ease driving and prevent splitting.
Drilling Operation: For drilling, set the adjusting ring to the drill marking. When drilling in wood, guide screw-equipped drills are recommended. For drilling in metal, an indentation should be made with a center-punch and hammer before starting. A cutting lubricant should be used for most metals, except iron and brass, which should be drilled dry. Users are cautioned against excessive pressure, as it can damage the bit, decrease performance, and shorten tool life. Small workpieces should be secured in a vise.
Using as a Hand Screwdriver: The tool can be used as a hand screwdriver for tasks requiring less than 12.5 Nm of fastening torque. To do this, switch off the tool, move the lock button to position A, and then turn the tool. This mode is useful for checking screwdriving but not for tasks requiring excessive force.
Using Holster: A holster is provided for carrying the tool. It can be threaded onto a waist belt, and two bits can be retained at the front. Ensure the tool is turned off and has come to a complete stop before placing it in the holster, and securely close the holster.
This comprehensive overview covers the essential aspects of the Makita DF030D, ensuring users can operate and maintain their tool effectively and safely.