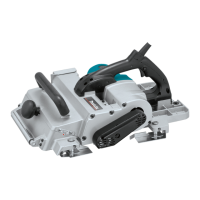
Repair
[3] DISASSEMBLY/ASSEMBLY
[3]-1. Poly V-belt 4-241 (cont.)
ASSEMBLING
DISASSEMBLING
Fig. 4
Fig. 5
1) Hook Poly V-belt 4-241 with V-pulley 4-20L. (Fig. 4 )
2) Hook a part of Poly V-belt with V-pulley 4-37. (Fig. 4 )
3) Turn V-pulleys 4-20L and 4-37 counterclockwise by hands to fit Poly V-belt 4-241 to the V-pulleys while holding
Poly V-belt firmly. (Fig. 4 )
Note: If it is difficult to completely fit Poly V-belt to V-pulleys, continue turning V-pulleys until all the grooves are
engaged with the protrusions of V-belt.(Fig. 5)
V-pulley 4-20L
on Motor side
1 2
3
1
2
3
V-pulley 4-37 on Drum side Protrusions on Poly V-belt 4-241
Two positions of
Poly V-belt 4-241
Grooves on V-pulleys
[3]-2. Motor section
Fig. 6 Fig. 7
Fig. 8 Fig. 9
1) Remove Belt cover and Poly V-belt 4-241 as illustrated in Fig. 2 or Fig. 3
Note: Separating Armature from Bracket is impossible without removing Poly V-belt.
2) Loosen M4x16 Pan head screw and remove Chip cover. (Fig. 6)
3) Remove Brush holder caps and Carbon brushes, then remove four 4x18 Tapping screw on Bracket. (Fig. 7)
4) Remove Bracket by tapping Main frame complete. (Fig. 8) Armature and Drum complete come with Bracket.
5) Hold Armature by gloved hand and turn V-pulley 4-20L clockwise using wrench 13. (Fig. 9)
V-pulley 4-20L can be removed.
Note: V-pulley 4-20L has a left hand thread.
.
Wrench 13
M4x16 Pan head screw Carbon brush
Bracket
Bracket
Bracket
Brush holder cap
4x18 Tapping
screw (4pcs.)
Chip cover
V-pulley 4-20L
Armature Drum complete
P 3/ 8

 Loading...