10 ENGLISH
Nozzle cleaning
Cleanthenozzleregularly.
Use a compressed air to clean the clogged nozzle.
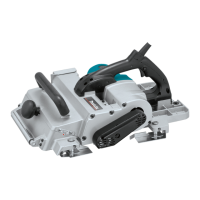
OPERATION
WARNING: To reduce the risk of injury to
persons, do not operate without nozzle or chip
cover in place.
Holdthetoolrmlywithonehandontheknobandthe
other hand on the switch handle when performing the
tool.
Planing operation
►Fig.15: 1. Start 2. End
First,restthetoolfrontbaseatupontheworkpiece
surfacewithoutthebladesmakinganycontact.Switch
onandwaituntilthebladesattainfullspeed.Then
move the tool gently forward. Apply pressure on the
frontoftoolatthestartofplaning,andatthebackatthe
endofplaning.Planingwillbeeasierifyouinclinethe
workpiece in stationary fashion, so that you can plane
somewhat downhill.
Thespeedanddepthofcutdeterminethekindofnish.
The power planer keeps cutting at a speed that will not
resultinjammingbychips.Forroughcutting,thedepth
ofcutcanbeincreased,whileforagoodnishyou
should reduce the depth of cut and advance the tool
more slowly.
Shiplapping (Rabbeting)
►Fig.16
Tomakeasteppedcutasshowninthegure,usethe
edgefence(guiderule)whichisobtainedasaccessory.
►Fig.17: 1. Blade edge 2.Cuttingline
Draw a cutting line on the workpiece. Insert the edge
fence into the hole in the front of the tool. Align the
bladeedgewiththecuttingline.
►Fig.18: 1. Screw 2. Edge fence (Accessory)
Adjusttheedgefenceuntilitcomesincontactwiththe
sideoftheworkpiece,thensecureitbytighteningthe
screw.
►Fig.19
Whenplaning,movethetoolwiththeedgefenceush
with the side of the workpiece. Otherwise uneven plan-
ing may result.
Maximumshiplapping(rabbeting)depthis9mm.
►Fig.20
Youmaywishtoaddtothelengthofthefenceby
attachinganextrapieceofwood.Convenientholes
are provided in the fence for this purpose, and also for
attaching an extension guide (optional accessory).
Chamfering
►Fig.21
►Fig.22
Tomakeachamferingcutasshowninthegure,align
the"V"grooveinthefrontbasewiththeedgeofthe
workpiece and plane it.
MAINTENANCE
CAUTION:
• Alwaysbesurethatthetoolisswitchedoffand
unpluggedbeforeattemptingtoperforminspec-
tion or maintenance.
• Neverusegasoline,benzine,thinner,alcohol
or the like. Discoloration, deformation or cracks
may result.
Sharpening the planer blades
For conventional blades only
►Fig.23: 1. Sharpening holder
Alwayskeepyourbladessharpforthebestperfor-
mancepossible.Usethesharpeningholder(optional
accessory)toremovenicksandproduceaneedge.
►Fig.24: 1. Wing nut 2. Blade (A) 3. Blade (B) 4. Side
(D) 5.Side(C)
First, loosen the two wing nuts on the holder and insert
theblades(A)and(B),sothattheycontactthesides
(C)and(D).Thentightenthewingnuts.
►Fig.25
Immerse the dressing stone in water for 2 or 3 minutes
beforesharpening.Holdtheholdersothattheboth
bladescontactthedressingstoneforsimultaneous
sharpening at the same angle.
Replacing carbon brushes
►Fig.26: 1. Limit mark
Removeandcheckthecarbonbrushesregularly.
Replace when they wear down to the limit mark. Keep
thecarbonbrushescleanandfreetoslipintheholders.
Bothcarbonbrushesshouldbereplacedatthesame
time.Useonlyidenticalcarbonbrushes.
►Fig.27: 1.Chipcover2. Screwdriver
►Fig.28: 1. Nozzle 2. Screwdriver
Use a screwdriver to remove the chip cover or nozzle.
►Fig.29: 1. Brush holder cap 2. Screwdriver
Useascrewdrivertoremovethebrushholdercaps.
Takeouttheworncarbonbrushes,insertthenewones
andsecurethebrushholdercaps.
To maintain product SAFETY and RELIABILITY, repairs,
anyothermaintenanceoradjustmentshouldbeper-
formedbyMakitaAuthorizedServiceCenters,always
using Makita replacement parts.

 Loading...