13.A 13-05-03
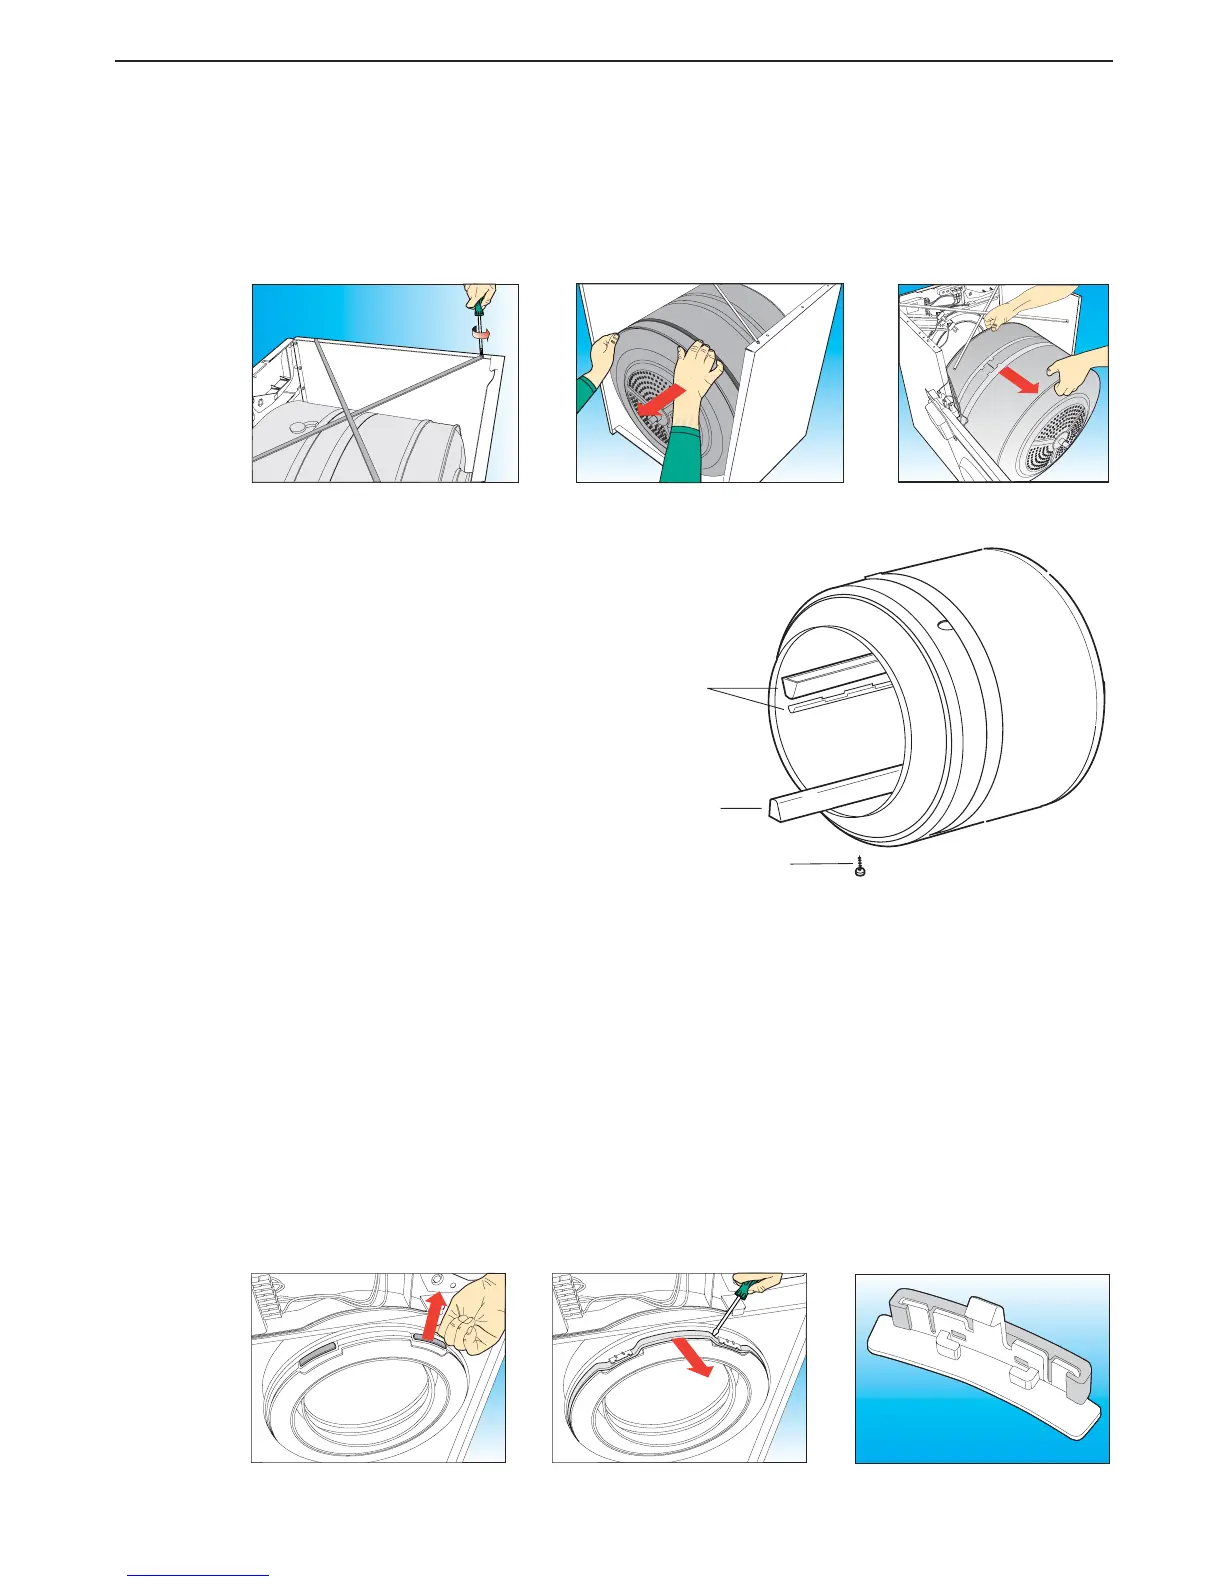
Step 19 Removing and/or replacing the drum assembly (A300):
(a) Remove the top cover (B360) as described in Step 1.
(b) Remove the rear panel (B580) following Step 16, dismantling only those parts necessary.
(c) Manually remove the belt (A290) from the drum and motor.
(d) Remove the two fixing screws (A510) securing the tie rods (B350) to the back of the drier.
Push the side panels apart and extract the drum.
T To re-assemble, follow the same procedure in reverse order, following Step 18 to replace the belt.
Step 21 Replacing and/or removing the slide blocks (A530) and the felt seal (A410) from
the drum support surround (A340):
(a) Remove the top cover (B360) as described in Step 1.
(b) Remove the rear panel (B580) following Step 16, dismantling only those parts necessary.
(c) Manually remove the belt (A290) from the drum and motor.
(d) Remove the two fixing screws (A510) securing the tie rods (B350) to the back of the drier.
Push the side panels apart and extract the drum.
(e) Press on the rear lug of the slide block (A530) with one hand and remove the block.
At this point the felt seal (A410) can be removed using a screwdriver.
NB: When replacing either the slide blocks or the felt seal, it is advisable to fit both new slide blocks
(A530) and a new seal (A410). A kit is available for this operation and can be ordered as spare
part number 720208100. The kit also contains the two-sided adhesive tape for fixing the felt seal.
(f) To re-assemble, follow the same procedure in reverse order, following Step 18 to replace the belt.
Step 20 Replacing and/or removing the drum paddle with probe (A320) and/or the drum paddle
without probe (A310) from the drum assembly (A300):
(a) Remove the top cover (B360) as described in Step 1.
(b) Remove the three fixing screws (A420) securing the paddle
to be replaced.
(c) To re-assemble, follow the same procedure in reverse order,
following Step 18 to replace the belt.
MAINTENANCE PROCEDURES
A420
A310
A320
 Loading...