Do you have a question about the Markem Imaje SmartDate X40 and is the answer not in the manual?
Markem-Imaje shall not be liable for any damage or injury resulting from failure to follow safety instructions.
Care should be taken when removing the printer from the host machine, considering its weight.
Recommends solvent-resistant gloves, safety goggles, and notes noise levels and operating environment.
Ensures availability of power, compressed air, print go signal, and sufficient space for installation.
First-time installations are typically done by qualified technicians; experienced users should check first.
The printer is designed for thermal transfer printing; any other use is prohibited and at the user's responsibility.
Disconnect power before servicing, use correct tools, keep covers on, and disconnect air supply.
Contains a non-replaceable lithium battery. Return control board assembly for repair if it fails.
Instructions for proper disposal of used batteries and electronic appliances, emphasizing environmental protection.
Detailed illustration and labeling of the SDX40 Continuous Printer components.
Detailed illustration and labeling of the SDX40 Intermittent Printer components.
SmartDate X40 consists of a printing device and a control device with operator interface or OEM controller.
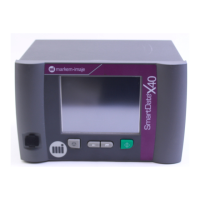
Explains the Home screen layout and functions of the buttons on the standard controller.
Describes the OEM controller screen, which can be displayed on PC or integrated into machine control panels.
Provides a detailed explanation for various icons used in the printer's interface and their functions.
Illustrates the process of starting the printer, showing the 'Ready' and 'Producing' states.
Illustrates the process of stopping the printer, showing the 'Producing' and 'Ready' states.
Explains how to select a job from the printer's local database using the interface.
Details on how to input a job name using the on-screen keyboard for local selection.
Describes how to select a job from a remote database, requiring job name input.
Illustrates the confirmation screen after selecting a job from a remote database.
Visual representation of the printer's menu hierarchy, showing main options and sub-options.
Provides an expanded view of the menu structure, including machine settings and diagnostics.
Illustrates the cleaning process for the printhead using cotton swabs and solvent.
Details on regular printhead cleaning intervals, methods, and precautions to prevent damage.
Step-by-step guide on how to safely remove and replace the ribbon cassette.
Illustrates correct ribbon threading for both left-hand and right-hand configurations.
Explains the difference between Warnings and Faults, providing examples like 'Low Ribbon' and 'Cassette open'.
Lists common issues such as 'LOW RIBBON', 'CASSETTE OPEN', 'CALIBRATION FAILED' and their solutions.
| Print Technology | Thermal Transfer |
|---|---|
| Resolution | 300 dpi |
| User Interface | Touchscreen |
| Ink Type | Thermal Transfer Ribbon |
| Supply Voltage | 100-240 V AC |
| Connectivity | Ethernet, USB |
| Operating Temperature | 5°C to 40°C |
| Storage Temperature | -20°C to 60°C |