Do you have a question about the Marra Forni Traditional and is the answer not in the manual?
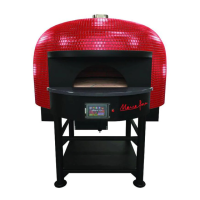
| Type | Pizza Oven |
|---|---|
| Available Diameters (Internal) | 36", 44", 48" |
| Fuel Type | Gas |
| Temperature Range | Up to 1000°F |
| Dimensions | Varies by model |
Warnings about improper installation, adjustment, alteration, service, or maintenance causing damage, injury, or death.
Major cause of oven related fires is failure to maintain required clearances to combustible materials.
Warning against using the appliance as a space heater to avoid carbon monoxide poisoning.
Warning about covering openings, blocking airflow, causing carbon monoxide poisoning or fire hazard.
Prohibition of storing or using gasoline or other flammable vapors near the appliance.
Requirement to post a statement if using gas as a heat source regarding gas smell detection.
Specifies minimum clearances for combustible and non-combustible construction around the oven.
Details the required minimum opening for the burner housing for proper combustion.
Outlines electrical grounding requirements according to local and national codes.
Procedures for disconnecting and isolating the appliance during gas supply piping pressure testing.
Instructions for moving the oven to its location and ensuring it is level using shims.
Instructions for lifting the Model 90 oven using a forklift from the center crossbars.
Instructions for lifting the Models 110, 140, 150 ovens using a forklift from the sides.
Detailed steps for safely lifting the oven with a forklift, ensuring proper fork placement.
Instructions for safely lifting the oven with a pallet jack, emphasizing capacity and placement.
Guidance on selecting a location and marking the floor space for oven installation.
Specifies minimum clearance between the ceiling and oven, and sidewalls.
Instructions for drilling holes and inserting anchor bolts to fasten plates to the concrete floor.
Options for facing the oven dome with non-combustible materials like brick or tile.
Step-by-step procedure for curing a gas oven over five days.
Step-by-step procedure for curing a wood-fired oven over five days.
Methods for cleaning the oven floor, including removing debris and spills.
Guidance on cleaning stainless steel surfaces with mild soap and water.
Importance of regular cleaning and maintenance of the exhaust system to prevent fires.
How to use the door for heat retention and manage coals.
Details the layers of materials from inside to outside the oven structure.
Explains permitted venting methods: direct venting and Type I exhaust hood.
Specifies requirements for Type I exhaust hoods, including clearances and dimensions.
Refers to Lennox Chimney Supply for direct venting installation requirements.
Specifies the required inside grease duct diameter based on oven size.
Illustrates the installation required for a direct venting application according to ETL guidelines.
Advises consulting local authorities regarding fire-rated duct shafts.
Emphasizes installing the chimney according to manufacturer's instructions and ETL listing.
Details correct room isolation and open air intake for combustion.
Explains how diverted combustion air causes backflow.
Advises against adding vents, which disrupts airflow.
Explains poor performance from blocked air intake.
Specifies service space and application of non-combustible board.
Connect oven to correct gas type and check for leaks using soap and water.
How to check and set manifold pressure, referring to the nameplate.
Connecting 3/4" gas supply with nonreactive joint compound and installing shutoff valve.
Connecting the gas burner control box to a 120 VAC power supply and ensuring grounding.
Emphasizes that all operators must read and understand instructions for safe operation.
Only pizza and/or bread products should touch the hearth; use cookware for other foods.
Warning against over-firing, indicated by flames spilling out or temperature exceeding 1000°F.
Keep a wood fire-rated extinguisher nearby and ensure personnel are aware of its use.
How to poke and stir the fire with a wood tool to improve combustion.
Cleaning cooking area and procedures for non-dough based foods.
Warning against combining exhaust systems for solid fuel and non-solid fuel equipment.
Guidelines for fuel types, storage, exhaust hoods, and fire safety.
Procedures for ash disposal, hearth cleaning, and wood storage.
Cleaning around the oven and managing creosote buildup.
Daily cleaning of grease filters and regular vent system inspection.
Warnings on hot oven maintenance and guidelines for dual fuel usage.
Steps to ignite the gas oven, including turning on blowers, gas valve, thermostat, and switch.
Procedures for temporary and complete shutdown of the gas oven.
Steps to start a wood fire in the oven, including using firestarter and kindling.
Warning to keep flammable liquids away from the oven and not use them for starting fires.
Guidance on adding larger pieces of firewood once kindling is burning well.
How to maintain desired heat rate and signs of over-firing.
Step-by-step guide to operating the gas burner control panel for temperature setting.
Instructions for regular cleaning and servicing of the gas burner, including disconnecting power.
Steps to remove the burner for cleaning, including disconnecting gas and igniter.
Procedures for reinstalling the burner after cleaning.
Warning never to use an open flame to check for gas leaks; use soap/water solution.
Procedure for daily thermal cleaning by increasing oven temperature to 850°F.
Instructions on leaving the oven door slightly open and avoiding cleaning agents.
Steps for shutting down the oven, including turning off power and gas.
Description of the EC200 gas burner design and air shutter.
Table of specifications for various burner models and components.
Graphs and tables for sound, capacity, and plume height of fan models.
Full factory specifications for the gas burner, including fuel types and BTU output.
Details on flame safety, automatic gas valve, and notes on SCFM and derating for altitude.
Wiring diagram for the EC200/300 115V gas burner system.
Wiring diagram for the EC200/300 230V gas burner system.
Legend explaining the symbols and conventions used in the wiring diagrams.
Caution regarding gas supply pressure and regulator adjustment to prevent overfire conditions.
How to identify a defective gas valve based on constant manifold pressure and inlet pressure.
Identifying gas valve leakage on standby and the need for replacement.
Description of electronic control operation in heat mode and lockout conditions.
Caution about explosion hazard and malfunction if the device gets wet.
Motor features permanently lubricated ball bearings and requires no routine maintenance.
How to check the burner flame color and what it indicates about fuel mixture.
Caution regarding standby flame or premature ignition spark activation requiring immediate shutdown.
Warning to install a gas leak warning device when using propane in confined spaces.
Check shutter closure for blue flame issues.
Verify wire connections and test temperature control dial for stuck flame settings.
Check low flame and adjust regulator if burner shuts itself off.
Check gas supply, turn oven off/on, and ensure combination gas valve is ON.
Adjust low flame regulator to ensure sufficient gas reaches the oven.
Check for blown fuses or contact Marra Forni representative if control box is unresponsive.
Ensure the Thermocouple is plugged into the control box.
Adjust the high and low flame regulators.
Use paper to light oven and contact Marra Forni for replacement burner.
Interpreting LED flashes for faults, airflow, and ignition lockout.
Confirming shut off valve, gas knob, thermostat, and safety controls.
Verifying burner grounding and line voltage between wires.
Checking 24V at transformer and thermostat connections.
Confirming blower motor operation and checking PSW terminal voltage.
Verifying V1 terminal voltage and checking for ignition spark.
Checking for flame, air in gas line, and 24V to gas valve.
Checking flame current signal strength for proper burner setup.
Lists parts for the EC200 burner head assembly, bracket, and spark rod assembly.
Lists parts for EC200/EC300 blower motor assembly, wheel, and motor.
Lists parts for slow opening valves, air shutter assemblies, and inlet ring.
Lists parts for control assembly, strain relief, ignition cable, and flame rod wire.
Lists parts not shown in the diagram, such as mounting flange kit and wire kit.
Description of the exhaust fan, its housing material, and construction.
Details about the fan motor, including type, insulation, and protection class.
Lists standard equipment like junction box and optional equipment like speed control.
Lists ETL and ULC certifications and CE compliance for the fan.
Details the 2-year factory warranty and 10-year warranty against corrosion perforation.
Table comparing discharge velocity, amperage, and power ratings for different fan models.
Table detailing the dimensions (A-E) for various GSV fan models.
Table showing sound pressure levels (Lw dB) for different fan models at various frequencies.
Graphs illustrating fan capacity (CFM vs. Ps) and plume height for different fan models.
Defines the acronyms UL, CSA, ETL, and CE related to product certifications.
Information about Underwriters Laboratories, Inc. and its role in product safety testing.
Information about the Canadian Standards Association and its marks.
Details on Intertek Testing Services and the ETL mark for product safety.
Explanation of the CE mark and its significance for products in the European Union.
Summary of certification marks as assurance of electrical safety and emissions standards.
Details Marra Forni's one-year warranty against defects in material or manufacture.
Lists instances where the provided warranties do not apply, such as improper installation or use.
Defines Marra Forni's sole obligation as repair/replacement and limits liability for damages.
Interpreting LED flashes for faults, airflow, and ignition lockout.
Confirming shut off valve, gas knob, thermostat, and safety controls.
Verifying burner grounding and line voltage between wires.
Checking 24V at transformer and thermostat connections.
Confirming blower motor operation and checking PSW terminal voltage.
Verifying V1 terminal voltage and checking for ignition spark.
Checking for flame, air in gas line, and 24V to gas valve.
Checking flame current signal strength for proper burner setup.