21
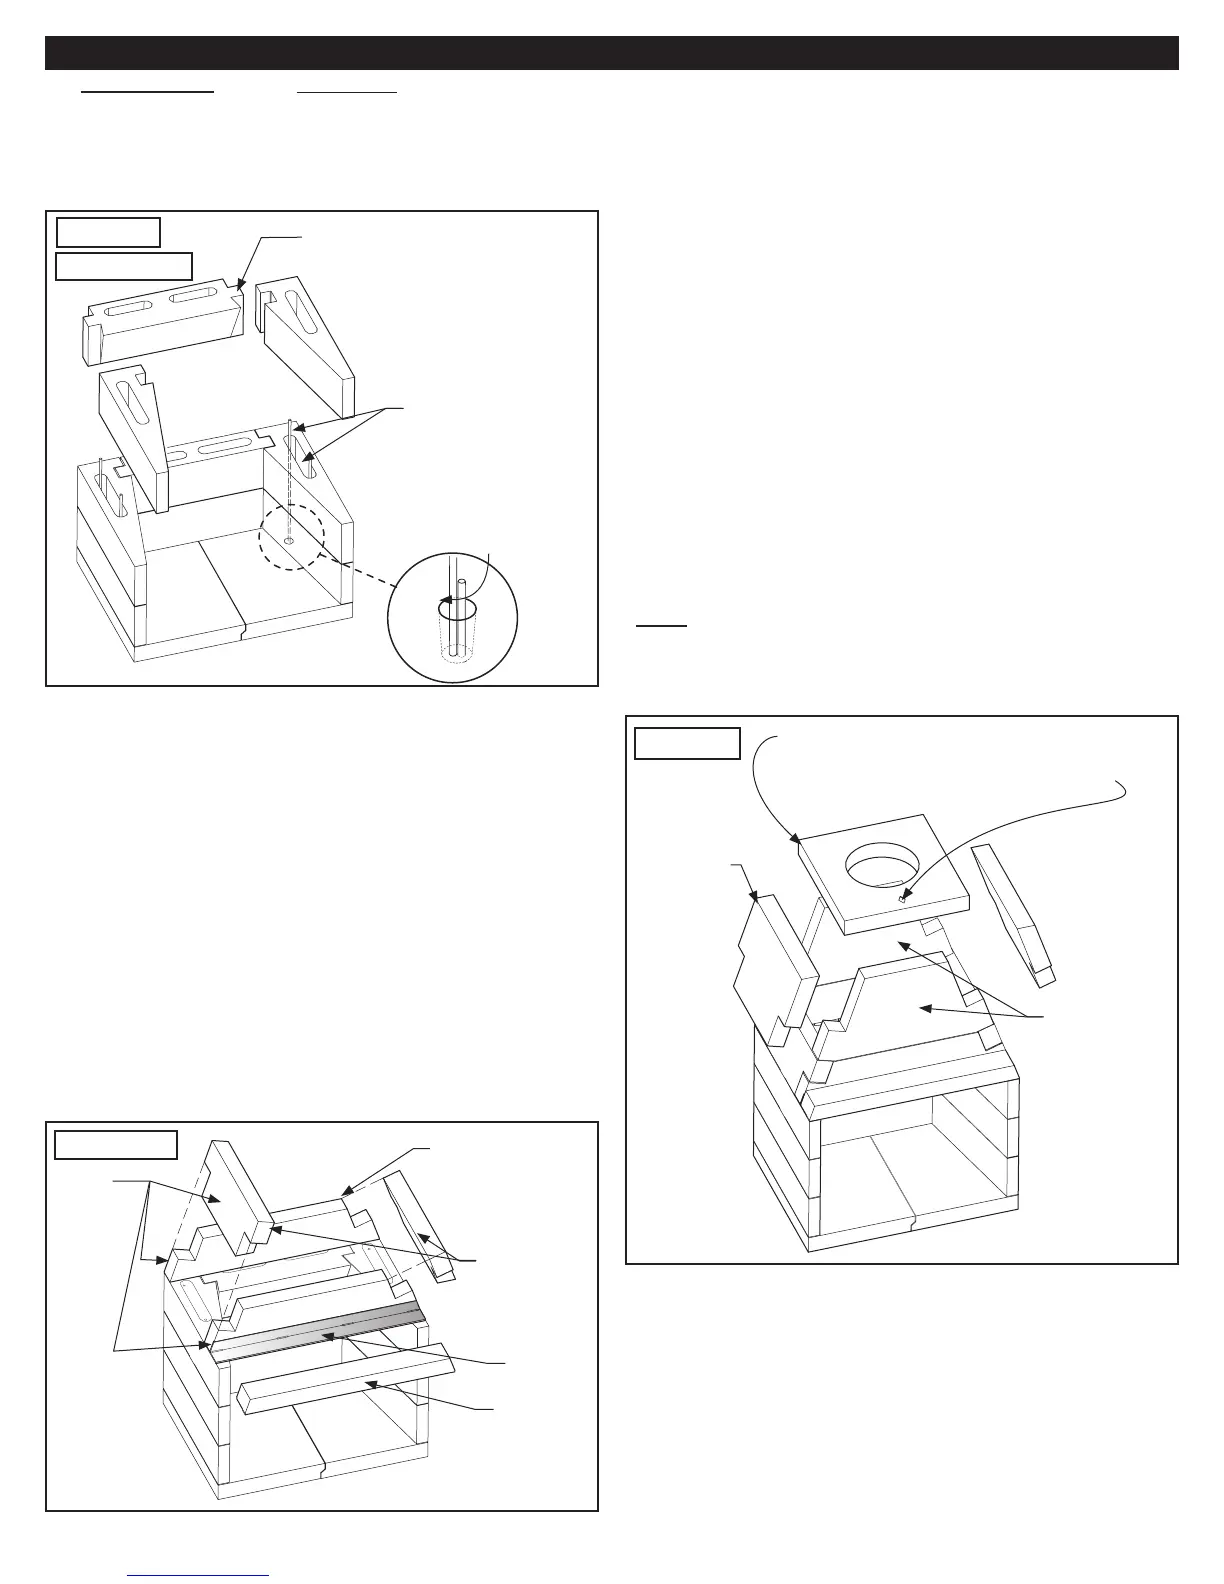
8. MFP-33 ONLY: After the second row of rebox is complete,
install Smoke Shelf and remaining side walls (Figure 31).
Mix approx. 2 cu. ft. of Ready-Mix Concrete. Insert 28”
rebar vertically through the cells, into the holes in the
hearth, adjacent to the rebar and/or all-thread sticking up
from the hearth. Fill all cells with Ready-Mix Concrete mix.
9. Set the Lintel and Lower Rear Dome in place as shown
in Figures 32. Check that all is level. If you need to make
adjustments, use shims. Place one or more of these
shims between the lowest wall component and the top
surface of the base plate. Once you are satised with
the degree of levelness, you can address any gap that
may have occurred with an appropriate amount of mortar.
Note: Although you are cautioned to use MASON-LITE
mortar sparingly because it does have such holding power,
you should look over the rebox assembly at the end and ll
in any gaps, especially joint connections, with the mortar.
Important: Adjustments can only be made while the mortar
is still wet when correcting for squareness and leveling.
10. Assemble Lower Dome Sides as shown in Figure 32. The
beveled face lines up with the inward angles of the lintel
sides. Top surfaces should be level.
11. As you are connecting each MASON-LITE component, be
certain you are following the instructions given previously
for using MASON-LITE mortar. Stop to look at the smoke
dome side, front and rear walls to see that they are aligning
correctly and that the surfaces are smooth and uniform.
Make sure connections are covered with an adequate
amount of mortar. Remember that you have the option
of using shims but they must be removed and any holes
lled. Make any adjustments to the replace alignment
before continuing to the next step.
12. Assemble Upper Dome (MFP33-10) and Dome Sides
(MFP33-8) as shown in Figure 33. Check your assembly
here. If things are proceeding as they should be, the
nished top surface should be at and level.
13. Finally, set the Dome Top into position. Be sure that it is
ush in every direction as you place it on the crest of the
smoke dome wall assembly. After this is done, proceed to
section on “Installing Damper and Chimney System” on
page 26.
Note: The chimney hole on the Dome Top is not centered
from front to back - it should be oset closest to the rear of the
replace (see Figure 33).
MFP-33 Fireplace Assembly
Figure 31
Install rebar adjacent
to all-thread or rebar
stemming from oor.
MFP-33 Only
Install Smoke Shelf MFP33-4
after 2nd row of walls.
Add rebar and ll all
cells with concrete mix
Lower Rear Dome
MFP33-5
Lintel Front
Lower Dome
Sides
MFP33-7
These
surfaces
should
be ush.
T-Bar
Figure 32
Dome Sides
MFP33-8
Upper Domes
MFP33-10
Figure 33
Dome Top (MFP33-9)
Center of chimney hole is oset towards the rear.
Position marker towards front as shown.
MFP-33
 Loading...