25
Figure 50
MFP63-8
Dome Middle Side
MFP63-8
Dome
Middle Side
MFP63-10
Dome Middle
36. As you are connecting each MASON-LITE component,
be certain you are following the instructions given
previously for using MASON-LITE mortar. Stop to look at
the smoke dome side, front and rear walls to see that they
are aligning correctly and that the surfaces are smooth
and uniform. Make sure connections are covered with an
adequate amount of mortar. Remember that you have
the option of using shims but they must be removed and
any holes lled. Make any adjustments to the replace
alignment before continuing to the next step.
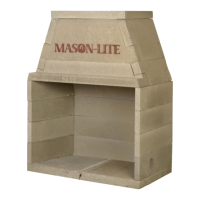
37. Assemble Upper Domes (MFP63-11) and Dome Sides
(MFP63-7) as shown in Figure 51. Check your assembly
here. If things are proceeding as they should be, the
nished top surface should be at and level.
Figure 51
MFP63-9
Dome Top
MFP63-7
Dome Side
MFP63-11
Upper Dome
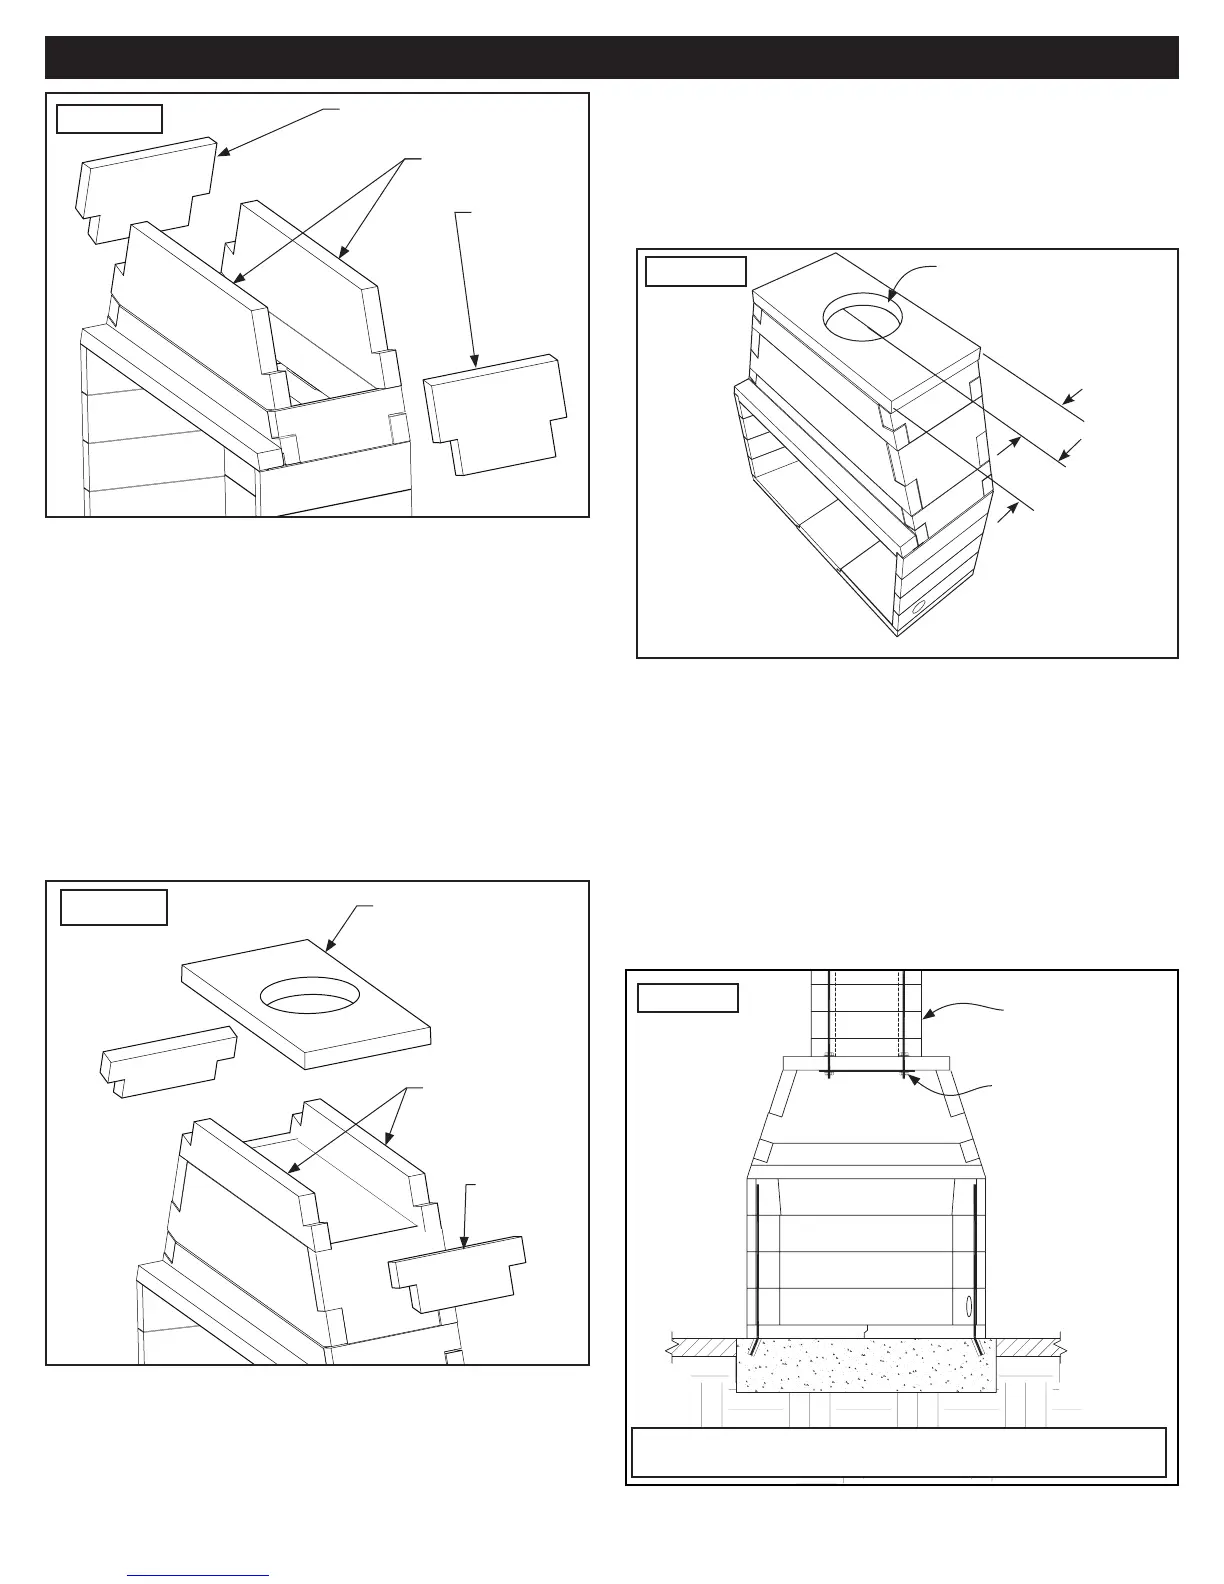
38. Finally, set the Dome Top (MFP63-9) into position. Be sure
that it is ush in every direction as you place it on the crest
of the smoke dome wall assembly.
Note that the chimney hole on the Dome Top is not centered
from front to back - it should be oset closest to the rear of the
replace. (see Figure 52).
Figure 52
Center of Ø16” chimney hole
is oset towards the rear.
10”
12-1/2”
MFP-63
39. Now that you have completed the smoke dome assembly,
all the components should stack up for a smooth transition
into the ue components. Setting the smoke dome
completes the MASON-LITE Firebox and Smoke Dome
assembly. You are now ready to begin the installation of
the necessary re brick lining and the ue components.
WARNING: DO NOT PACK REQUIRED AIR SPACES
WITH INSULATION OR OTHER MATERIALS.
40. For use of Masonry Chimney sections on the Mason-lite
replaces, please see Masonry Chimney instructions
located online at www.mason-lite.com
Figure 53
Mason-Lite
Masonry Chimney
sections
All-thread through
Dome Top
Check with local codes for use of Masonry Chimney in
your area - restrictions may apply.
MFP-63 Fireplace Assembly