Amate Electroacústica,s.l
EL Series. Version 1.1 Sep 07
17
3.8.3.Volado EL-18SW /EL-30
Estos modelos no han sido diseñados para
ser volados.
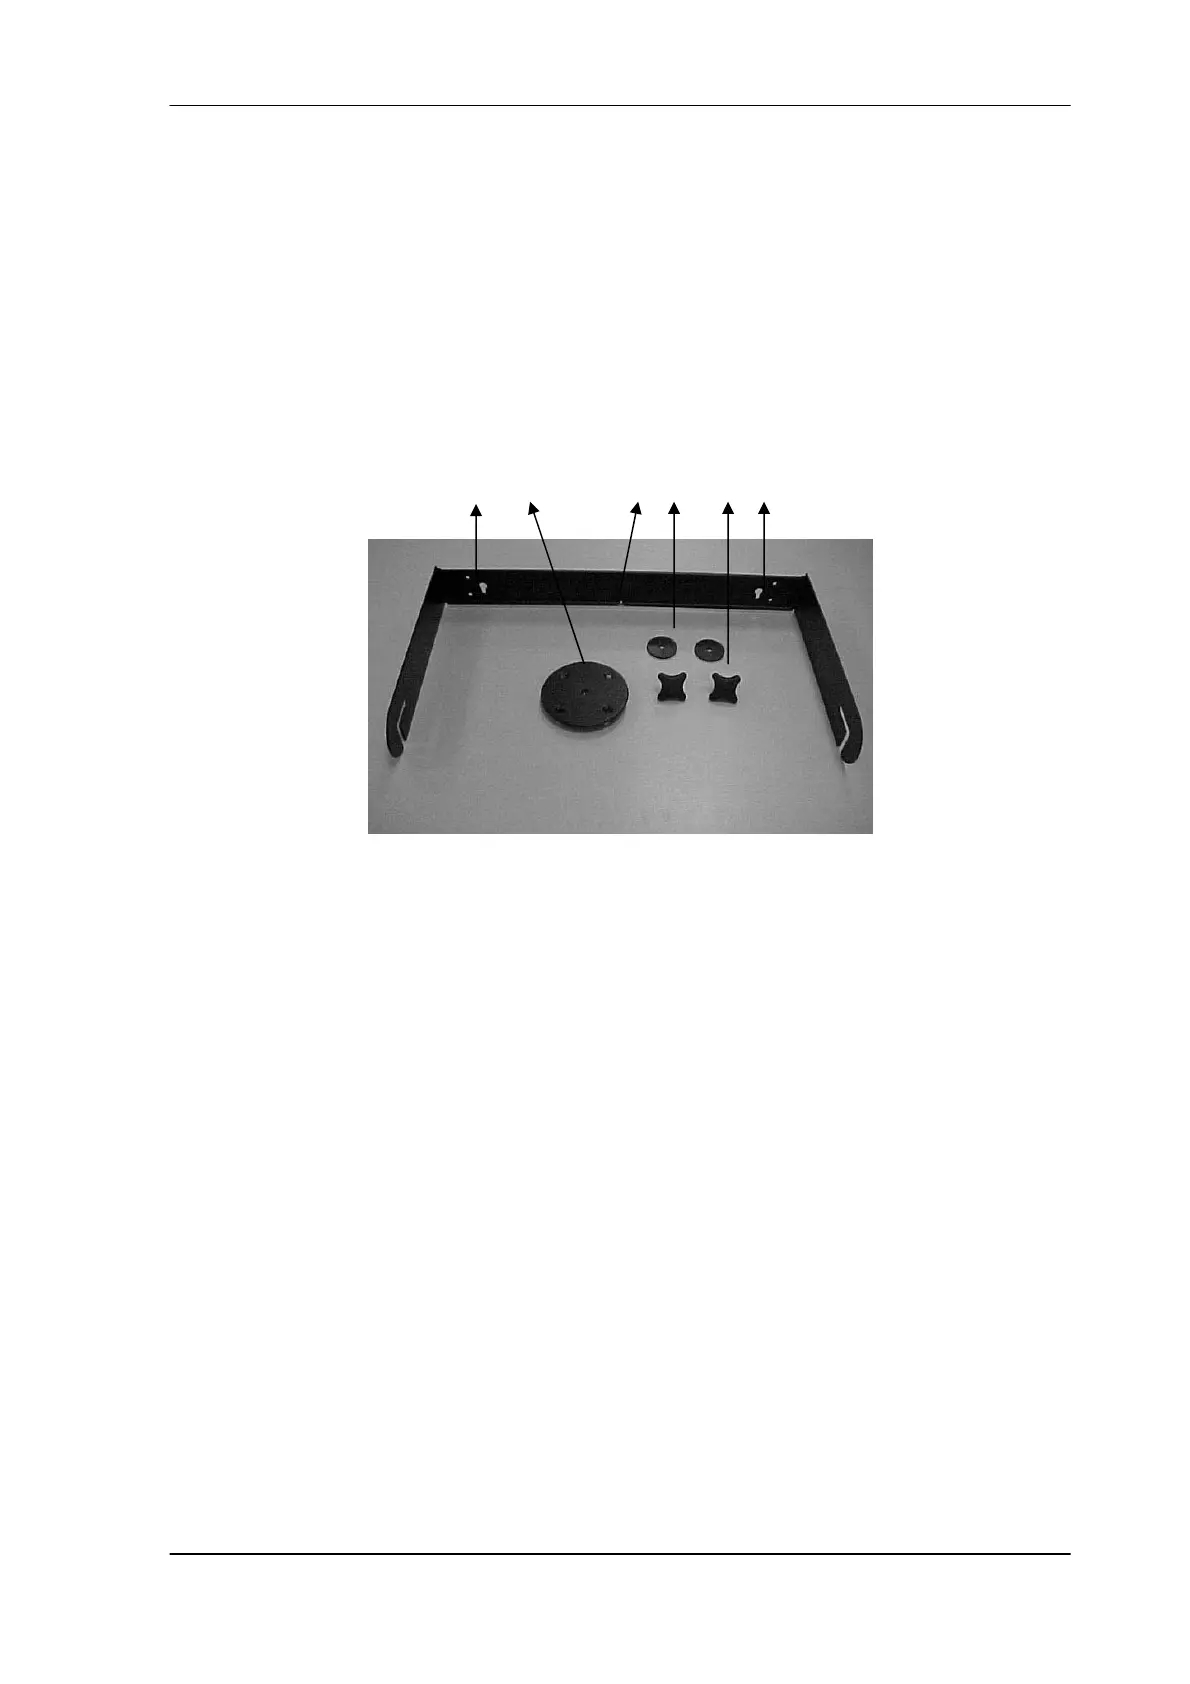
3.8.4.Soporte "U" modelo U-N10
(Opcional)
Opcionalmente, puede adquirirse soporte en
forma de "U" para el modelo EL-10. El
soporte debe ir siempre montado con sus
correspondientes roscas y permite el
colgado tanto en posición horizontal como
en vertical.
1 2
Colgado:
1- Sitúe el soporte cerca de la pared donde
vaya a colgar la caja y marque la
localización de los puntos de soporte (1).
2- Realice los taladros en la pared y cuelgue
el soporte con tornillería adecuada.(incluida
en el kit).
3- Cambiar el vaso para trípode que
incorpora la caja de serie en la parte inferior
por la pletina suministrada en el kit (2).
4- Coloque la caja entre el soporte y fíjela
con las dos roscas de M8 que incorpora el
kit. El orden de colocación de los
accesorios es el siguiente:
a) Arandela de goma (3)
b) Soporte U-N10
c) Roscas de M8 (4)
5- Ajuste la caja a la posición y ángulo
deseado.
Es posible añadir cable de acero de 2mm a
través del punto (5) para asegurar aún más
el soporte.
3.8.3. EL-18SW / EL-30 Flying
These models are not prepared for flying.
3.8.4.Bracket U-N10 (Optional)
The EL-10 can optionally incorporate a "U"
bracket which allows the cabinet to be
mounted on a wall or ceiling. The bracket
may be mounted with either nails or screws,
horizontally or vertically.
5 3 4 1
Mounting:
1- Hold the bracket against the mounting
surface, so you can mark the locations of
the mounting holes (1).
2- Drill corresponding pilot holes on the
wall and attach the bracket with screws
(included).
3- Unscrew the top hat (located on the
bottom of the cabinet) and place the metal
plate (included on the kit) (2).
4- Set the cabinet on the bracket and fix it
through the two M8 bracket knobs
(included on the kit). The order must be as
follows:
a) Rubber washer (3)
b) U-N10 Bracket
c) M8 bracket knobs (4)
5- Adjust the cabinet for desired position
and angle.
It is possible to add a 2mm steel cable
through (5) to make the bracket safer.
 Loading...