en
CZ
DE
DK
EE
ES
FI
FR
GB
HR
HU
IT
LT
LV
NL
NO
PL
RO
RU
SE
SI
SK
UA
SE
SI
SK
TR
UA
PLEASE TAKE TIME TO READ THIS MANUAL
CAREFULLY BEFORE USE AND SAVE IT FOR
FUTURE REFERENCE.
THE UNIT IS SEALED AND CONTAINS FLUO-
RINATED GREENHOUSE GASES COVERED
BY KYOTO PROTOCOL.
THE “GWP” IS LISTED IN THE “TECHNICAL
SPECIFICATIONS TABLE”.
► 1. HOW IT WORKS
This product is a dehumidier. It controls relative humidi-
ty by passing the air through the unit, forcing the excess
moisture to condensate over the cooling elements. Contact
with this cold surface causes the moisture in the air to con-
dense. This condensed water then drains safely into the
water tank. The dried air then passes through the conden-
ser where it is slightly warmed and re-enters the room at a
slightly elevated temperature.
► FIG. 1
1. Dry warmer air
2. Condenser (warmed coil)
3. Evaporator (cold refrigerated coil)
4. Moist saturated air
5. Water tank
6. Compressor
7. Motor
8. Fan rotor
► 2. WHERE TO POSITION
Excess moisture will travel throughout your home, in the
same way that cooking smells waft to every room in the
house. For this reason, the dehumidier should be posi-
tioned, so that it can draw this moist air towards it from all
over the home.
Alternatively, if you have a serious problem in one area you
can begin by positioning the dehumidier close to this area
and later moving it to a more central point.
When positioning the dehumidier, ensure that it is placed
on a level surface and that there is a minimum of 10 cm
(4”) of space on either side of the unit to allow for efcient
airow.
This dehumidier is tted with castors for extra mobility, if
you move the unit, it should rst be switched off and the
water tank emptied.
We do not recommend the use of an extension lead, so
please try to ensure that the unit is sufciently close to a
xed mains socket. If it is necessary to use am extension
lead, please ensure the diameter of the wires of the cable
is at least 1 mm
2
.
When the dehumidier is in operation, outside doors and
windows should be closed when necessary for most ef-
cient use .
► 3. BEFORE USE
CAUTION!
► Always keep the unit in vertical position.
► Leave the unit to stand for one hour before connecting
to the mains supply after transport or when it has been
tilted (e.g. during cleaning).
► Keep all foreign objects away from the air intake or out-
put openings.
► The mains supply must conform to the specication
shown on the rating plate at the back of the unit.
► If the supply cord is damaged, it must be replaced by
an approved service representative or a similar qualied
person in order to avoid a hazard.
► Never use the plug to start and stop the unit. Always
use switch on the control panel.
► Before moving the unit, rst switch off, then unplug and
empty the water tank.
► Don’t use bug sprays or other ammable cleaners on
the unit.
► Never pour or spray water over the unit.
► THIS APPLIANCE IS NOT INTENDED FOR USE BY
PERSONS (INCLUDING CHILDREN) WITH REDUCED
PHYSICAL , SENSORY OR MENTAL CAPABILITIES, OR
LACK OF EXPERIENCE AND KNOWLEDGE , UNLESS
THEY HAVE BEEN GIVEN SUPERVISION OR INSTRUC
-
TION CONCERNING USE OF THE APPLIANCE BY A
PERSON RESPONSIBLE FOR THEIR SAFETY. CHILD-
REN SHOULD BE SUPERVISED TO ENSURE THAT
THEY DO NOT PLAY WITH APPLIANCE.
IMPORTANT!
Do not use this unit at ambient temperatures below 5
O
C, to
prevent the possibility of a heavily ice up evaporating coil.
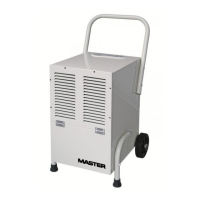
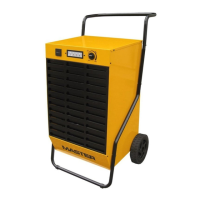
► 4. PARTS
► Front FIG. 2
1. Control panel
2. Ambient light
3. Front plate
4. Rear plate
► Rear FIG. 3
5. Wind ap
6. Handle
CONTENTS
1... HOW IT WORKS
2... WHERE TO POSITION
3... BEFORE USE
4... PARTS
5... OPERATION
6... DRAINAGE
7... MAINTENANCE
8... TROUBLE SHOOTING